Month: September 2025

Hearty Vegetable Tortellini Soup with Lentils

Hearty Vegetable Tortellini Soup with Lentils

It was a good time for more fall soup today, and we still had some fresh chicken broth to use up. To be fair, I could happily eat soups or stews several days a week when the weather’s not too hot. My family did that 

Swedabilly Pea Soup and Cornbread

Swedabilly Pea Soup and Cornbread

Swedes are pretty serious about their pea soup. It is almost like their version of a good old pot of pinto beans back home. You can easily find canned versions, like this “Soldier’s Pea Soup” from Knorr. (Which is pretty good.) Also refrigerated versions in 

Savory Carrot Dill Oat Bread with Walnuts

Savory Carrot Dill Oat Bread with Walnuts

Jump to Recipe

We currently have most of a huge bag of nice fresh carrots that Mr. C picked up from the newish Costco here in town, so I’ve been trying to think of some yummy things to do with the root vegetable windfall. Expect to see more recipes involving carrots coming up here in the near future!

Inevitably, I started thinking of a sweet carrot cake, or zucchini bread type loaf–and we may be getting some of that soon too! I do love those types of cake.

But, I was more in the mood today for some type of savory quickbread. Which also put me in mind of some of the savory takes on zucchini bread that I’ve seen and tried–including these awesome muffins from Evergreen Kitchen, which I really need to make again. Those worked great just subbing in a (custom) gluten free flour blend. I decided to include some of the fine corn flour and a little cornmeal for flavor, to eat with some bean soup a while back for a somewhat roundabout Three Sisters approach. I’m sure they’d be at least as good without that additional monkeying.

Anyway, we also happen to have much of a large bag of grated Comté cheese from the same shopping trip. So, a plan started to present itself!

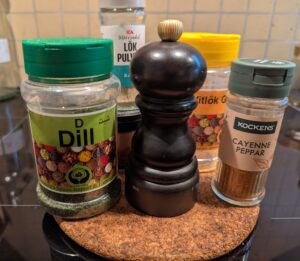
Today’s little baking experiment was also partly inspired by what seems to be an entire genre of carrot oat rolls, which seem to be popular enough here that I keep seeing at least one brand of commercial GF ones in the freezer section. I have yet to try any of them, but may have to try making some of those too before too long. I know rolled oats work great in any kind of quickbread or moist cake like this. May as well up the Swedish inspiration, and go for dill and chive as the herbs here! It should all work together.

Ditto for the walnuts. Chopped nuts are great in sweet carrot or zucchini breads, and I also really enjoy nuts in savory applications. May as well roll with that too.

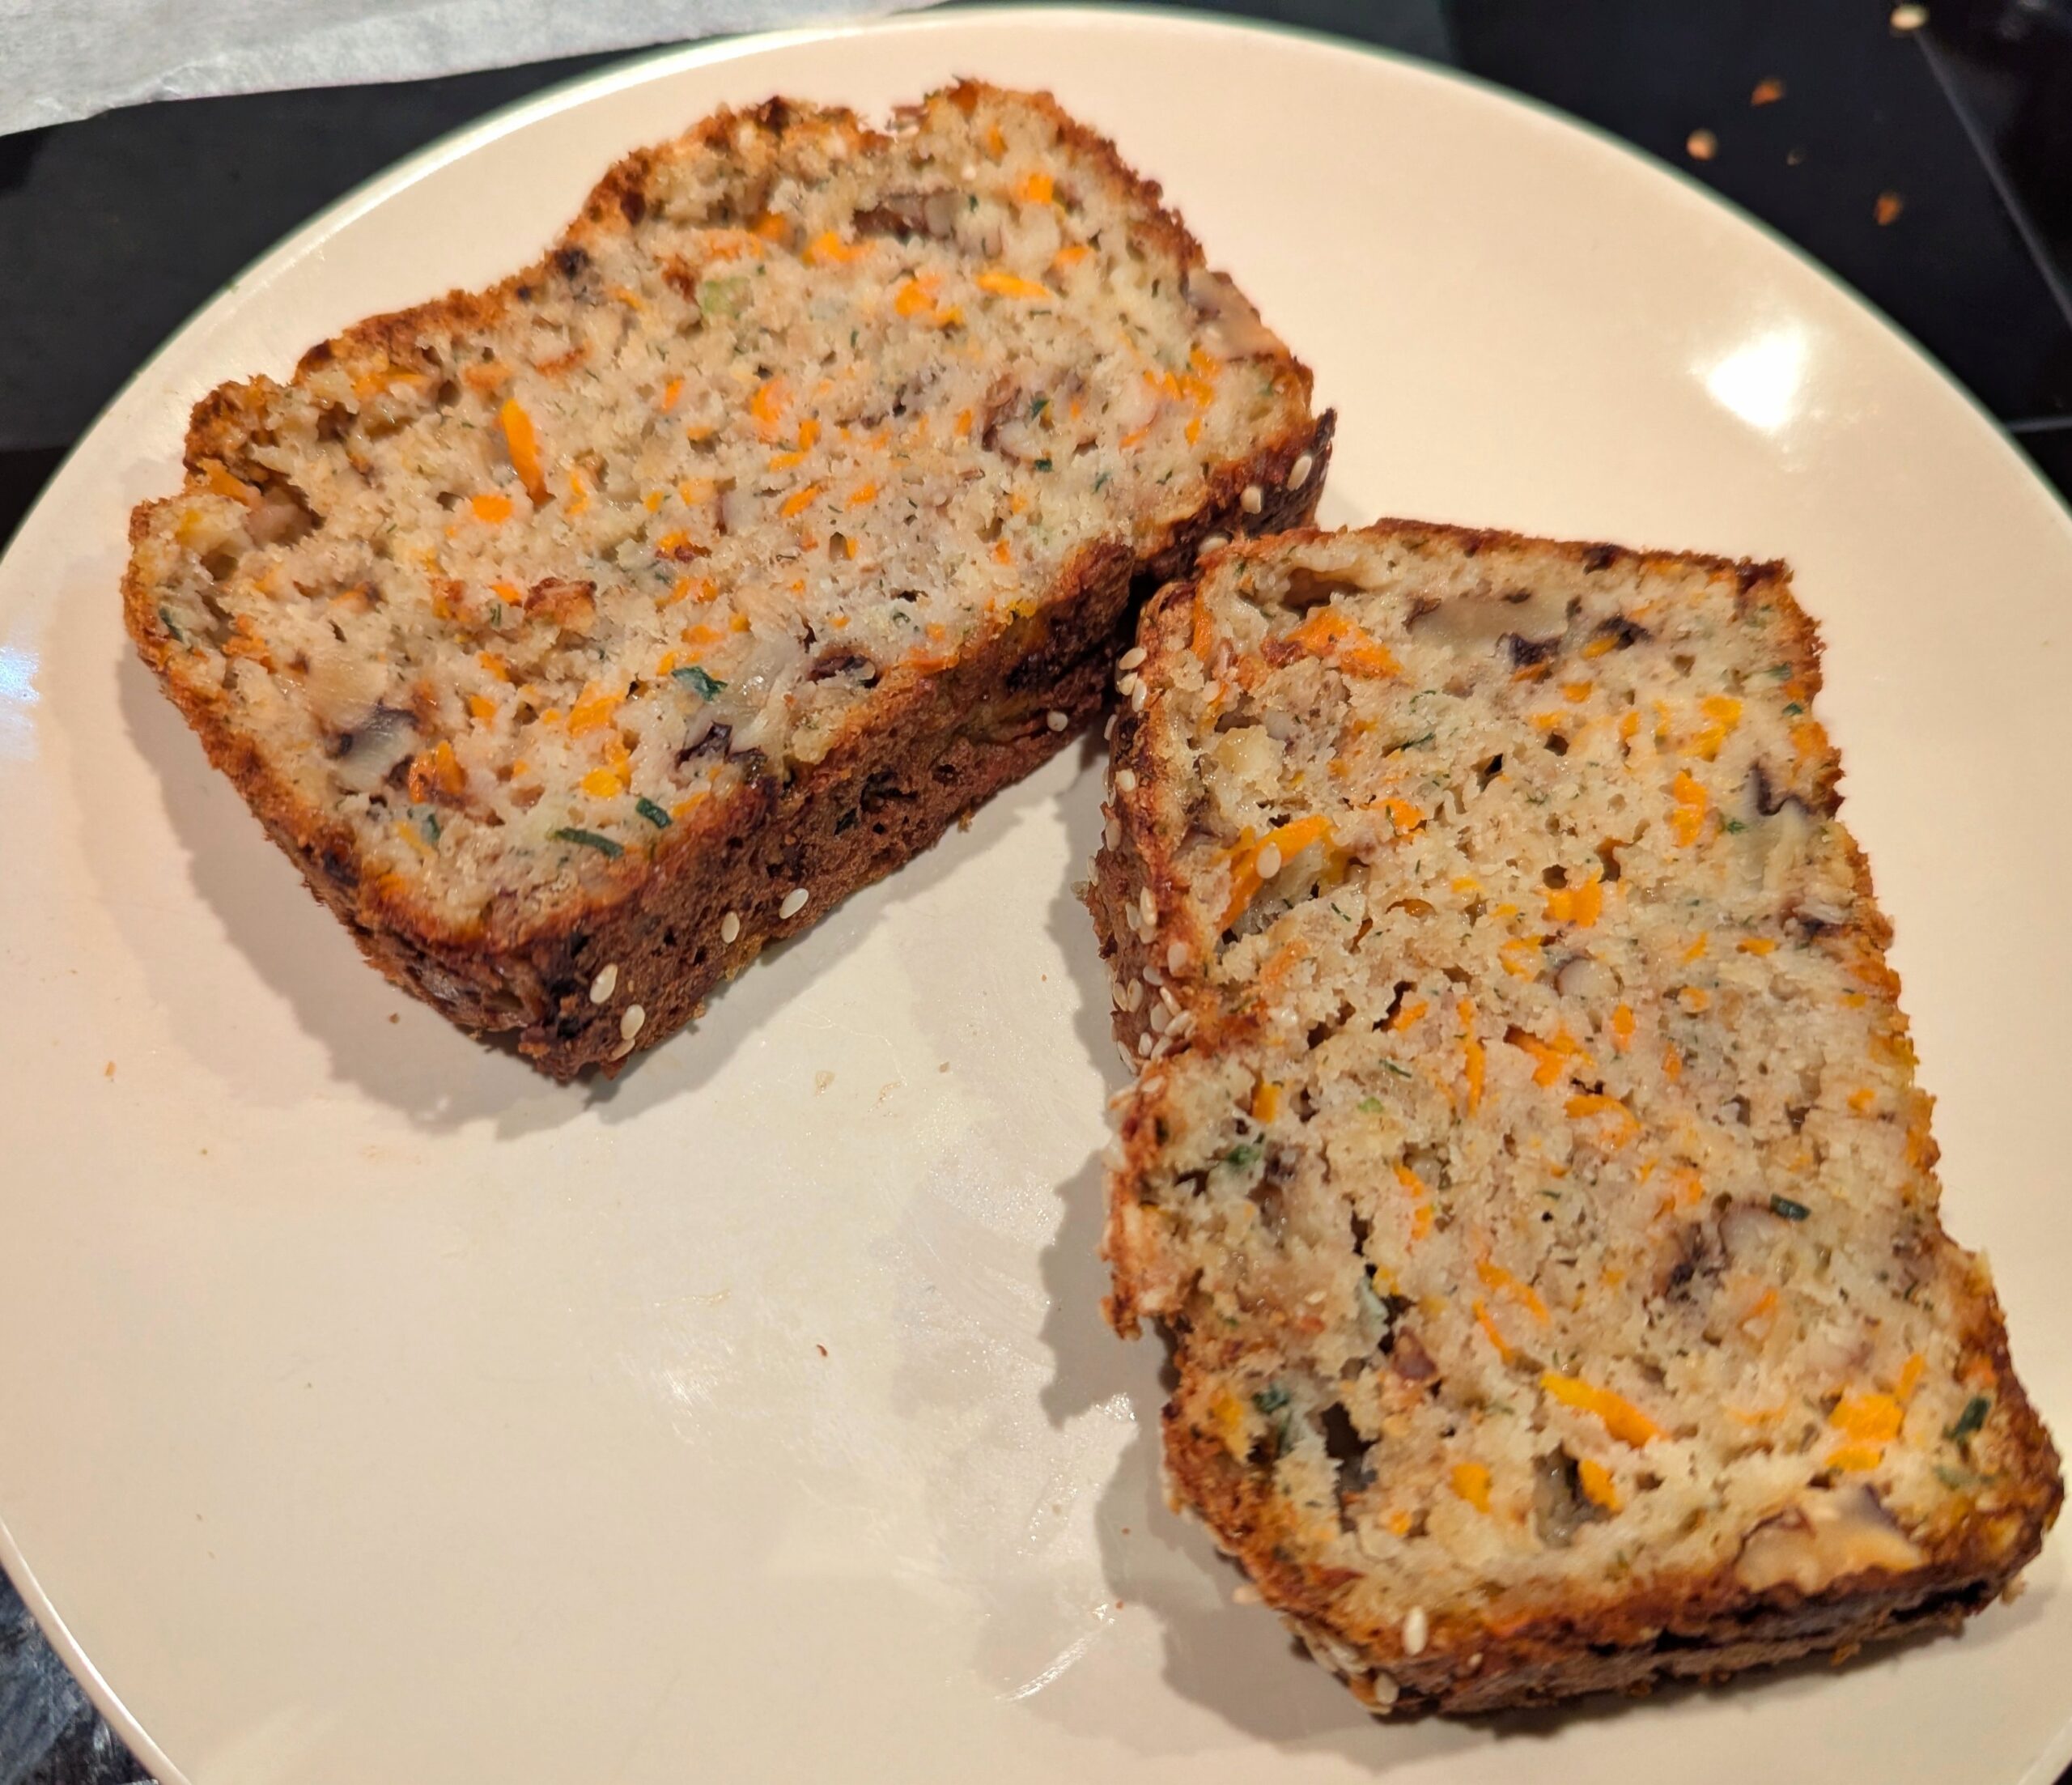
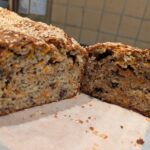
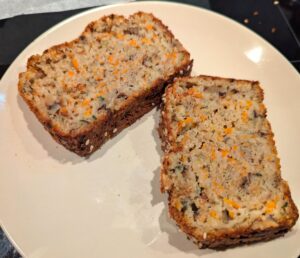
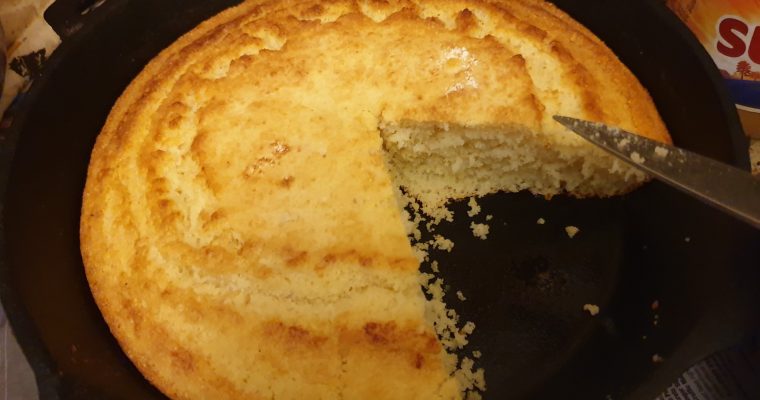
As it turned out, this bread was absolutely delicious, if not quite as dilly as I expected. (I increased the amount of dill just a little in the written recipe.) It is moist and dense with the oats and carrots, and would be equally great at breakfast time or with a soup or stew. I just snacked on a couple more pieces, and we may finish that loaf off tomorrow.

Savory Carrot Dill Oat Bread with Walnuts

An easy gluten free cheesy quickbread
Prep Time30 minutes
Active Time50 minutes
Total Time1 hour 20 minutes
Course: Baking, Quickbreads
Cuisine: American
Keyword: Gluten free
Yield: 1 loaf

Materials

Wet Ingredients

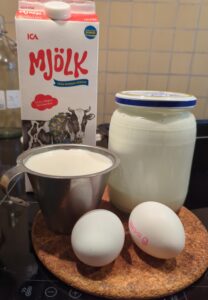
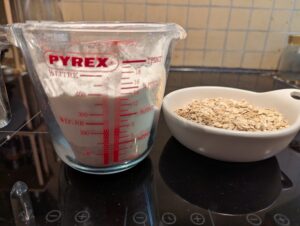
  • 300 ml buttermilk (1.25 cup)
  • 2 eggs
  • 100 g butter, melted (7 tablespoons cold)

Dry Baking Ingredients

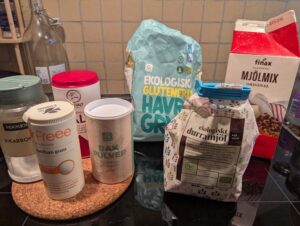
  • 80g rolled oats (200ml, or a scant cup)
  • 400 ml gluten free flour blend (1.5 cup) – Mine came out to 270g.
  • 1.5 teaspoon baking powder
  • 1.5 teaspoon xanthan gum
  • 0.5 teaspoon baking powder (sodium bicarbonate)
  • 0.75 teaspoon table salt

Dry Seasoning Ingredients

  • 0.5 teaspoon onion powder
  • 0.5 teaspoon garlic powder
  • 0.25 teaspoon celery salt
  • 0.25 teaspoon cayenne powder not enough for heat, just to help accent the cheese
  • 0.25 teaspoon coarsely ground pepper
  • 2 teaspoons dried dill

Batter Add-Ins

  • 3 medium carrots, coarsely grated (around a scant 2 cups or 450ml)
  • 75 g chopped walnuts (0.75 cup, or around 200ml)
  • 125 g grated cheese of your choice (350ml or 1.5 cup)
  • 1.5 tablespoon fresh or frozen chives, chopped
  • 2 teaspoons sesame seeds for on top optional

Instructions

Preparation

  • Set the buttermilk and eggs aside to come closer to room temperature before baking.
    I wasn't sure exactly how much liquid this would want, so I measured out a cup of buttermilk and also had regular milk ready to make up any difference. The written ingredients call for all buttermilk to reflect how much I did end up needing.
    A stainless measuring cup of buttermilk sits next to the glass jar it came from. Two eggs sit in front, and a carton of whole milk behind them.
  • Grate carrots and chop walnuts, and set those aside.
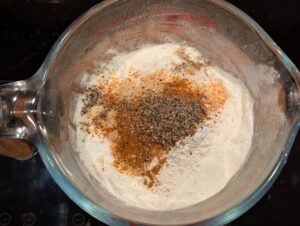
  • Preheat the oven to 350℉ / 180℃. Grease the bread pan well with butter.
    I find that this is an excellent use for squeeze margarine.
  • Assemble your dry ingredients.
    Here, I am using roughly a 50:50 mixture of sorghum flour, and the starch-heavy Finax Red blend to make sure there is plenty of starch to help bind the coarser rolled oats. You can use any flours you prefer, or have ready access to where you live. Quick breads are forgiving.
    A collection of packages of all the ingredients listed in the "dry baking ingredients" section above
  • Assemble your dry seasoning ingredients.
    A collection of containers of all the ingredients listed in the "dry seasoning ingredients" section above
  • Measure out your flour and oats..
    A British pint Pyrex measuring cup containing flours in two layers, with a bowl of rolled oats next to it.
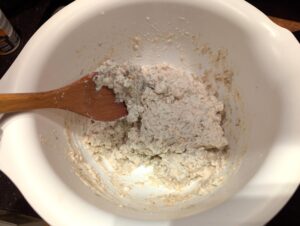
  • Add the other dry ingredients into the flour,, both leavening/salt/xanthan gum and seasonings. Stir well to combine.
    The flour cup with a pile of mixed seasonings visible on the surface
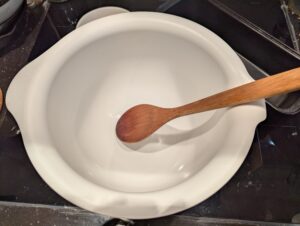
  • Place all the dry ingredients in a large mixing bowl, and stir to combine.
    I don't think it's worth hauling out the mixer for a quick batter bread, so I'm just taking the wooden spoon approach. Feel free to use mechanical aids if you prefer.
    A white plastic mixing bowl with a big wooden spoon resting in it.
  • Pour in all the wet ingredients.
    The bowl with flour/oat mixture, and a pool of buttermilk, beaten egg, and melted butter on top.
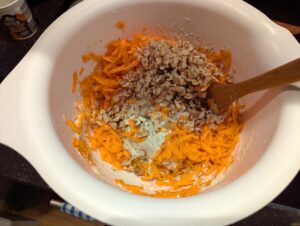
  • Stir well to combine.
    You're looking for a fairly wet batter at this stage. The oats still need to soak up liquid. The carrot will release some as it cooks, but not as much as the grated zucchini in similar recipes that I'm mainly basing this on. I think this should be good. ¯_ (ツ)_/¯
    Batter quick breads do tend to be more forgiving than yeast doughs, so it's less critical here.
    The bowl showing a very wet dough or stiff batter consistency
  • Fold in the grated carrot and chopped nuts.
    Batter with carrot and nuts on top
  • You want everything well combined, but don't go too nuts (haha!) with the stirring at any point. if you overmix, it will knock the chemical leavening bubbles out.
    Batter with the additions fairly well distributed
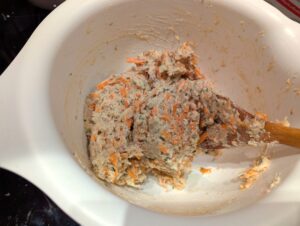
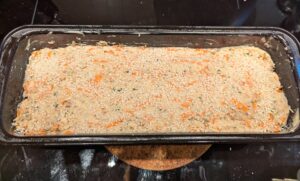
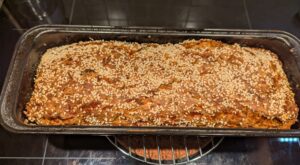
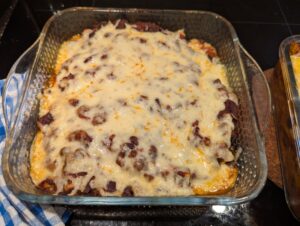
  • Now, do the same with the grated cheese and chives.
    I am using Comté cheese and frozen chives here, because we happened to have a big bag of grated Comté and some frozen chives. But, you can use any flavorful semi-hard cheese you like. Cheddar, Gruyère, or Gouda would be awesome.
    Also, any fairly mild fresh herb you prefer. Dill and chive is a classic enough combo here in Sweden that it's also a very popular (and delicious!) potato chip flavor. That's the major reason I did choose this herb combo.
    Getting ready to fold the cheese and chives into the batter.
  • Once everything is well incorporated, turn the dough into your waiting greased pan.
    Spread it out somewhat evenly with your spoon, and sprinkle with the optional sesame seeds. Gently pat the seeds down onto the surface of the dough. (Which I hadn't yet done here.)
    Dough in the pan, topped rather heavily with sesame seeds
  • Bake in the middle of your preheated oven for 45 minutes. The top should be fairly evenly browned. Test for doneness by poking a toothpick or skewer into the middle. If that doesn't come out clean or it just doesn't feel throughly cooked in the center, test again after another 5 minutes in the oven until it's done.
    My loaf here took a total of 50 minutes. But, yours may vary depending on your pan, oven, and particular ingredients.
  • Take out of the oven, and let rest in the pan for 10-15 minutes.
    A pan of fresh baked bread sitting on a cooling rack, immediately after coming out of the oven
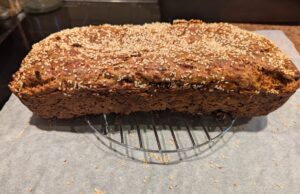
  • Carefully turn out of the pan, and place on a rack to cool.
    You may need to gently loosen the loaf around the edges with something like a thin spatula. This moist, cheesy loaf wanted to stick to my pan a bit. You could also get around the whole thing by lining the pan with baking paper, which I did not this time.
    I did, however, put a sheet of it underneath the rack to catch loose seeds and crumbs, and I was glad I did have the forethought to do that!
    Bare loaf of bread sitting on a raised round wire rack, above a sheet of white parchment paper scattered with sesame seeds and crumbs
  • Let the loaf cool for at least 30 minutes before cutting into it, or when it just feels a little warm to the touch. This is always the hardest part about baking, especially with something which smells this scrumptious!
  • Enjoy!
    I particularly like this type of bread with a garlic or chive cream cheese, but butter is good too.
    Two slices of fresh bread, sitting on a small side plate.

Notes

You can bake this as muffins, by dividing it up in a well-greased muffin tin. Paper liners will unfortunately stick to the outside, and keep you from getting a nice crust.
If you do choose the muffin route, try baking for 35 minutes before testing for doneness.
This recipe should also work great with the same volume of plain or all-purpose flour, if you don’t need the bread to be gluten free. I haven’t used it in 20+ years and never weighed any ingredients at that point, but I think that should come out to just over 200g of flour. You might be good to make the dough just a little drier-looking in the beginning, before the carrots go in.
Chicken Vegetable Noodle Soup with Kimchi

Chicken Vegetable Noodle Soup with Kimchi

Fall is well and truly rolling in, so it was soup night Chez Swedabilly Chaos. (It used to just be Chez Chaos, as dubbed by Mr. Sweden. But, here now in Skåne things are indeed looking easily 90% more Swedabilly.) In the previous post–and earlier 

Liquid Gold: Rich Chicken Broth

Liquid Gold: Rich Chicken Broth

It’s hard to get more comforting and versatile than a nice pot of chicken broth. Today I was really starting to feel the fall settling in here, and I really wanted some soup. We also had the remnants of half a roast chicken in the 

Leftover chili-smothered enchiladas

Leftover chili-smothered enchiladas

Jump to Recipe

This is another dish that I decided to assemble out of ingredients we had on hand, and it turned out very satisfying!

Over the weekend, I cooked a pretty big batch of a fairly saucy basic ground meat and three-bean chili in the Instant Pot. The next time I make some, I will be sure to post a recipe. At any rate, we had plenty of yummy leftover chili to use up. Instead of freezing all of it or just eating it over pasta again, today I decided to combine it with the remnants of a package of tortillas from the freezer.

You can use any protein you prefer in the filling. This “sauce” component already had plenty of meat and beans. I did consider just going with fried onions and cheese, but we also had plenty of eggs on hand and that seemed worth trying. It did work well together.

You could make a delicious vegetarian version using veggie chili, with a tofu scramble filling. I sometimes used to cook similar as a more straightforward red sauce enchilada dish.

Tonight, we just served this with some remarkably decent premade “pizza salad” from Lidl. But, any type of fresh leafy salad would be good on the side.

Two individual serving containers of a storebought oil and vinegar shredded cabbage salad.

Leftover Chili Smothered Egg and Onion Enchiladas

An easy, delicious use for that leftover chili
Prep Time25 minutes
Active Time20 minutes
Total Time45 minutes
Course: Main Course
Cuisine: American, Mexican-inspired
Keyword: Gluten free, Leftovers
Yield: 2 people

Materials

  • 6 corn tortillas
  • 3-4 tablespoons oil neutral oil of choice
  • 2 medium onions
  • 4 cups prepared chili (1L)
  • 8 ounces grated melting cheese (250g)
  • 2 teaspoons olive oil to grease pan

Filling

  • 1 large onion, or two smallish halved and sliced (around 1.25 c. or 300ml cut onion)
  • sprinkle salt for cooking onions
  • 2 tablespoons olive oil
  • 2 large eggs or 3 medium
  • 2 teaspoons milk, or other liquid for eggs
  • seasonings to taste

To Serve

  • Sour cream
  • Green onions sliced/chopped

Instructions

  • Preheat the oven to 375°F / 190°C.
  • Cut the onions. We had more red onions, but use whatever you like.
    Sliced onions in a plastic container.
  • Grate your cheese, if necessary. I used a Cheddar-like Swedish "household cheese", but any melty cheese you prefer should work.
    A large block of cheese, with a chunk sliced off one end.
  • Start onions sautéing in olive oil over medium heat, with a pinch of salt to help them sweat down. Cook covered for around 10 minutes, stirring occasionally, then uncover and fry a few more minutes until they begin to brown a little around the edges.
  • Gently beat eggs in a bowl with a splash of milk. I also added a dash of Knorr Aromat seasoning to these.
    A bowl with eggs waiting to be scrambled, on a stovetop next to a pan of sautéing red onions
  • Pour the egg mixture into the pan with the onions, and scramble them together. Season to taste while cooking; I used a sprinkle of Creole seasoning. Reserve this filling to the side. (We had more than needed, so I reduced quantities a little for this recipe writeup.)
    A pan with eggs and sautéed onions being scrambled together.
  • Assemble your other ingredients. (I was prepping two dishes at once. Ignore the pasta for now!)
    Clockwise: packaged corn tortillas, a plastic storage container of leftover chili con carne, and a zip bag of leftover cooked pasta for another recipe
  • Grease an 8"x8" (roughly 20cmx20cm) baking dish with more olive oil. Cover the bottom with some of your chili, ready for the enchiladas.

Tortilla Prep, and Enchilada Assembly

  • Heat your neutral oil over medium-high heat, to fry the tortillas. This step is optional, but highly recommended to help keep them from cracking or falling apart in the sauce.
  • Fry each tortilla for around 30 seconds to a minute per side, flipping them over once the edges start puffing and blistering. Remove once the middle starts puffing, and set aside to drain on paper towels, stacking as you cook more. Heat-safe tongs are useful. You want them to still be soft and pliable, but with a little fried surface.
    Tortilla frying in a pan, next to a paper towel lined plate with the previous cooked tortilla on it.
  • It's time to get your assembly line going!
    Ingredients assembled to put together the enchiladas.
  • This isn't the way I would normally wrap enchiladas, but no need for a sauce layer on these. We're just going with maybe a tablespoon of grated cheese (some Comté my partner picked up at Costco, in this case), then a heaping spoonful of the egg filling–which looks pretty terrible with the red onion changing color as it sat in the egg!
    A couple of enchiladas mid-assembly, side by side on top of the double stack of fried tortillas.
  • It will all be smothered in chili very soon, so it's all good. Roll up, and add to the waiting pan. This was a particularly mild batch of chili, so I decided to also dress them up with a few splashes of a potent and delicious local habanero sauce. (Top ingredient by weight: habaneros.)
    Rolled enchiladas lined up in the baking dish, with a smattering of hot sauce on top. A hand is also in the frame, holding a bottle to show the "Skånsk Chili Original Habanero Hot Sauce" bottle, with text surrounding a stylized sugar skull.
  • Spread the rest of the chili over top of your enchiladas.
    The same baking dish with a thick layer of chili spread over top of the rolled enchiladas, and a container of grated cheese ready to its left.

Cooking

  • We're going to take a shortcut here, working with cold chili!
  • Cover the baking dish, and microwave on 80% power for 9-10 minutes or until the middle is thoroughly hot. Remove, and uncover again.
  • Now it's time for the rest of the grated cheese to go on top. (Again, please ignore the other dish for now!)
    Two baking dishes side by side, both showing a generous layer of grated cheese just added on top.
  • Pop the pan into the preheated oven to finish it off, and bake for 10-12 minutes, or until the cheese is nicely melted to your liking and the chili is bubbling around the edges.
    A finished pan of cheese-topped enchiladas.
  • Let rest out of the oven for 10 minutes or so, then dig in! Sour cream and sliced green onion make excellent accompaniments.

Notes

If you prefer not to microwave this, you can also cover and bake for 30 minutes instead at that step. It may take a little longer. You’re looking for it to be very hot all the way through, either way. Then pull it out, and proceed the same way from there.
Instant Pot Curried Chicken and Chickpea Rice

Instant Pot Curried Chicken and Chickpea Rice

This dish is not even pretending to be Indian. It does make for a good easy fairly balanced one pot meal, in not much time. I’m infamously slow in the kitchen, and really not prone to underestimating the prep and cooking times required for PR 

Basics: Gluten-free Appalachian cornbread, 2025 redux

Basics: Gluten-free Appalachian cornbread, 2025 redux

Not too surprisingly, this seemed like an excellent choice for my inaugural recipe on this new blog. (The previous iteration, from 2010.) I also have plenty of photos of past batches ready to go. Cornbread constitutes its own food group, and a somewhat contentious one