Jump to Recipe
I love Southern Louisiana style home cooking in the way that only someone from another region of the South who has spent the last 20+ years in Europe can love Southern Louisiana food. It’s not even my home, but by now the distinctive flavors feel that way.
It’s also thankfully pretty easily adapted to make good use of the ingredients you have on hand, very much like my own home cuisine. Just watch actual Cajuns cook. Your dish may not turn out quite the same, but it’ll still be delicious.
I first learned to cook a lot of things back in the ’90s, partly from Chuck Taggart’s classic The Gumbo Pages recipe site (which dates back to before HTTPS was standard). Need to shout out his basic Creole seasoning recipe, which is what I used here. It’s much lower on salt than the average run of commercial blends. If you want to use one of those for this dish, I would suggest either going for a lower sodium version or cutting back on the salt used elsewhere in the recipe. Maybe substitute low sodium beef broth with a saltier Creole seasoning.
More recently (as in, the past 15 years or so!), I have also learned a decent bit about home cooking by watching J.B. at Louisiana Cajun Recipes (007bondjb) on YouTube. He reminds me a lot of my uncle, but more Cajun, and he’s an excellent cook. I would strongly recommend checking out some of his videos.
Tonight’s Plan
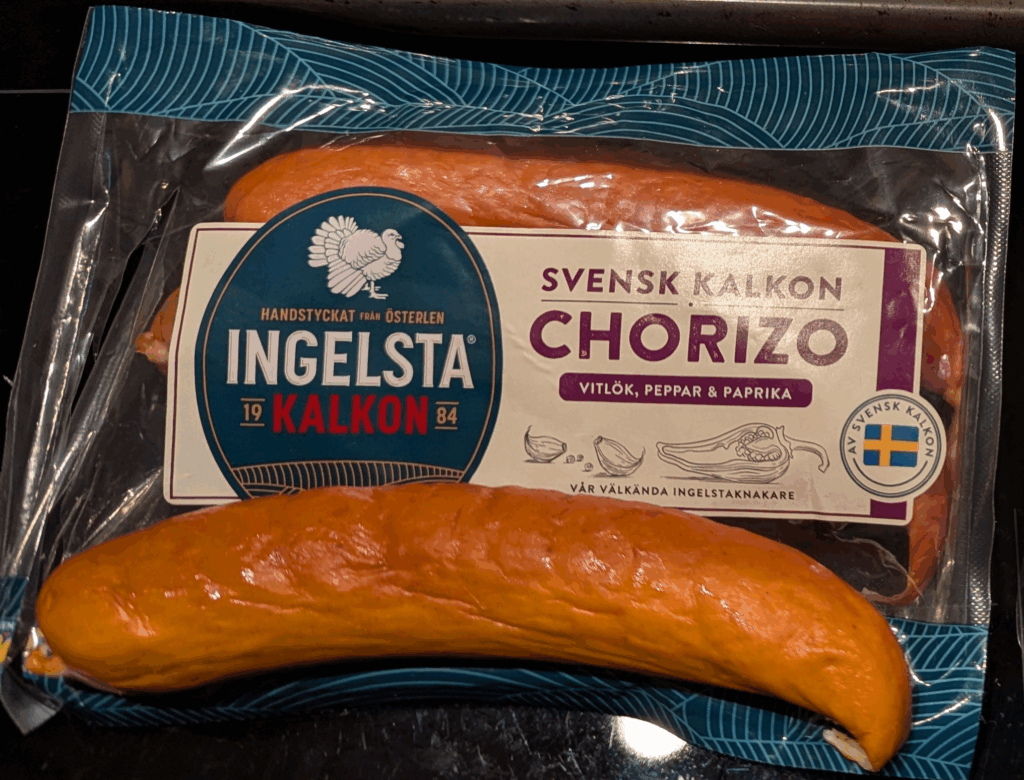
Anyway, it had been too long since I cooked up anything jambalaya-adjacent, and we had several kinds of meat to use up which should work great for that. Including more of that turkey version of a distinctly Swedish take on chorizo, which reminds me more in flavor of a cross between Polish-influenced smoked sausage and Louisiana chaurice:
Besides the basic chicken and sausage here, you can also include other cooked meats you may have. I’ve seen lots of Cajun pastalaya recipes that also called for pork, so the little bit of leftover roasted pork tenderloin that we needed to eat was a no-brainer here. I decided I was also more in the mood for pasta tonight than rice.
If you would prefer a red Creole version of pastalaya using tomatoes, I can strongly recommend Chuck’s take. Tonight, I was more in the mood for a brown Cajun style, relying on the pan gratin from the other ingredients and whatever seasoning for all the flavor and color.
Some people do like to add a little Kitchen Bouquet or other similar browning sauce for extra color, but here we won’t.
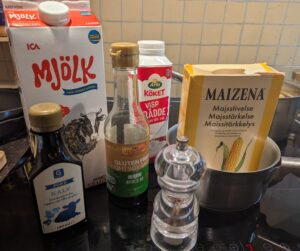
Our basic cast of characters for tonight:
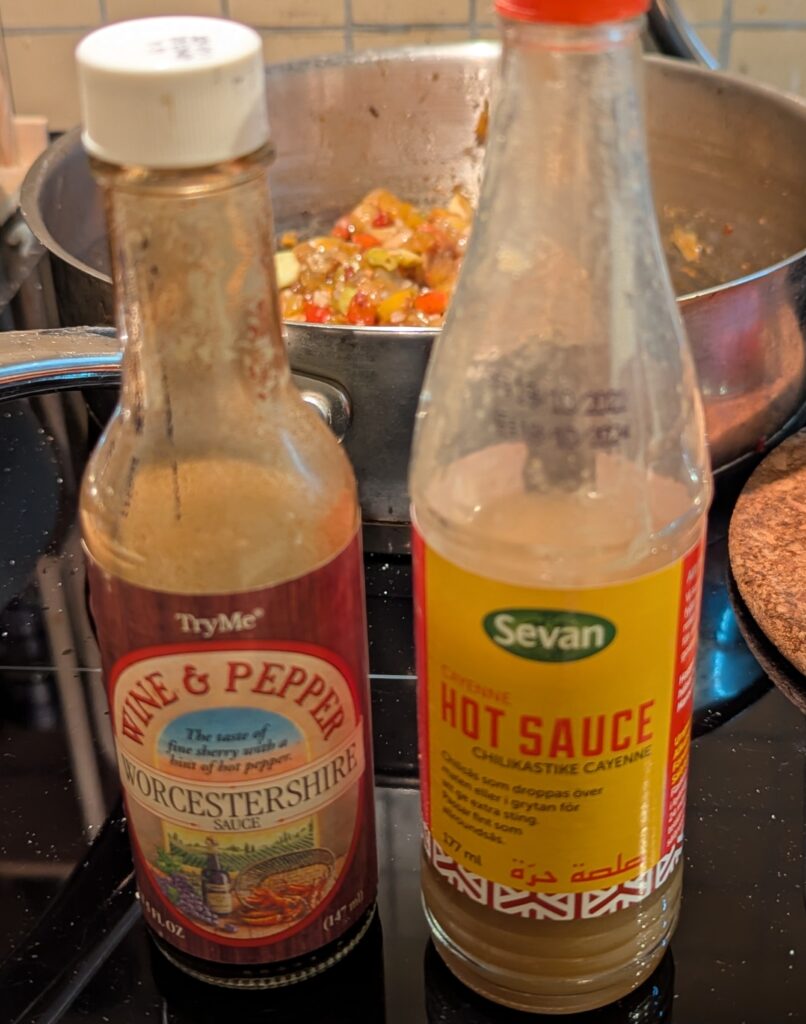
Plus a couple of sauces for more seasoning:
That bottle of local brand (US made) hot sauce looks terrible, because it’s at least a year old and was left out exposed to light for too long. But, it still tastes fine–and it is the major Louisiana-style hot sauce that I can readily find here. I think it probably is from Louisiana. And it’s still better for this than the next closest sauce we have. I really need to pick up a fresh bottle of the stuff. Hopefully y’all have better-looking sauce, or the time and energy to make it to the store for some.
The Worcestershire isn’t what I would normally pick, but it’s not bad. The standard British-made Lea & Perrins uses malt vinegar, because of course it does. I ran into this problem a lot with the popularity of barley malt when we lived in the UK. Sneaky malt products also caught me out a few times, even as carefully as you have to learn to read labels with celiac. This random US-made brand I found from an Asian supermarket is at least gluten free. When I bought it, they were out of the regular kind. But, the compromise “Wine & Pepper” variant isn’t half bad, and the flavor should work fine in this.
On Pasta Choice
Any short shape you want should work fine, really, as long as it’s not particularly fragile for a one pot dish. Bowties and broken spaghetti both seem to be very popular choices for pastalaya. Elbow macaroni or shells should also be good. So should fusilli.
Mr. Sweden actually picked up some Garofalo gluten free bowties in a mixed pasta multipack from Costco, and we still have a bag of them. I know those work great for one pot dishes. But, we had half an open box of penne, so I just went with that tonight. It really is up to you.
Whatever you do choose, it’ll give you a delicious and hearty meal without all that much effort involved. This is another one where the total cooking time may look a little intimidating, but not much of it is active and hands on. You can go and do other things while the vegetables sweat down, and then the pasta simmers. Just check back to give a stir occasionally. Add a salad, and you’re set.
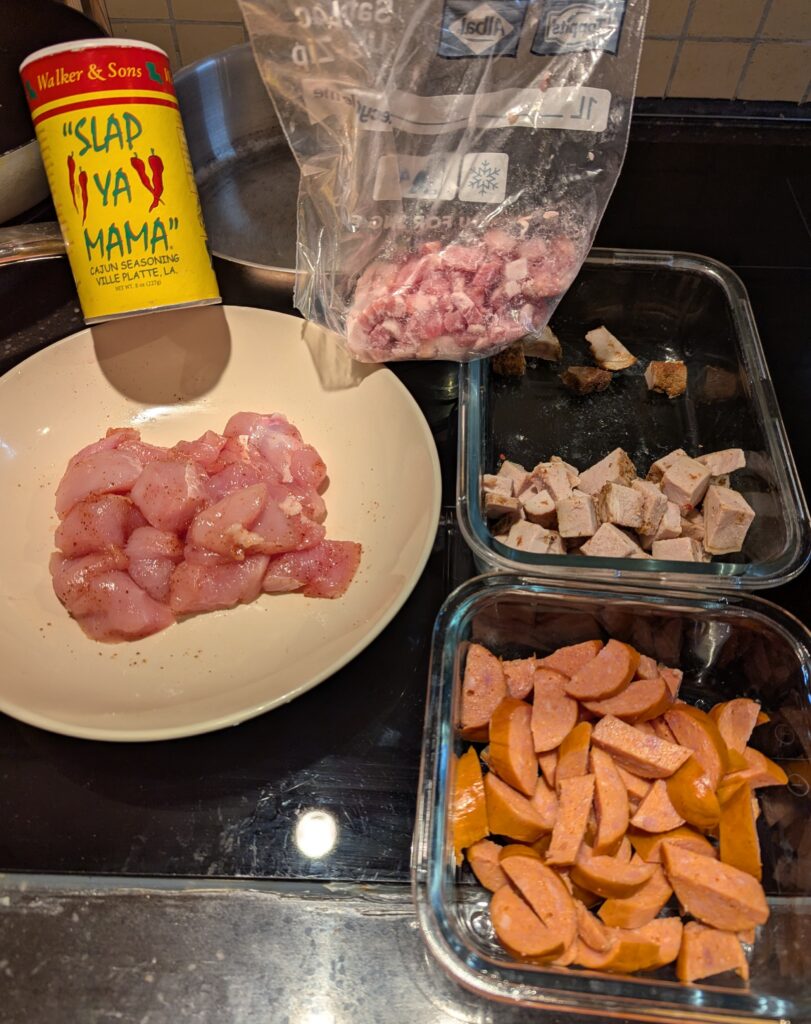
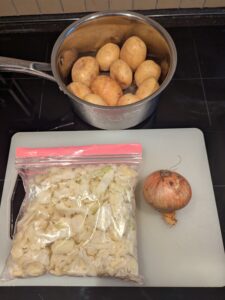
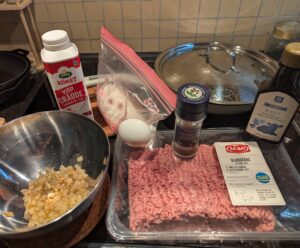
Meats Used Here (very flexible)
- 100 g (optional) chopped bacon (3.5 oz., or just under ¼ lb.)
- 200 g precooked smoked sausage of your choice (just under ½ lb.) sliced
- 250 g boneless chicken thigh or breast – I used one big breast (½ lb.) cut into bite-sized pieces
- sprinkle salty Creole seasoning to season raw chicken
- (very optional) leftover cooked meat cut into bite-sized pieces
- neutral oil of choice as needed for frying, depends on your meats
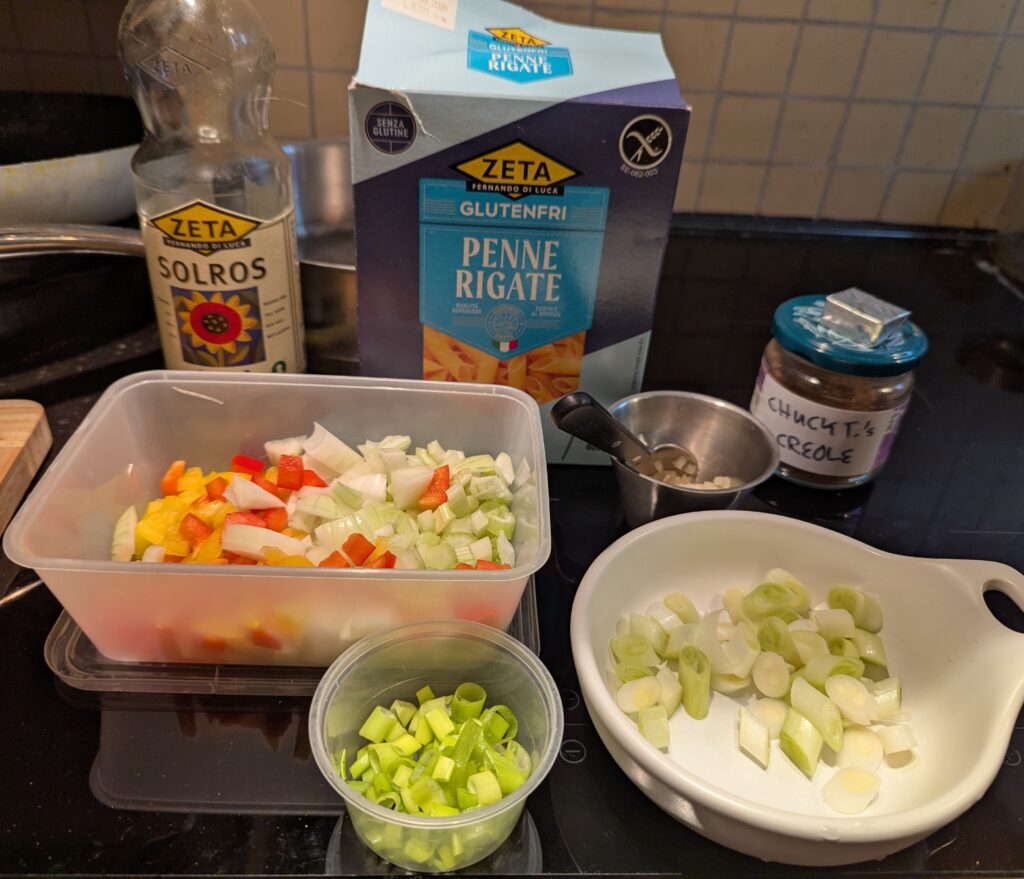
Vegetables
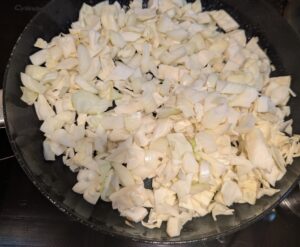
- 2 stalks celery strung and chopped
- ½-1 large sweet pepper chopped
- 1 medium onion chopped
- sprinkle salt to help sweat the Trinity down
- 2-3 large green onions chopped, with green tops set aside
- 3 cloves garlic minced
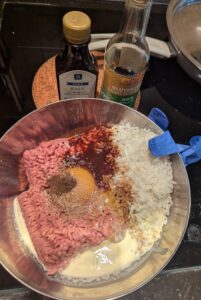
Seasonings and Everything Else
- 600 ml water (2½ cups, or 1 British pint) may need a little more
- 1 bay leaf which I forgot here
- 2 tsp Low salt Creole seasoning, or to taste recipe link in the instructions
- 1 Knorr beef cube or enough bouillon to make 500ml/2 c. of broth
- 1.5 tsp Louisiana hot sauce
- 1.5 tsp gluten free Worcestershire sauce
- 200-250 g short dry pasta shape of choice (½ lb.) – can also use spaghetti or linguine broken in half
Browning the Meats
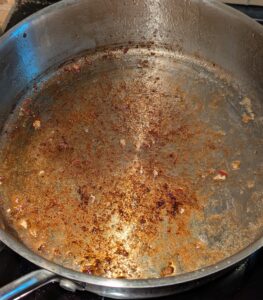
You'll want a nice deep skillet/Dutch oven with a lid to fit, or other heavy-bottomed pan for this. Cast iron is great. This is also a good use for stainless steel and its fondness for holding onto browned bits, which I am using here.
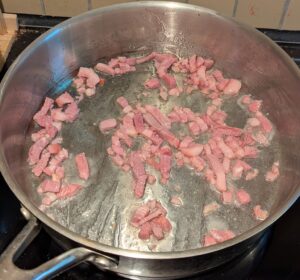
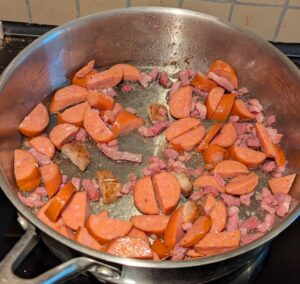
I'm using turkey sausage here, so I decided to include some chopped bacon that we also had, mainly for the extra fat. (Plus, how bad could it be?) This is a completely optional step.Starting this off in about a tablespoon of sunflower oil, and frying over medium heat just until it starts rendering some of the grease. Where most people would start. Once there is enough fat in the pan to keep it from sticking–especially if you're using lean sausage–add in the sliced smoked sausage.
NOTE: If at any point during these proceedings, it looks like your browned bits in the pan are wanting to start burning? Lower the heat a little, and add a splash of water if you need to. It's all good.We want plenty of Maillard goodness for rich flavor, but burning will spoil the party. Keep frying over medium heat, stirring and turning the sausage pieces occasionally until everything is well browned all over.
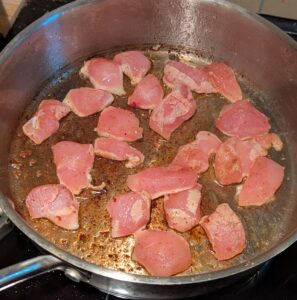
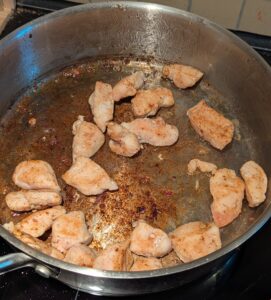
Remove the browned meats into a bowl, and add the seasoned chicken to the pan.Spread the pieces out well, and adjust the heat a little as required to let them brown too, instead of flooding the pan with liquid. After a few minutes, flip those over and let them brown on the other side.When that's done, transfer into the bowl with the reserved sausage. This leaves us with this nice layer of gratin in the skillet. We want to hold onto all of that, for the flavor and color. Same with the fat, unless more than 2-3 tablespoons came out of your meat. (Spoon out any excess grease.)Don't worry, it will all come loose soon!
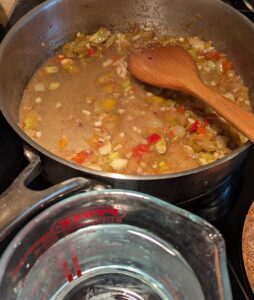
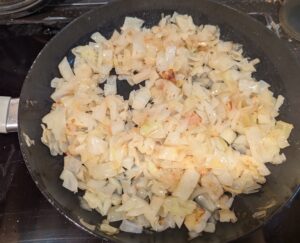
Cooking Down the Vegetables
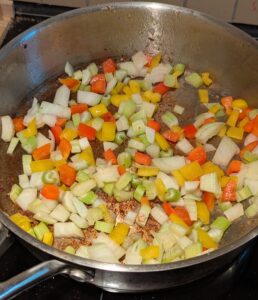
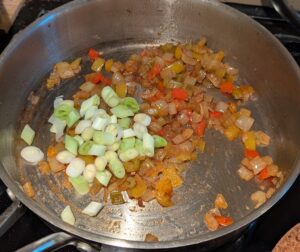
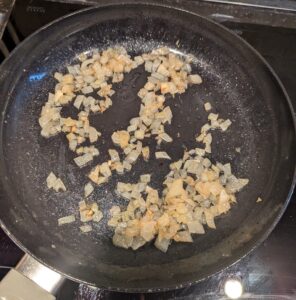
Add your Trinity, and stir around to coat with the grease.Turn down the heat a notch, sprinkle with salt to help the juices sweat out, and cover the pan. Let cook for around 10 minutes, stirring maybe once. Continue cooking down covered like this until everything is thoroughly softened. Stir occasionally, and add a splash of water to keep it from sticking if you need to.I didn't even take this down as far as some people like to, or as I would for some other dishes. But, this stage took probably 30-35 minutes–the vast majority of it hands-off time, when I could do other things between going back to stir and evaluate every so often. When the Trinity is nice and soft, add in the white parts of the green onions. Cook uncovered until they also soften–again, with the occasional stir and splash of water as needed. That'll probably take around 10 more minutes.
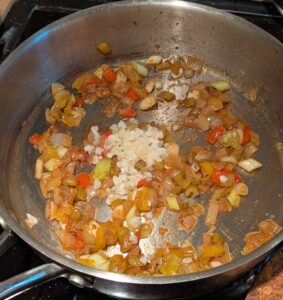
When those are soft too, add the garlic and fry for a couple more minutes until you can really smell it. If you actually remember (unlike me!), add in the bay leaf at the same time.
Pasta Time!
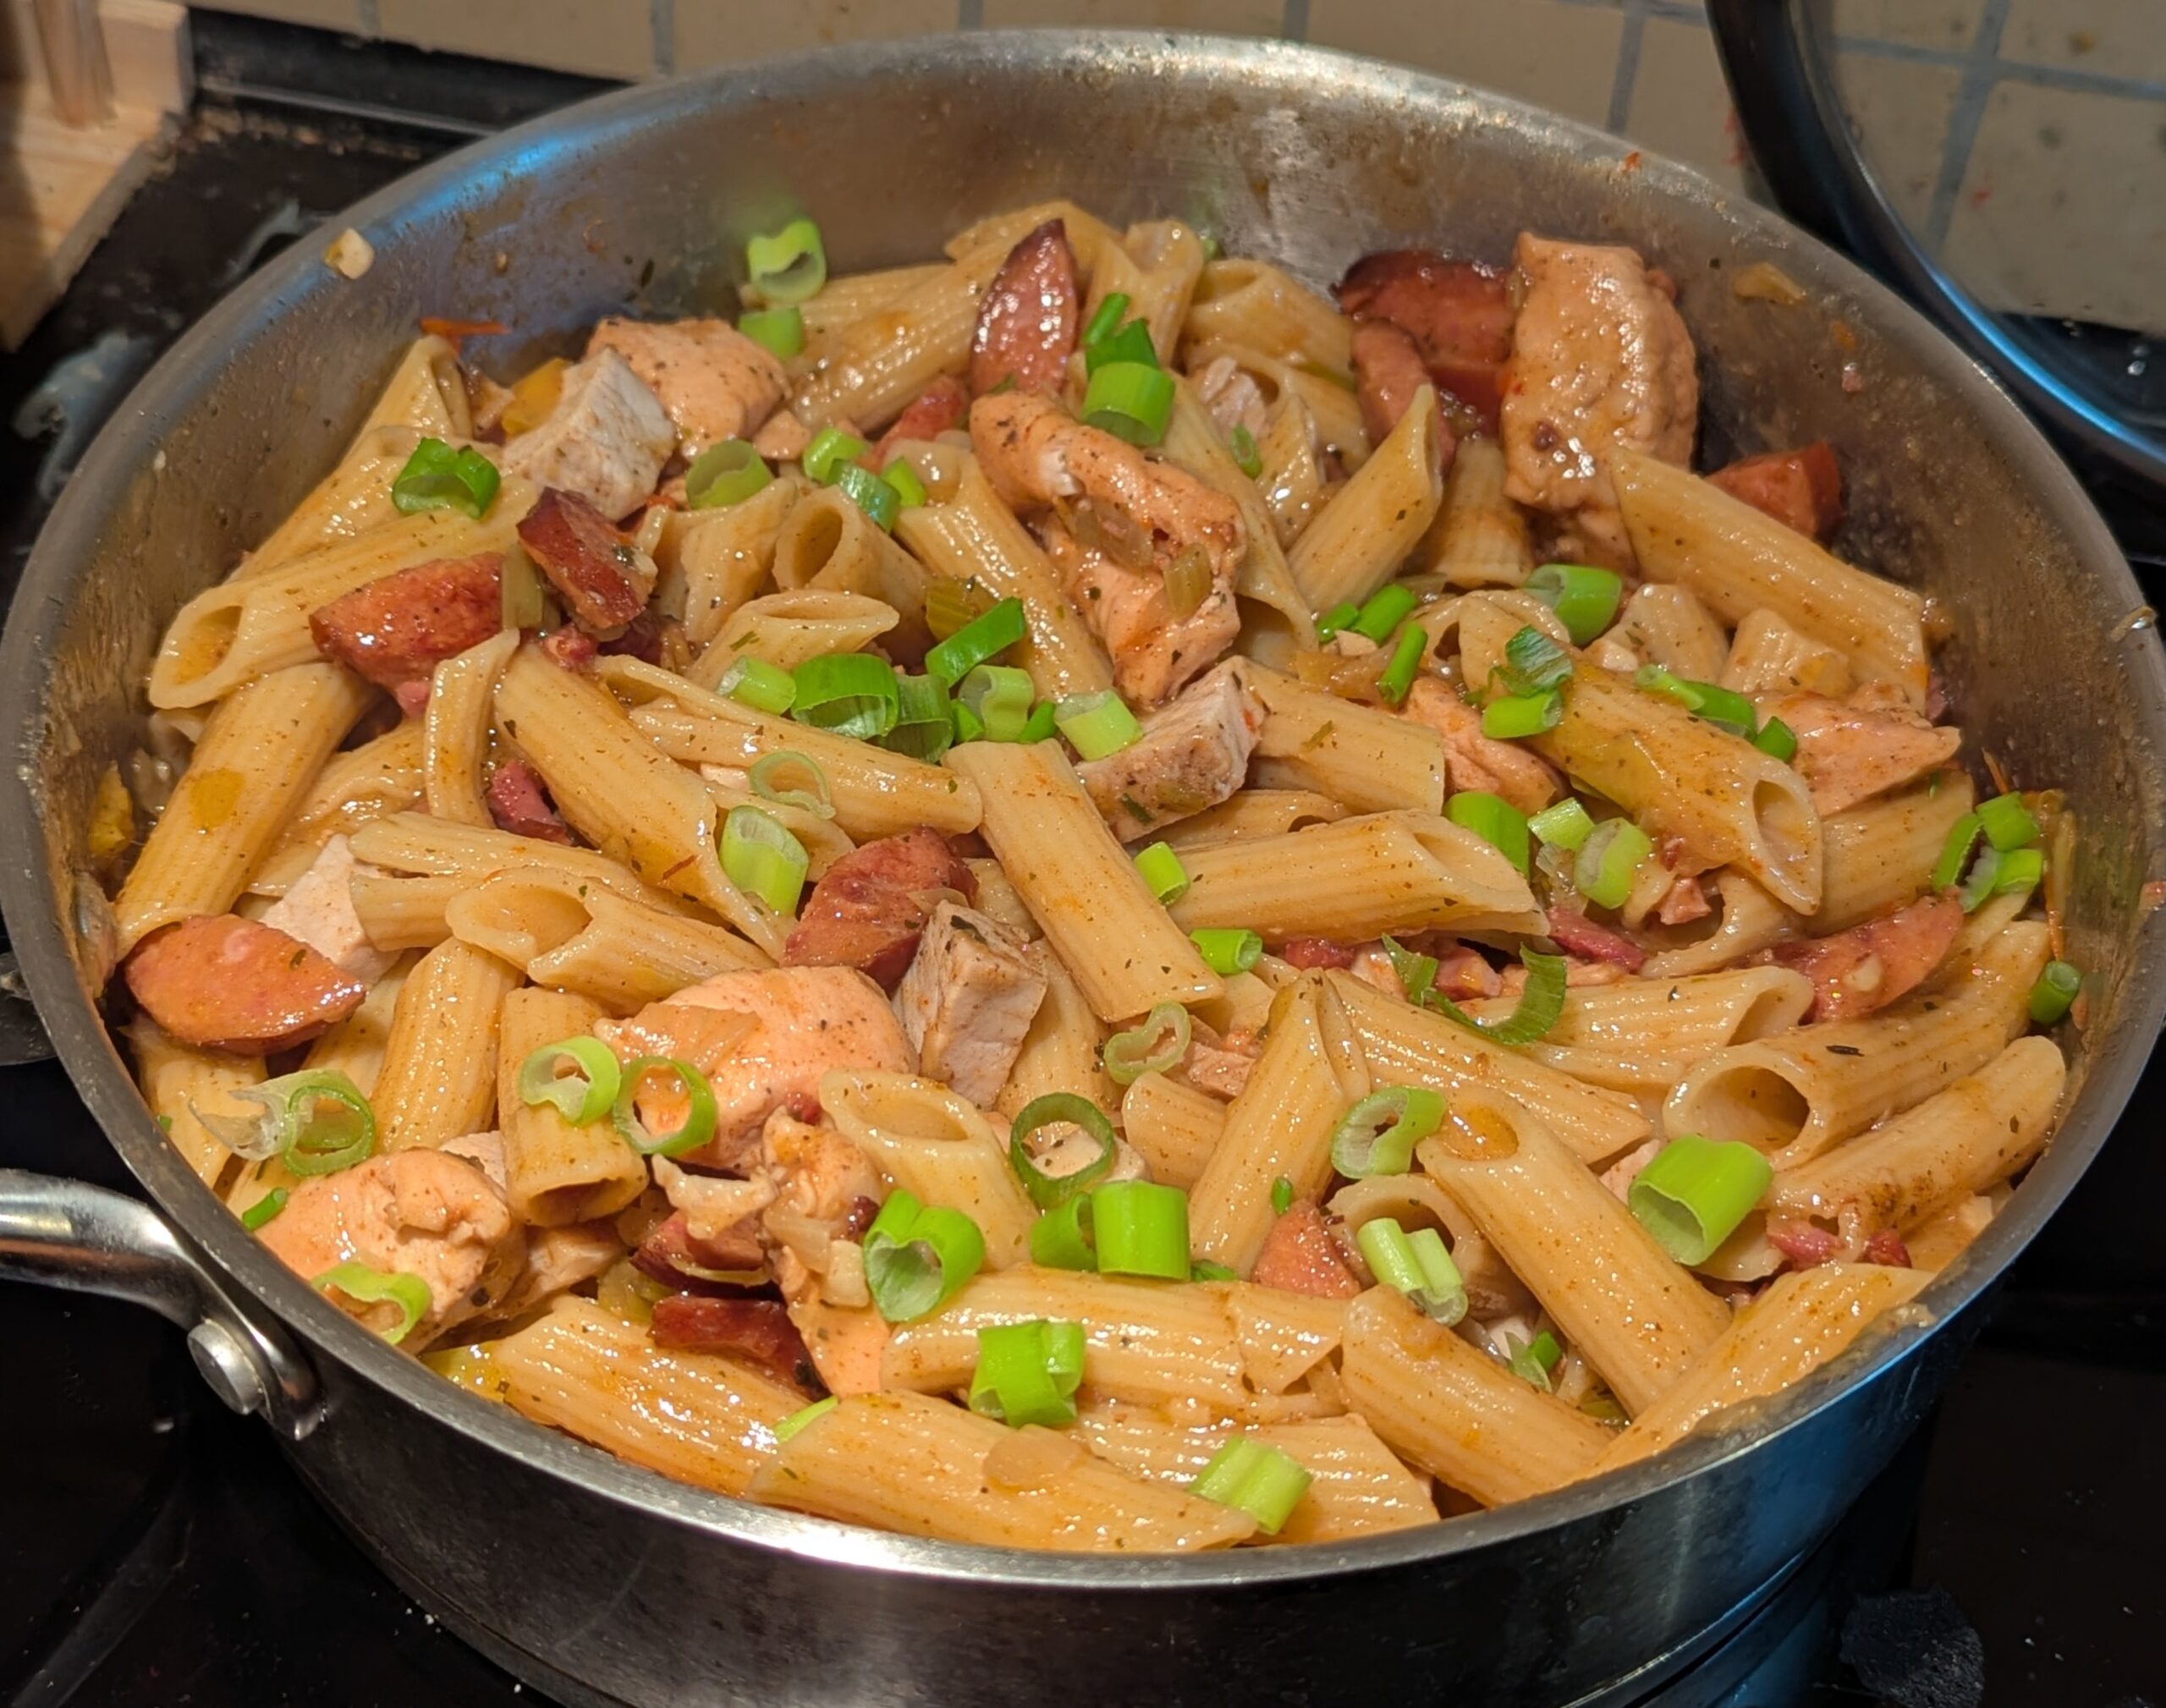
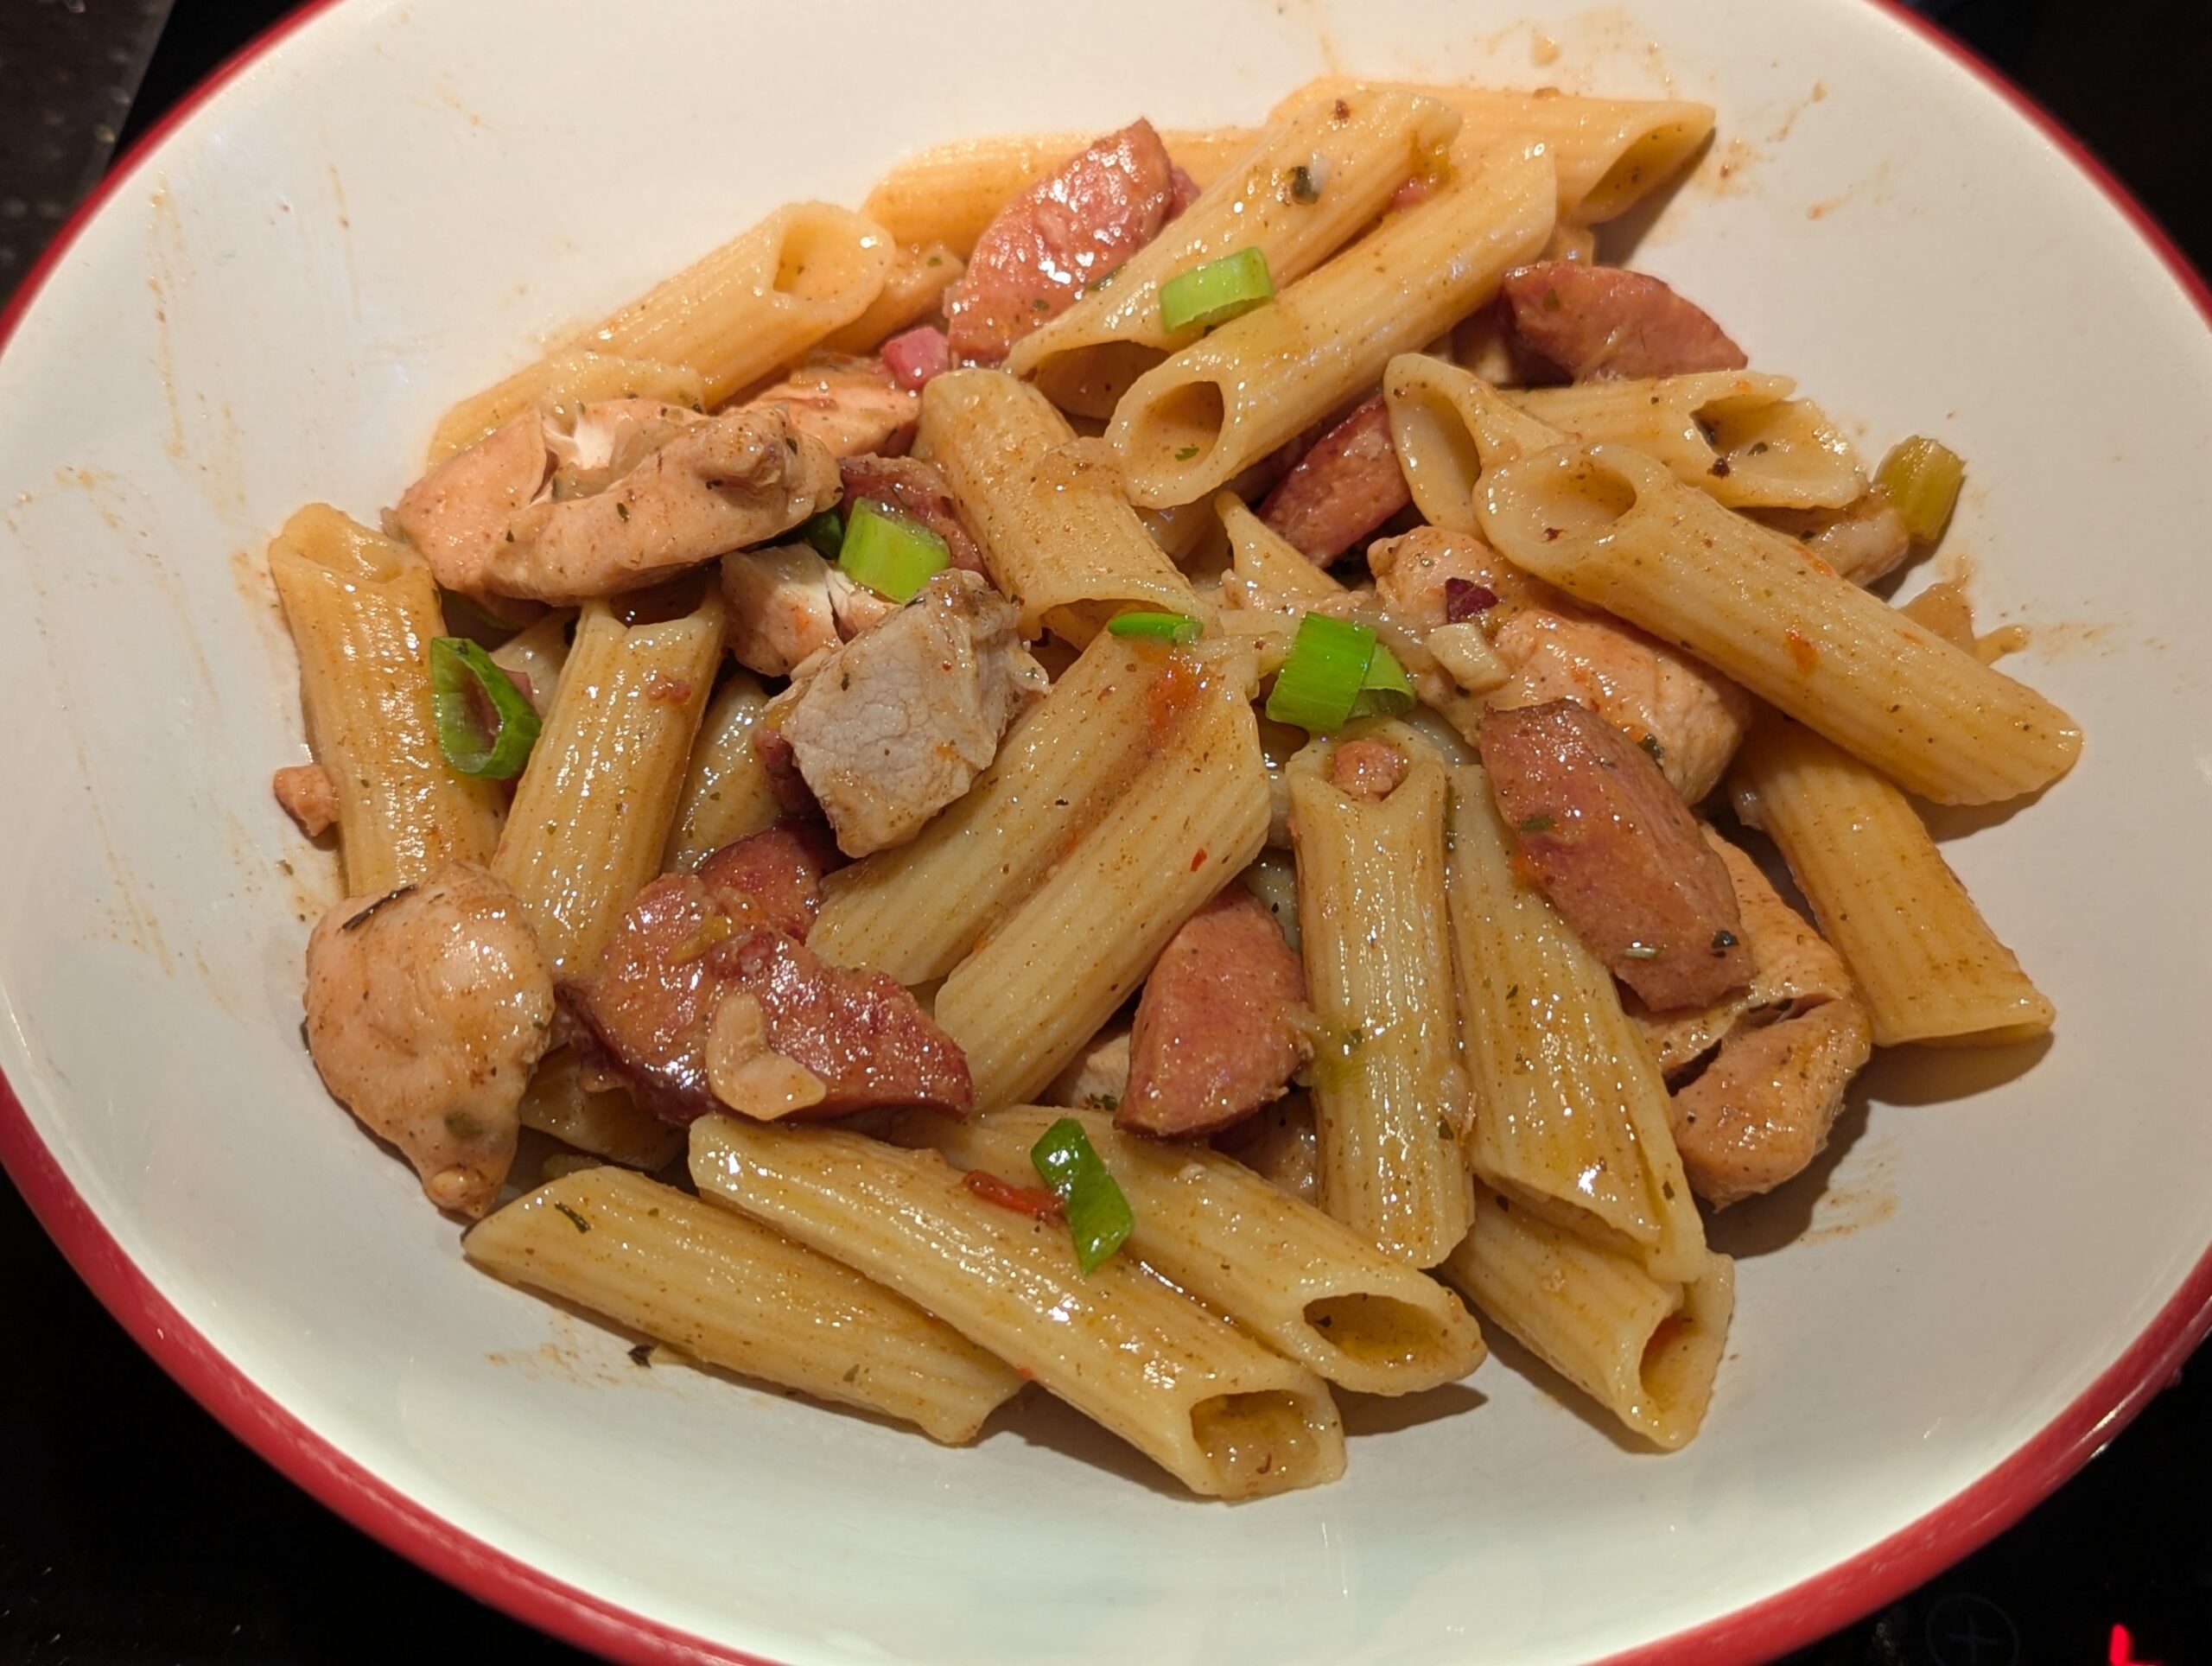
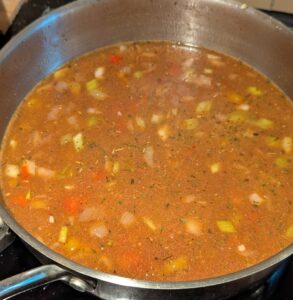
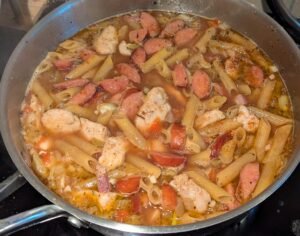
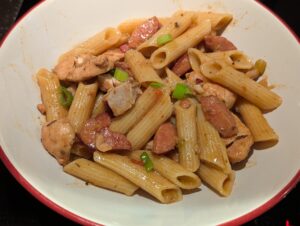
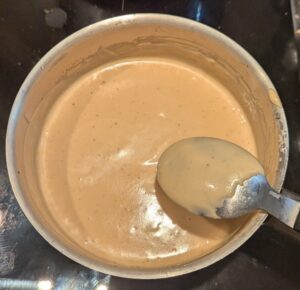
Add in a small portion of the water, and stir it around to deglaze the pan. Scrape any stubborn browned bits loose to get dissolved.At this stage, I also put in the crumbled bouillon cube to dissolve. Stir in most of the rest of the water, and the other seasonings. I wasn't sure if it would need all the water, but this penne did.The main seasoning I'm using here is based on Chuck Taggart's Creole Seasoning Blend, from his (excellent!) classic Gumbo Pages site. It is purposely low on salt, so I can control that separately. If you're adding any cooked leftover meat, you can decide how likely it is to benefit from more cooking. If it'll be fine, add it in with the chicken and sausage. I was using up what was left of that roast pork tenderloin, and I was afraid that might get tough. So, it went in close to the end. Bring to a boil, and add in the cooked meat and dry pasta. Taste for seasoning. You'll want the broth a little saltier and more seasoned in general than for a soup, same as with rice dishes. The pasta will soak up a lot of that.This is about the liquid level we need, with one-pot pasta dishes in general. You'll want to poke the pasta down with a spoon, so that not too much is sticking up out of the broth. Something like penne will want to poke up more than smaller or flatter pasta shapes. It's fine. Bring down to a simmer, cover again, and cook gently stirring every 5 minutes or so until it's done. You'll want to stir up from the bottom in sort of a folding motion, to make sure everything gets its fair turn fully down in the broth. (Again, more necessary with some shapes than others.)The pasta will take longer to simmer like this than the box's cooking time would suggest. That's normal and expected. This took about 20-25 minutes. When the pasta is nearly done to your taste, make any seasoning adjustments and stir in any extra meat or other ingredients which wouldn't take longer cooking. It should absorb most of the broth, and what's left should be thickened by the pasta starches. We're not aiming for a very saucy dish here.Let rest, covered, for 10 minutes. Scatter the green onion tops over it before serving. Dish it up, and enjoy!This is great served with just some salad on the side. Tonight we had more of that prepackaged oil-and-vinegar cabbage salad.