This is another recipe I snagged off r/Old_Recipes over on Reddit. This is one that blew completely up and seemed to be all that people were posting about 4-5 years ago, but I hadn’t actually gotten around to trying the cake until now. We haven’t …
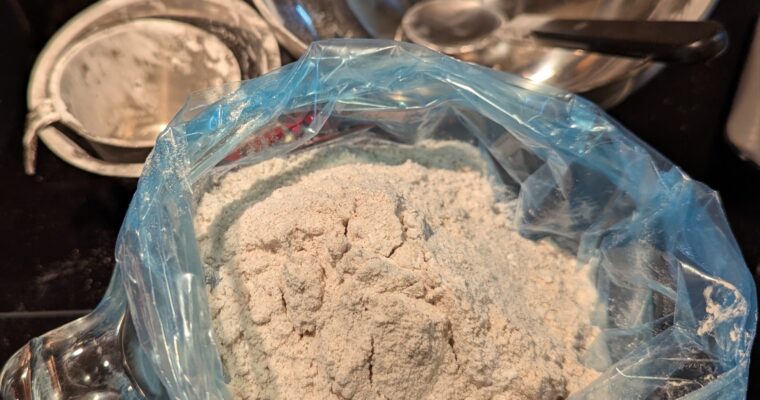
I generally mix flours on the fly per recipe. But, this time I thought I might as well throw together a larger batch of the blend I planned to use for a cake I was baking, to make things easier later. This should be one …
This soup idea was lightly adapted from another older recipe that I ran across on Reddit and squirreled away in my saved posts. This time, in the comments on an r/soup post requesting some sauerkraut soup recipes. HauntedMeow was kind enough to contribute this variation that they snagged from a church cookbook.
The flavor combination sounded intriguing, and like something which should be right up our alley. So, I had to save it to my digital Try Pile.
Sauerkraut soup is another thing that I did grow up eating sometimes at home. Like with my adaptation that turned into the Pork and Root Vegetable Stew with Miso a while back? I’m guessing my family’s style was pretty heavy on the migrated “Pennsylvania Dutch” influences. My mom’s take used more fresh pork and potato/carrot/etc., but no cream and simpler seasonings. Another dish that leans hard on the flavors of the stewed pork and vegetables. Good quality meat and kraut make the dish.
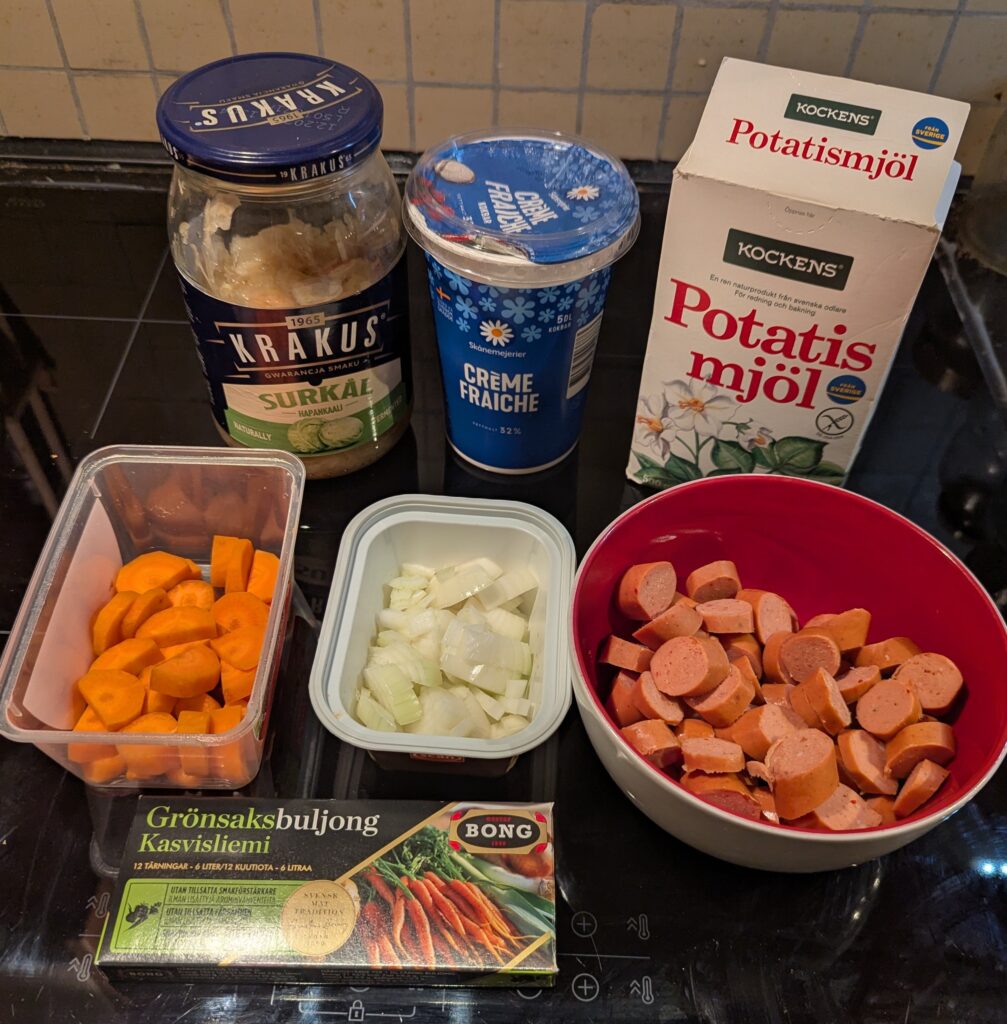
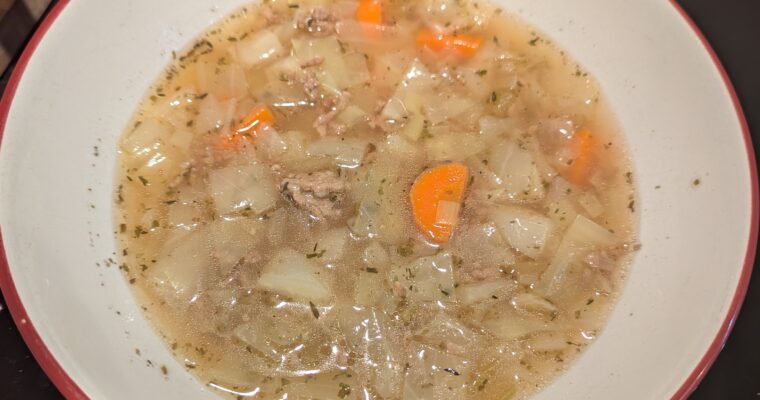
The main ingredients used in this soup
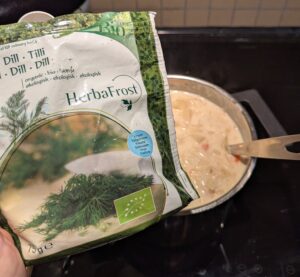
This version also uses simple ingredients, but the combination of cured meat, sour cream, and dill really does set it apart. And sounded very much worth a try!
We happened to have just the right amount of open sauerkraut and crème fraiche in the refrigerator, and some aging potatoes perfect for a soup or stew. So I picked up a pack of thin Polish-style smoked sausages, and decided to go ahead and give it a go.
This is a very easy meal to put together. I actually complicated the original recipe in several ways, trying to cook it the way I thought would give the best results to my own taste. (As is really par for the course around here!) I did follow the original ingredient list, other than the addition of some carrots and the bit of vegetable bouillon for a little umami flavor boost.
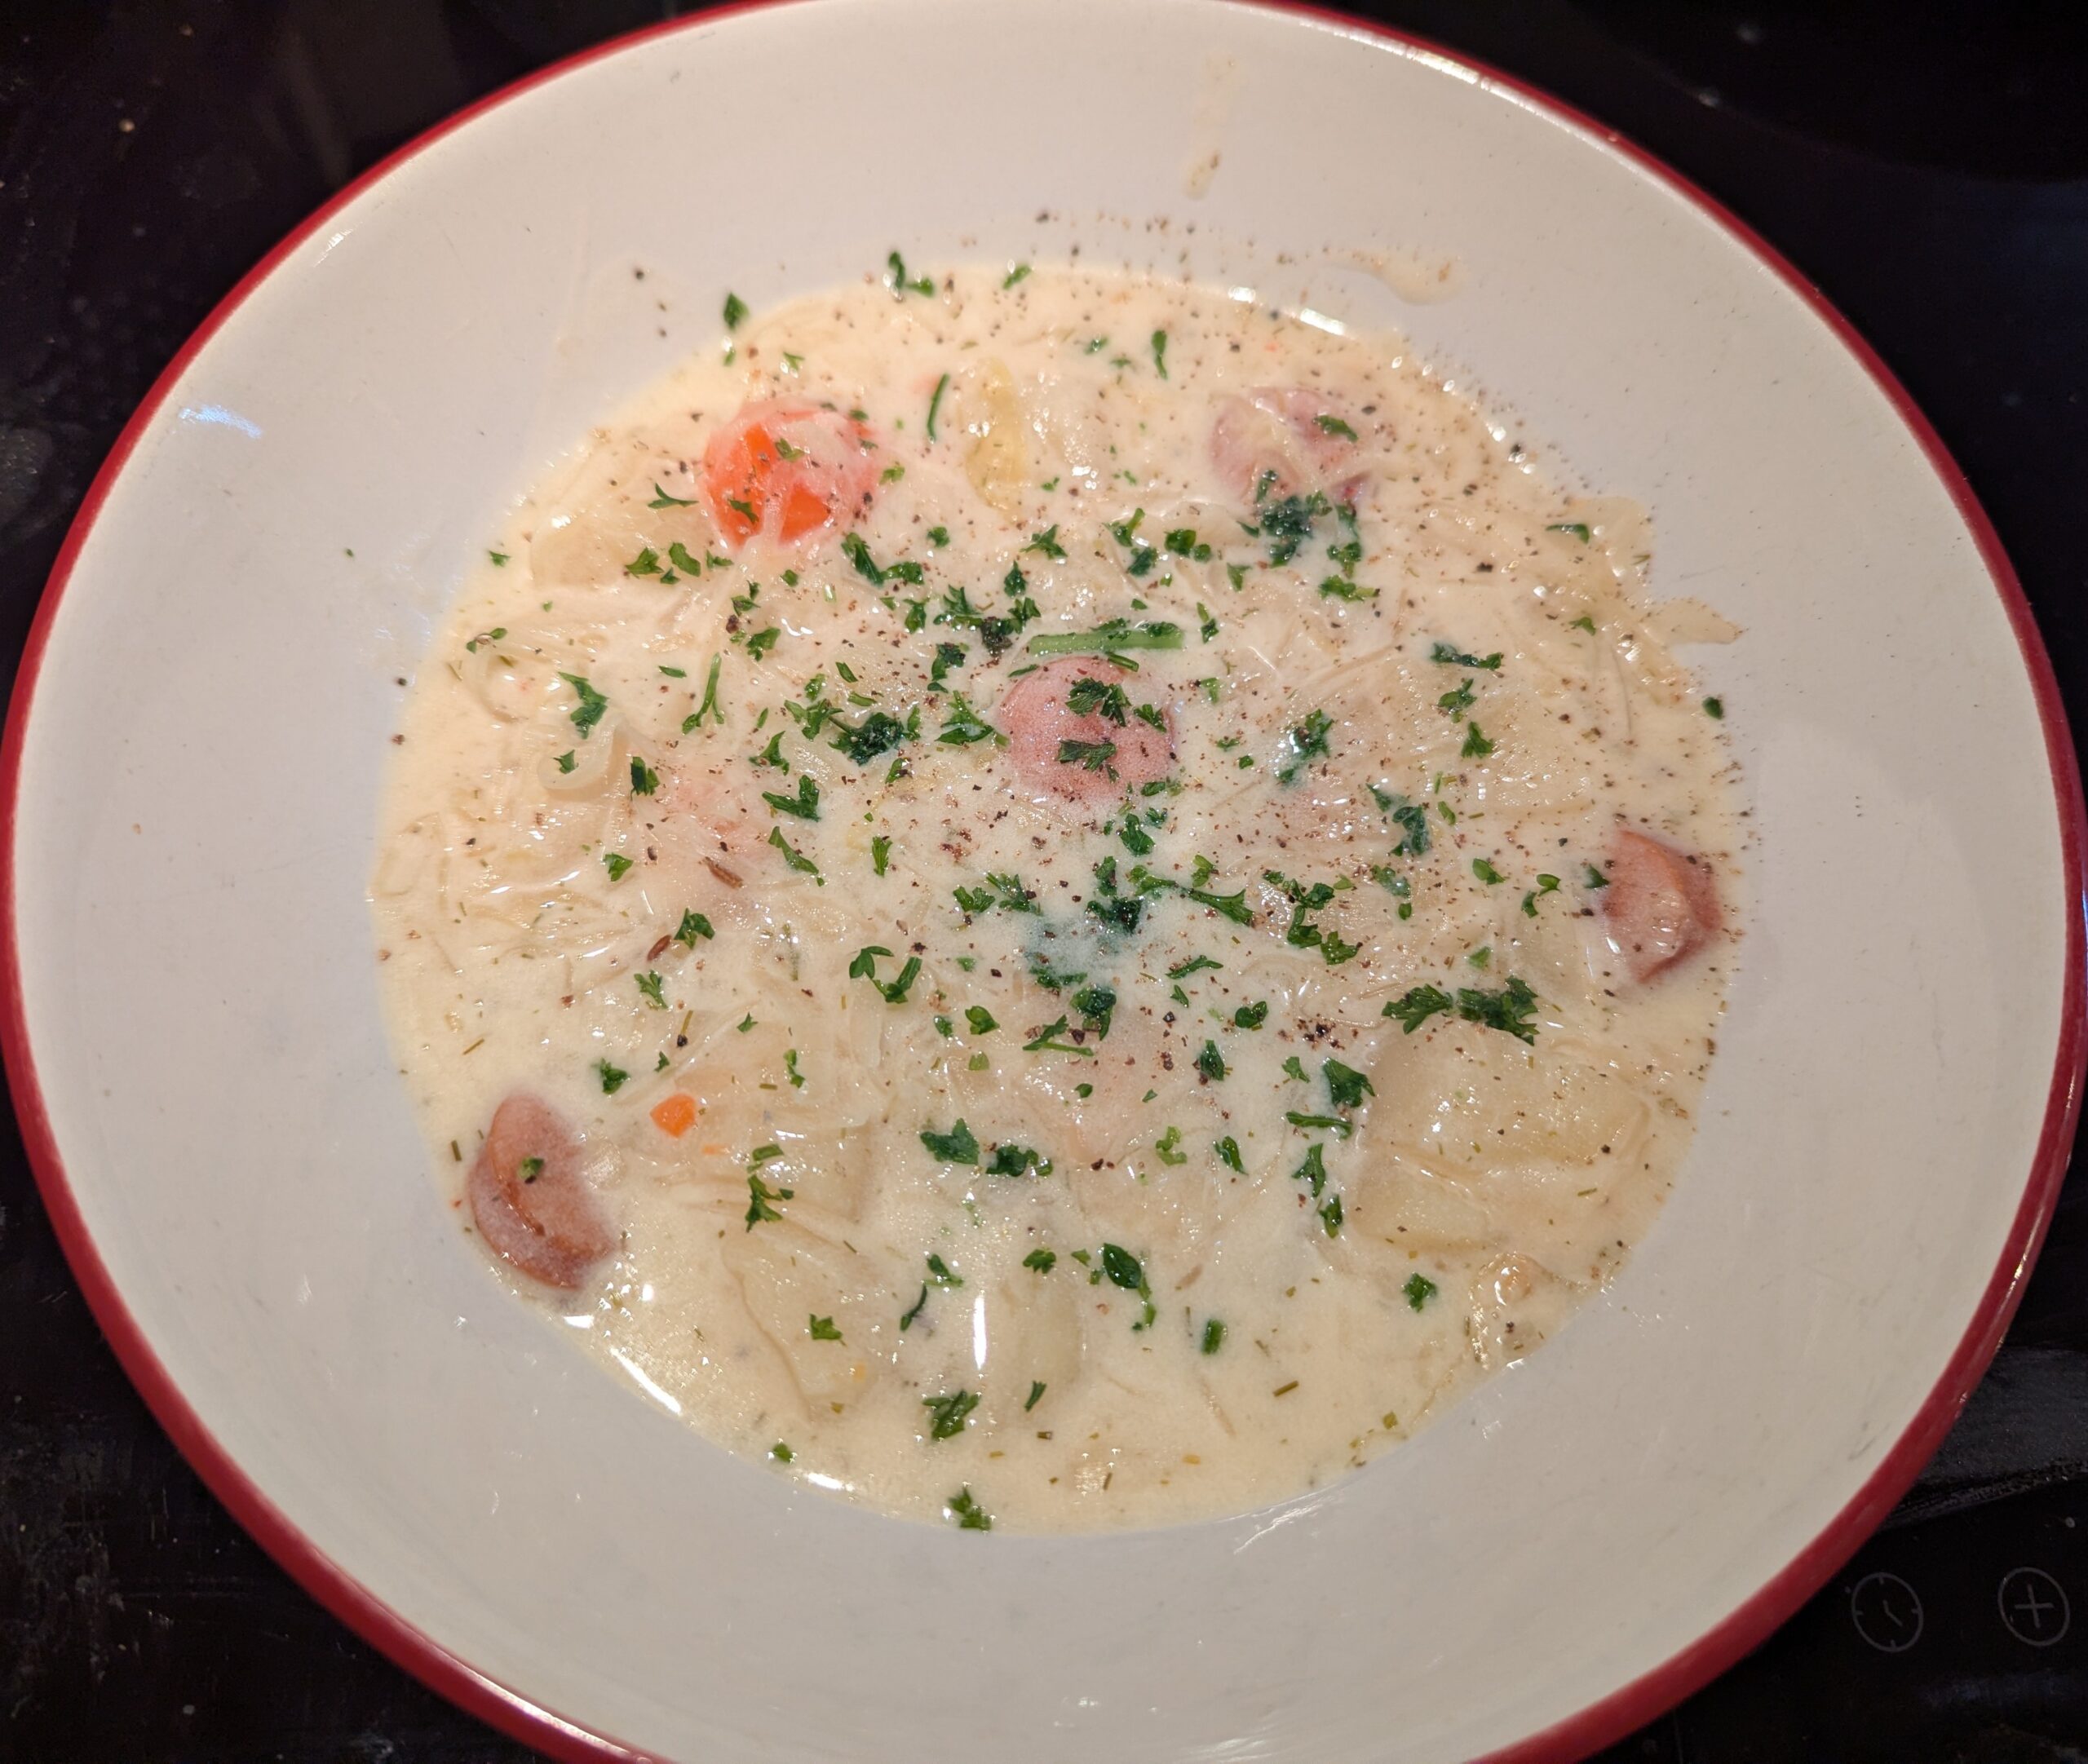
The soup turned out absolutely delicious, and I will definitely need to cook it again. These sausages worked well in there, but I would also be tempted to try some different smoky cured meat next time. The little hint of caraway flavor worked unexpectedly well in here, underneath the fresh dill pop that helped pull everything together. I also very much enjoyed the thicker, creamy broth and its contrast with the sharp kraut cutting through the richness.
If you’re into hearty soups and tart flavors, this is an excellent meal to try.
450gsauerkraut(16 oz., or 1 can) drained, with liquid reserved
Other major ingredients
1¼literwater(5 cups)
250mlsour cream/crème fraiche/gräddfil(1 cup) full fat is best
1tbsppotato starchcan substitute corn or another starch; use 2 tsp if you want the soup less thick
Seasonings
¼tspcaraway seed
1.5vegetable bouillon cubesenough to make 750ml/3 cups total
1large bay leaf
coarsely ground pepperto taste
½tspgarlic powderor use fresh
1tbspfresh or frozen dillchopped
saltto taste
sugarsmall amount to taste, if the sauerkraut is extremely tart
sprinkles of chopped dill or parsley, and pepperto garnish the top
Instructions
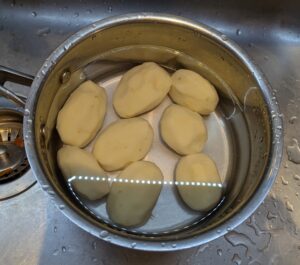
Peel the potatoes if you prefer, and chop them into bite-sized pieces. Hold to the side, covered with cool water. We had rather small potatoes today, so I used 8 of those.
Peel and slice carrots, and chop the onion. Hold to the side separately.
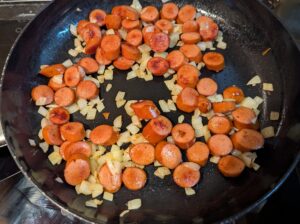
Slice the sausage into bite-sized pieces. These were a thin version of a Swedish take on soft Polish kabanosy. Kielbasa or pretty much any other smoked sausage you prefer should be good.
NOTE: This next part is best done in a fairly heavy-bottomed pot that you're planning to cook the soup in. I did this differently because I initially misjudged the size of pot this soup would need. I had hoped to simmer it all together in the potato pot shown above. For this size of batch, you will want at least 3 L/quarts of cooking capacity with room to stir. 4L would be better. Soups and stews do have such a talent for outgrowing their pans!
Fry the sausage over medium heat, stirring occasionally, until it's starting to brown. (Add the little oil or butter to keep things from sticking if your sausage is leaner.) Then add the onions.
Continue frying it around for a few minutes until the onion just starts picking up a little color around the edges. We aren't looking to cook it soft or deeply brown the sausage, just work up a little extra flavor.
When that's looking about ready, add in the caraway seeds and fry them around too for another minute or so. If you want to use fresh minced garlic, this is the time to add that too.
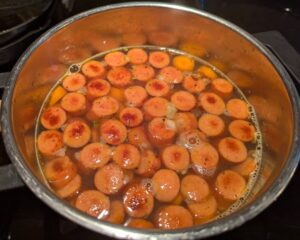
When that's ready, combine the sausage mixture in your soup pot with the potatoes, carrots, and water. Add in the bouillon, bay leaf, and pepper.Bring to a boil, then turn down the heat to simmer it covered for 20 minutes or until the potato and carrot is just fork tender.
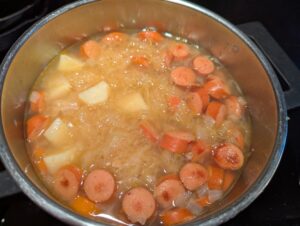
When the root vegetables are cooked, it's time to add in the sauerkraut and garlic powder. The veggies are unlikely to get much softer once the kraut acidity goes in.
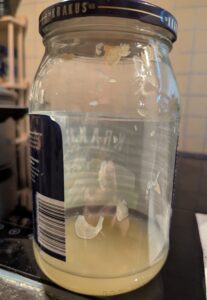
The original recipe I was working off specified to add the kraut undrained. This is up to your taste and the kraut you're using. I would suggest draining off most of the liquid and keeping it to add to taste later if you want it.The half a big jar I had to use up was sour enough that I just forked the cabbage out of the brine, and sort of wished I had drained it better. So, this remaining brine went back in the fridge.
Bring back to the boil, and simmer covered for another 15-20 minutes, or until it's wilted down and softened to your taste. Turn down to the lowest heat.
Place the sour cream in a heatproof container, and stir in the starch. Mix together until very smooth. Note: Potato starch will hold up better to the kraut acidity than corn. Tapioca starch is also good for that.This step is partly intended to help keep the cream from curdling or "splitting" in the hot soup. It's probably unnecessary with the 32% crème fraiche I was using, which can boil–but it will also serve to thicken the soup a little more.
Dip out some of the hot broth, and gradually stir about a cup/250ml into the sour cream mixture to temper it.This is also intended to keep the cream from curdling, besides the starch glumping up together when it hits the hot broth.
Our runny tempered sour cream mixture is ready to go into the soup! It should look very smooth.
Carefully stir this through the soup. Since we used potato starch here, it thickened the soup as soon as it was mixed in. If you're using another starch or your soup has cooled down more, you may need to gently heat it some more before it will fully thicken.
Adjust seasoning to your taste. This batch turned out just sour enough from that particular kraut that I needed to add around a teaspoon of sugar to help balance the flavors just a tad. The simmering and creaminess were not quite enough to mellow the edge off it. With less aggressively sauerkraut, this addition shouldn't be necessary.Add the dill. Stir in well, then let the soup sit off the heat for 5-10 minutes to let al the flavors blend.l
Soups's on! This would be good served with some crusty bread, and maybe a green salad. But, it felt like enough of a meal on its own that we just ate big bowls for supper.
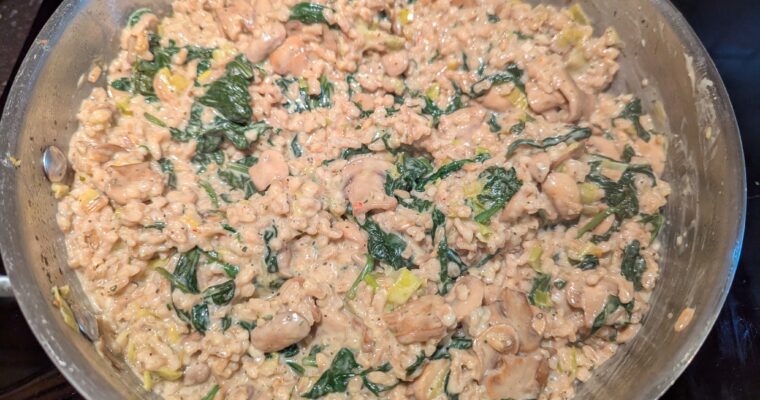
I picked up some mushrooms, leeks, and baby spinach on sale, at the same time as a fresh box of the havreris that I have come to love here. So, a plan suggested itself. Havreris is a nearly-wholegrain form of oats available here, pushed as …
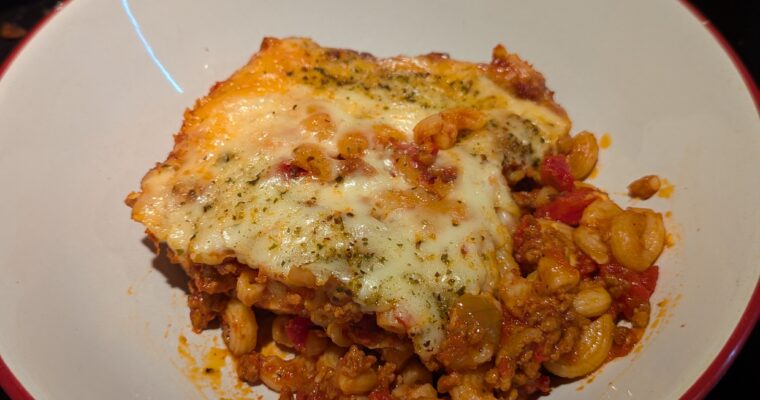
I was recently reminded that I hadn’t made something like this in a while, by one of Backyard Chef’s videos: Johnny Marzetti – One of the most important dishes in modern American cooking!. I felt like he seriously overstated that part, not being as personally …
Today, I was in the mood for something warm, filling, and low effort. It’s been a low energy day, and my musculoskeletal system is protesting the weather.
Some type of one pot noodle dish seemed just about perfect. And the Instant Pot makes these much easier.
Prepared meatballs were also a very tempting protein source. They’re tasty, versatile, and pretty well dump-and-go for a quick meal. Especially now that we’re living in Sweden, I always try to keep a meatball supply ready in the freezer. Probably the majority of prepared meatballs here are gluten free by default, using potato products for the little bit of binder–but, it does always pay to read the ingredients carefully before you buy.
My first thought today was a basic tomato-based Italian themed meatball pasta, which I will also post the next time I throw some together. But, that would mean that I needed to grate some Parmesan, and also come up with some sort of side salad or other vegetable for a rounded meal.
So, then my mind turned to more Asian style noodles, including a good bit of vegetables alongside the protein for a complete one-dish meal.
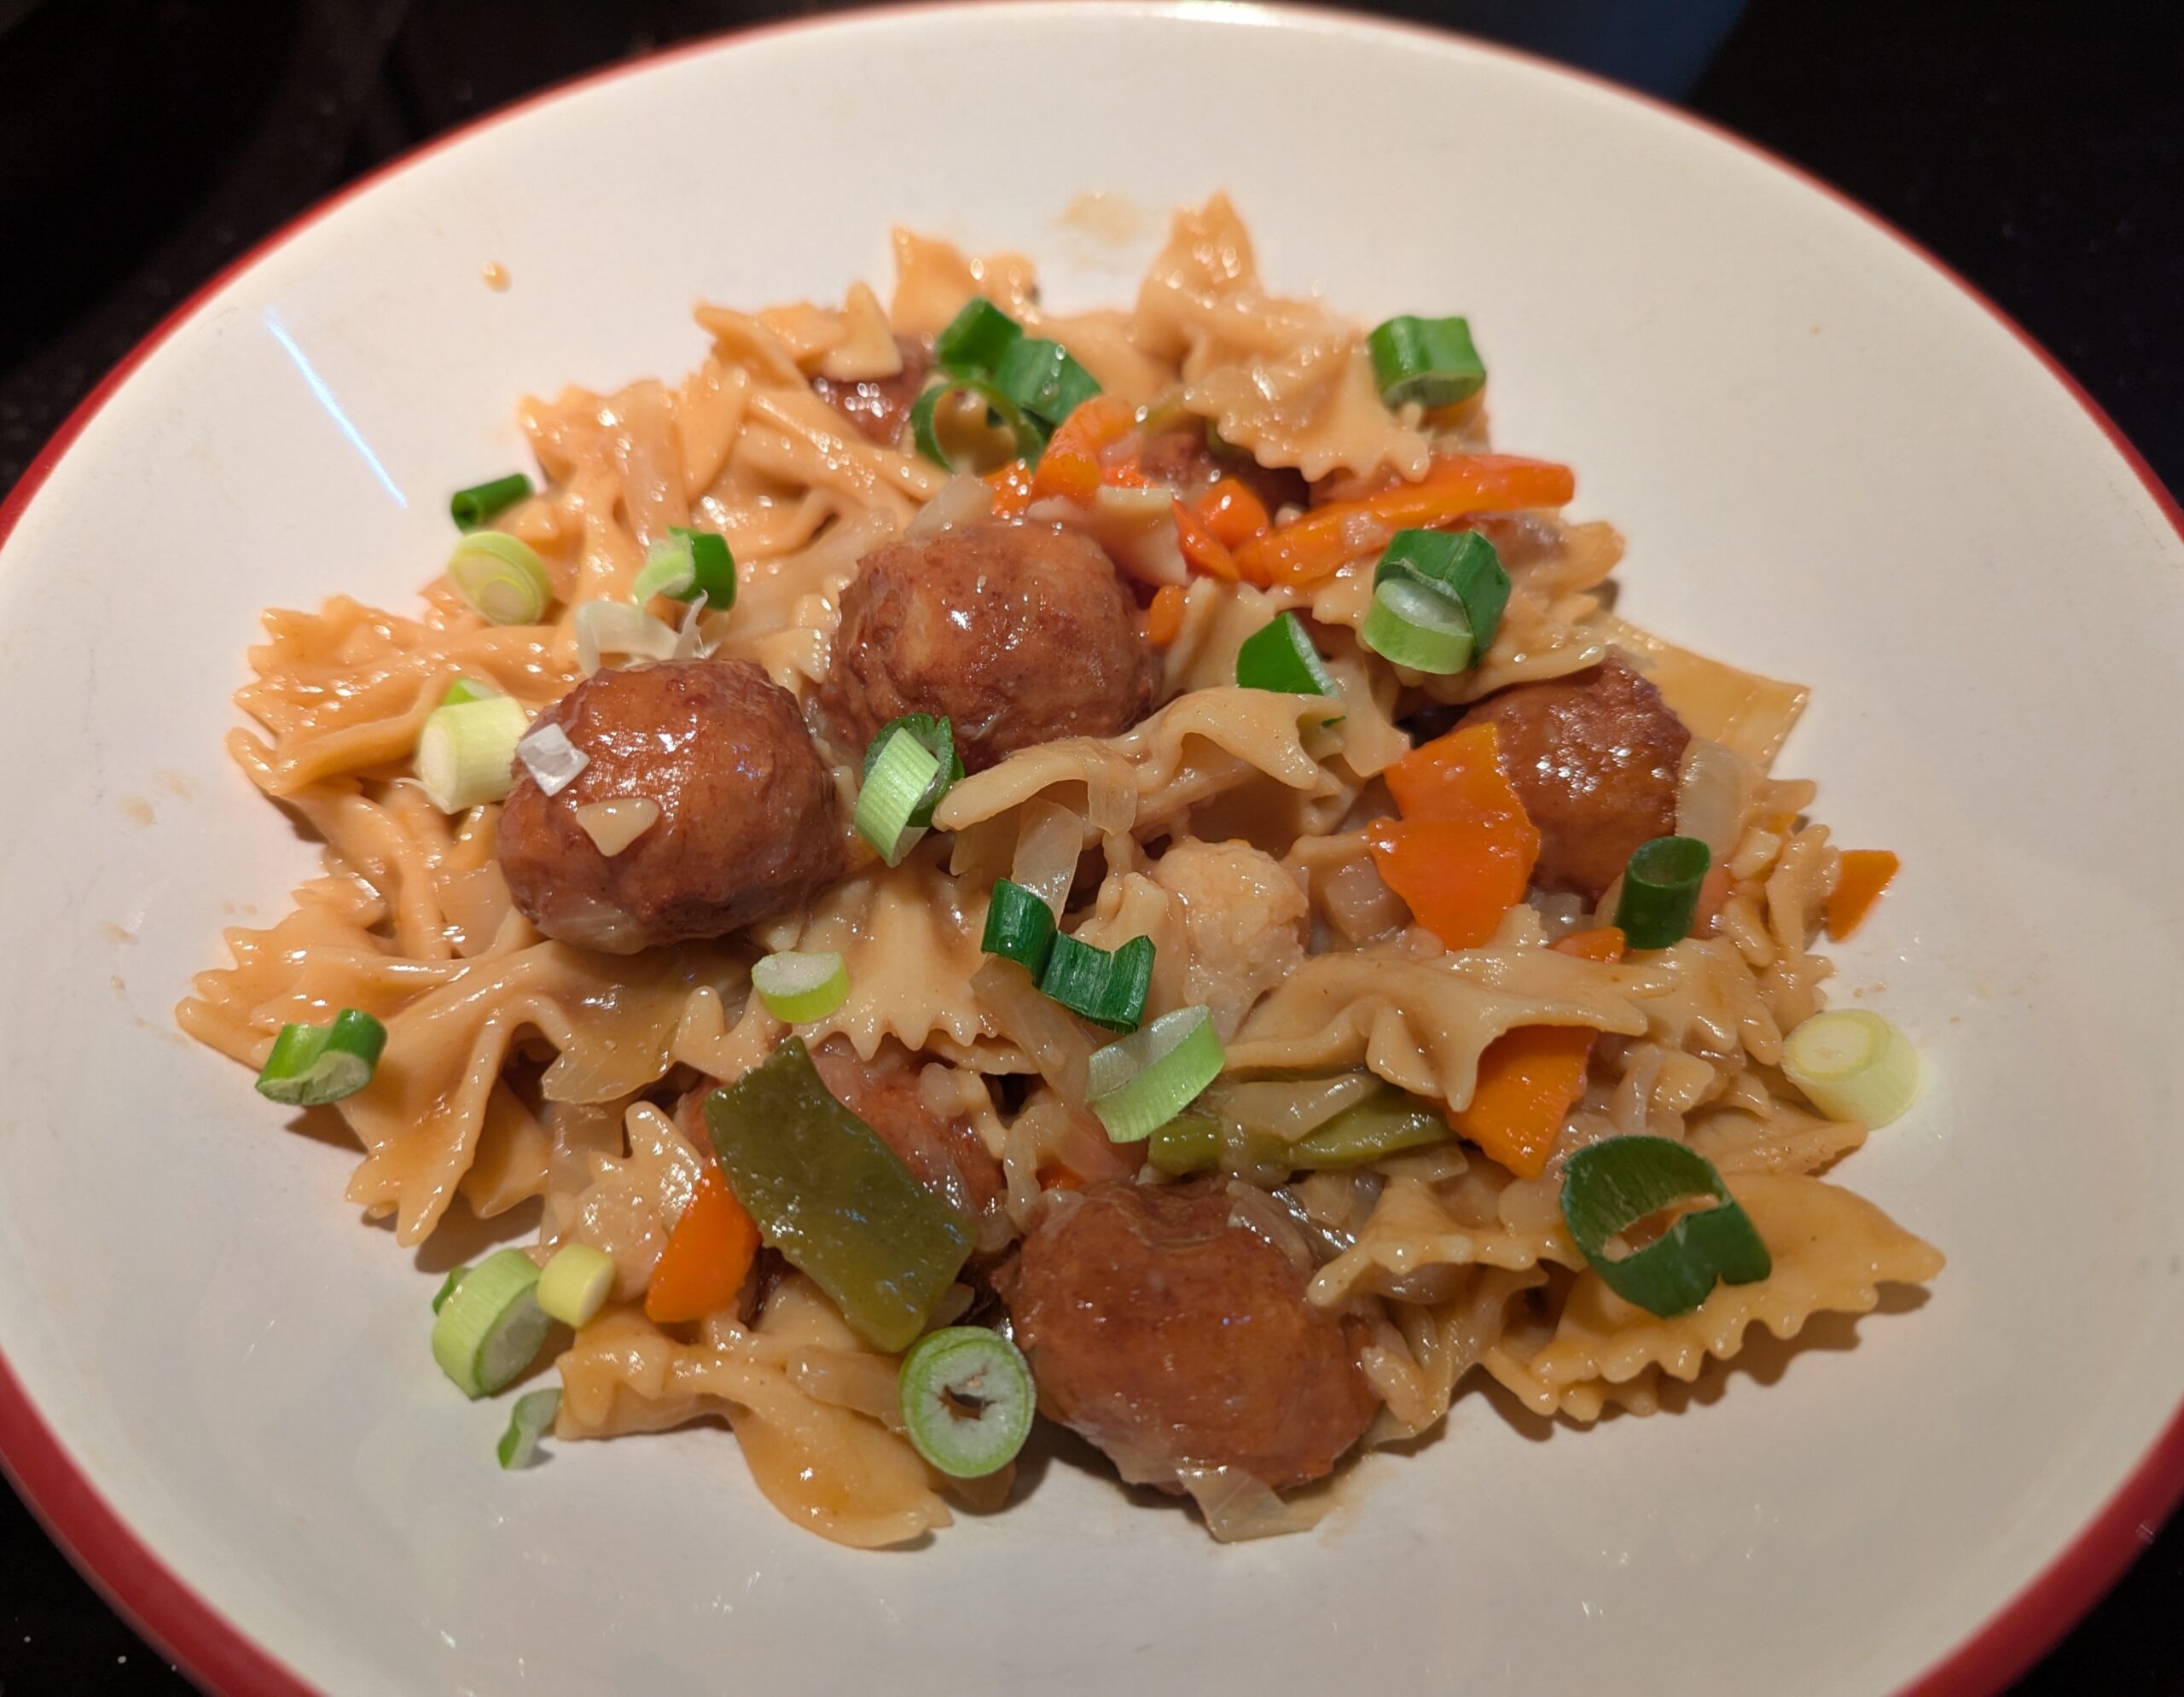
Considering that I wanted to use the meatballs, a short pasta shape made more sense than long noodles. I’ve also found that they are easier to manage in a one pot dish. It may not be traditional, but frankly nothing about this is! It’ll still be delicious.
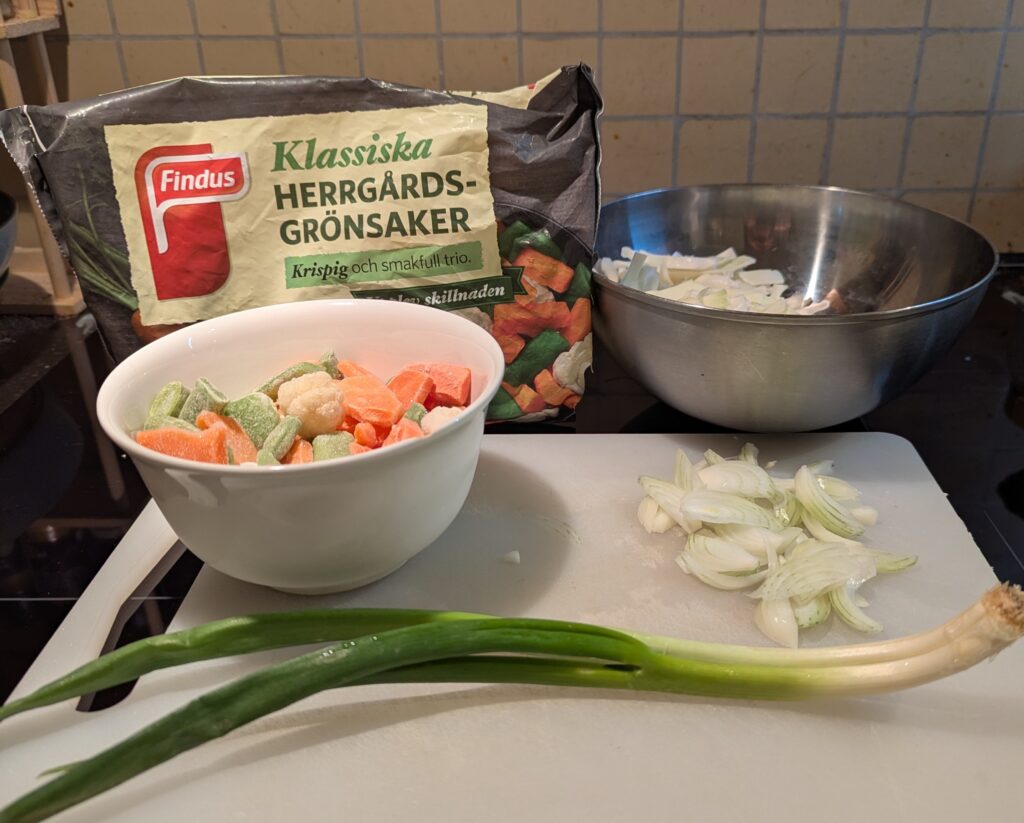
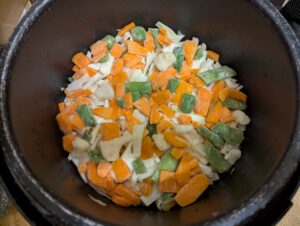
The vegetables we’ll need. This did require a little onion and cabbage cutting, but I opted to use a chunky frozen vegetable blend for the rest to add some color and variety. I didn’t end up chopping this neat twinned green onion tonight, because I realized we already had some leftover sliced in a jar.
The vegetables will cook pretty tender with this cooking method, but I’m fine with that tonight. If you prefer a more tender-crisp texture, you could also cook them on the side and add them in at the end once the seasoned pasta is cooked.
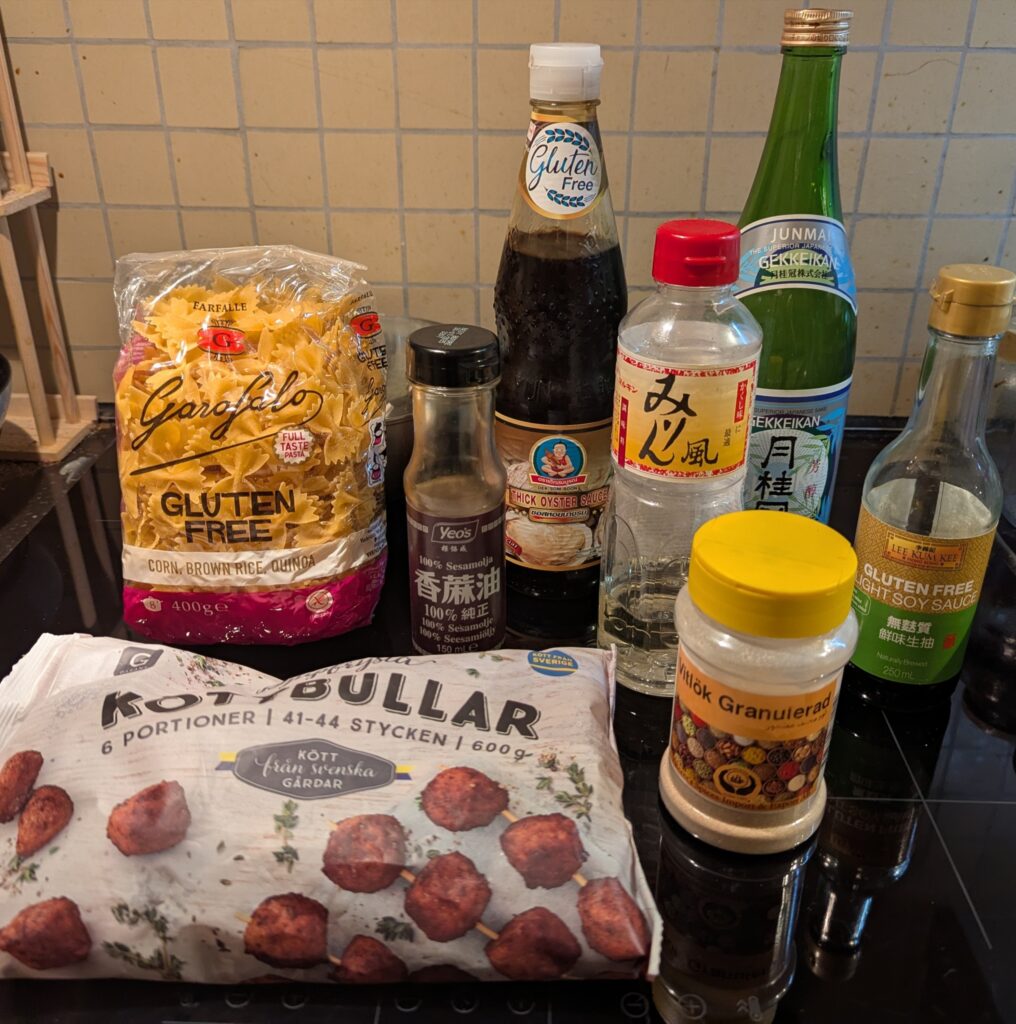
The ingredients otherwise are pretty simple. We have meatballs, pasta, and some seasonings. This particular size batch will only need half each of the pasta and meatballs.
Tonight I opted for bowties, because they hold up well for one pot cooking and don’t want to poke up out of the liquid nearly as much as something like penne. More important when you don’t want a very saucy dish and won’t be stirring it during the cooking! But, any short shape will work fine, you’re just likely to need more liquid to submerge it properly. You could also totally use spaghetti or linguine, broken in half to fit down inside the pot.
As for the seasoning sauce, we’re going for a rather international mix of ingredients. The Shaoxing rice wine used in so much Chinese cooking is unfortunately made with wheat, but substituting sake will give you a good flavor. And while we’re reaching for the sake, we might as well grab the mirin too for its distinctive sweet flavor which combines so well with sake. You can substitute a teaspoon of sugar if you don’t have mirin. Right now I have a bottle of Thai oyster sauce going, but generally I would buy Lee Kum Kee’s GF version. This brand is a little sweeter, but still pretty good.
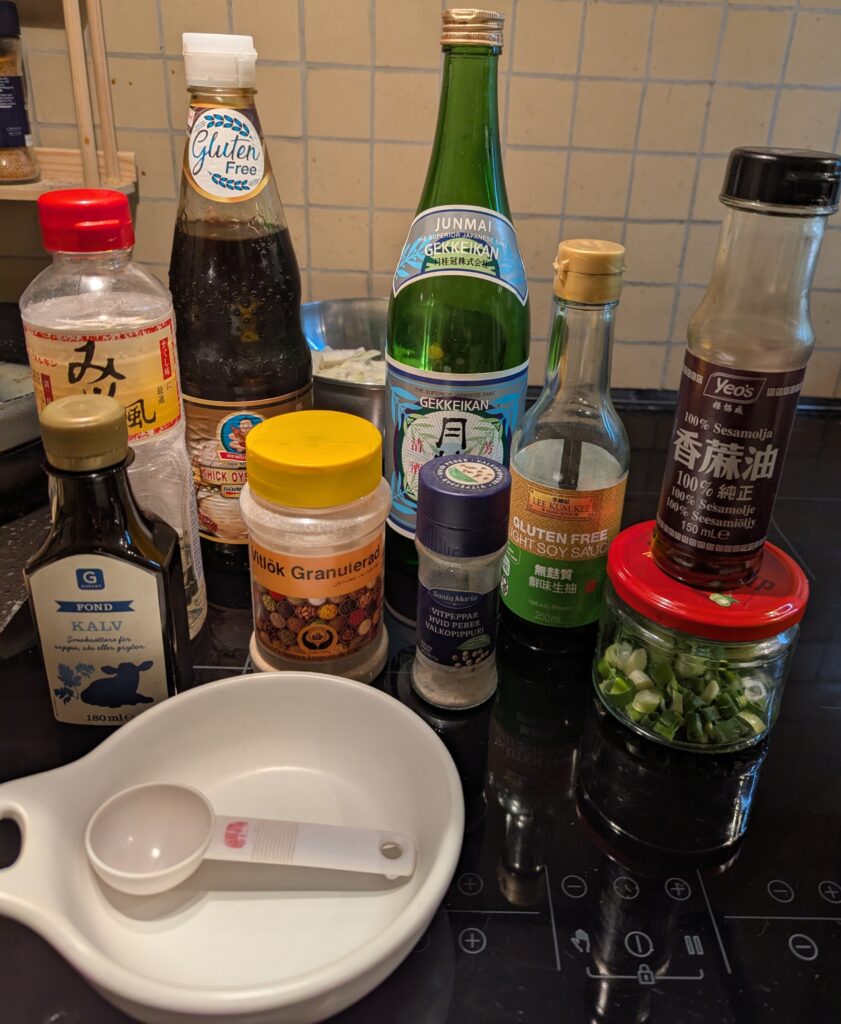
Since we’re using beef-and-pork meatballs, I am going for a cow version of the local liquid equivalent of Better Than Bouillon tonight. You can use any broth component that you like, for the equivalent of 2 cups / 500ml of liquid. And since we’re going lazy and not frying any aromatics, I’m just opting for garlic powder rather than fresh.
Once you have the little bit of prep done and the seasoning sauce mixed and ready to go, this meal goes together in no time. And it definitely hit the spot tonight!
Gluten Free Lo Mein-Themed Meatball Pasta in the Pressure Cooker
An easy one-pot pasta meal with meatballs and plenty of veggies, cooked simply in the Instant Pot.
200-300gchunky frozen vegetable mix of your choice(just around ½ lb.)
1largegreen onionChopped, with the whites and green top separated
300gfrozen meatballs(just around ½ lb.)
200-250gshort dry pasta shape of choice(just around ½ lb.)
500-600mlbroth(2-2½ cups)
OR water plus enough Better than Bouillon or crushed cubes to make 500ml/2 cups of broth
Seasoning Sauce
2tbspGF soy sauce
1tbspsake
1tbspmirin
OR 1 tsp. sugar
1tbspGF oyster sauce
½tspgarlic powder
¼tspground white peppercan use black
At the End
salt and white pepperto taste
1tsptoasted sesame oil
sliced green oniongreen tops, to garnish
Method
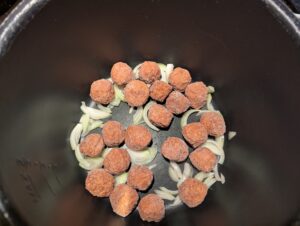
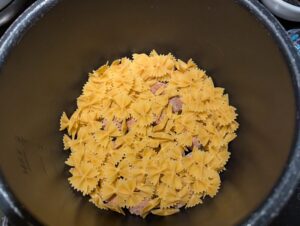
After assembling your ingredients as detailed above, it's time for some simple layering. Start with your onions, the white part of the green onion (if using), and frozen meatballs.
Distribute the dry pasta over the top.
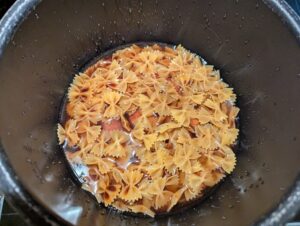
Pour over about half the liquid, and pour the seasoning sauce over the top.Rinse out the bowl with the rest of the liquid, and pour that in too.
This is roughly the liquid level we're going for: just barely up to the top of the dry pasta. No need to stir, just poke any pieces of pasta that are sticking up down into the liquid.We're aiming for most of the liquid to be absorbed, and the vegetables will contribute a little more as they cook.
Add the lightly salted cabbage, and then the frozen veggies to steam on the very top.
Cook on "Manual – High" for 5-7 minutes depending on your pasta. I know these Garofalo bowties need 7 to my taste.
Let the pressure natural release for 10 minutes before opening the valve.
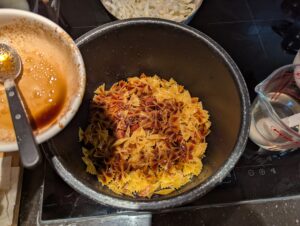
Stir together, and evaluate pasta doneness and the remaining liquid level. If it's too watery and your pasta is not quite there, simmer uncovered for a few minutes until it's good. Also adjust the seasoning as required. I added a little more salt and pepper, but did not need to simmer.NOTE: the pasta will absorb a little more liquid as it rests.
Remove from the base, stir in the sesame oil, and let sit covered for 10 minutes before serving.Serve with the green onion tops, and whatever other garnishes you prefer. Enjoy!
Biscuits are one of my favorite things to do with leftover mashed potatoes. And cheesy potato biscuits are even better! To go with this batch, I decided to try one intriguingly simple recipe from Elina Hultberg, which I ran across on YouTube (Swedish language): Her …
When colder days start settling in, some of the foods my mind starts going around to are always pork and the new season root vegetables. Within my family, I (Gen X) did grow up a couple of generations down the line from fall hog butchering …
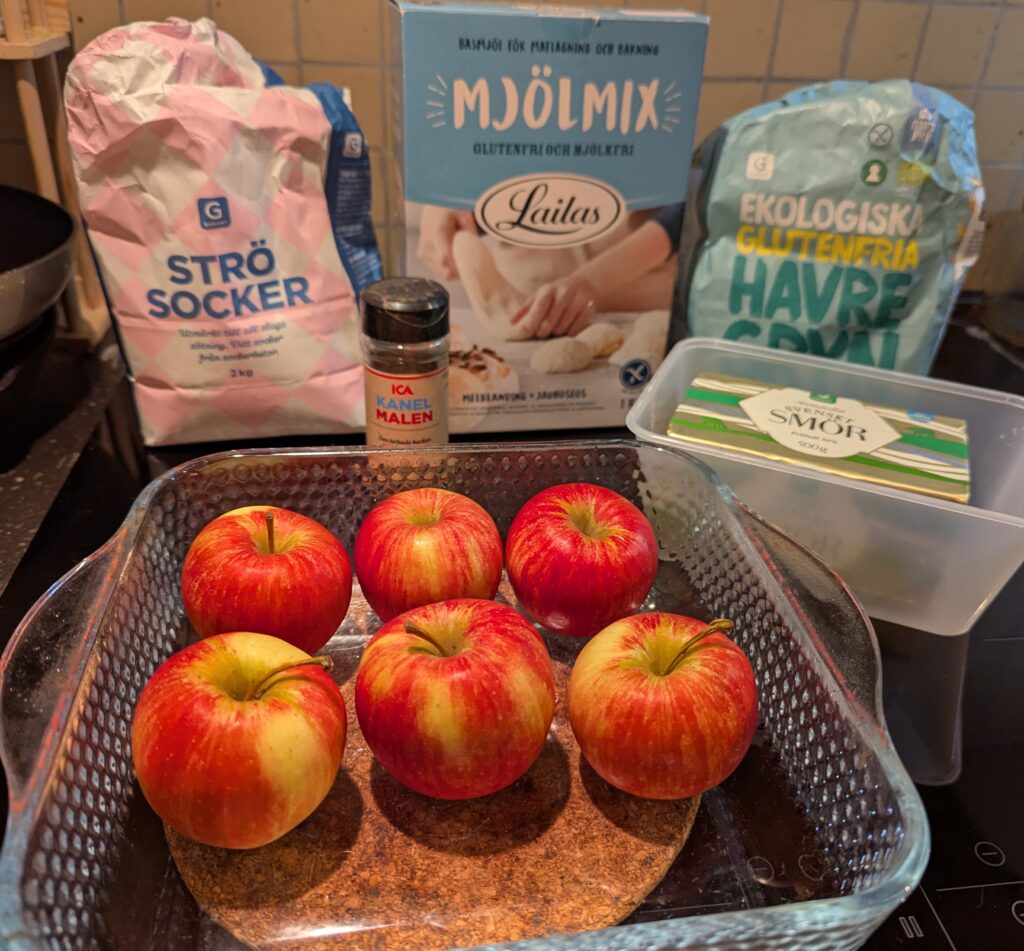
It’s the time of year that apples are in prime season, and warm desserts start looking very tempting. I picked up some nice fresh cooking apples, and had been plotting some good things to do with them. There are so many appealing options!
I had already been considering turning some of them into a crumble or crisp. It’s so easy and delicious. Smulpaj (“crumb pie”, where “paj” is actually an old borrowing from English and pronounced the same way) is a very popular genre of dessert here anyway, so it occurred to me to try something a little different this time around, and just work off a Swedish recipe.
The one I settled on comes from Glutenfria Godsaker (“Gluten Free Goodies”). Everything I have tried from there so far has turned out great. The original recipe: Glutenfri äppelpaj med smuldeg. For a change, I didn’t even make any tweaks beyond using more apples than she called for because these particular apples were on the small side. (Mine worked out to 12 fruits in a 1kg bag, so I went with half of them for around 500g or 1 lb.)
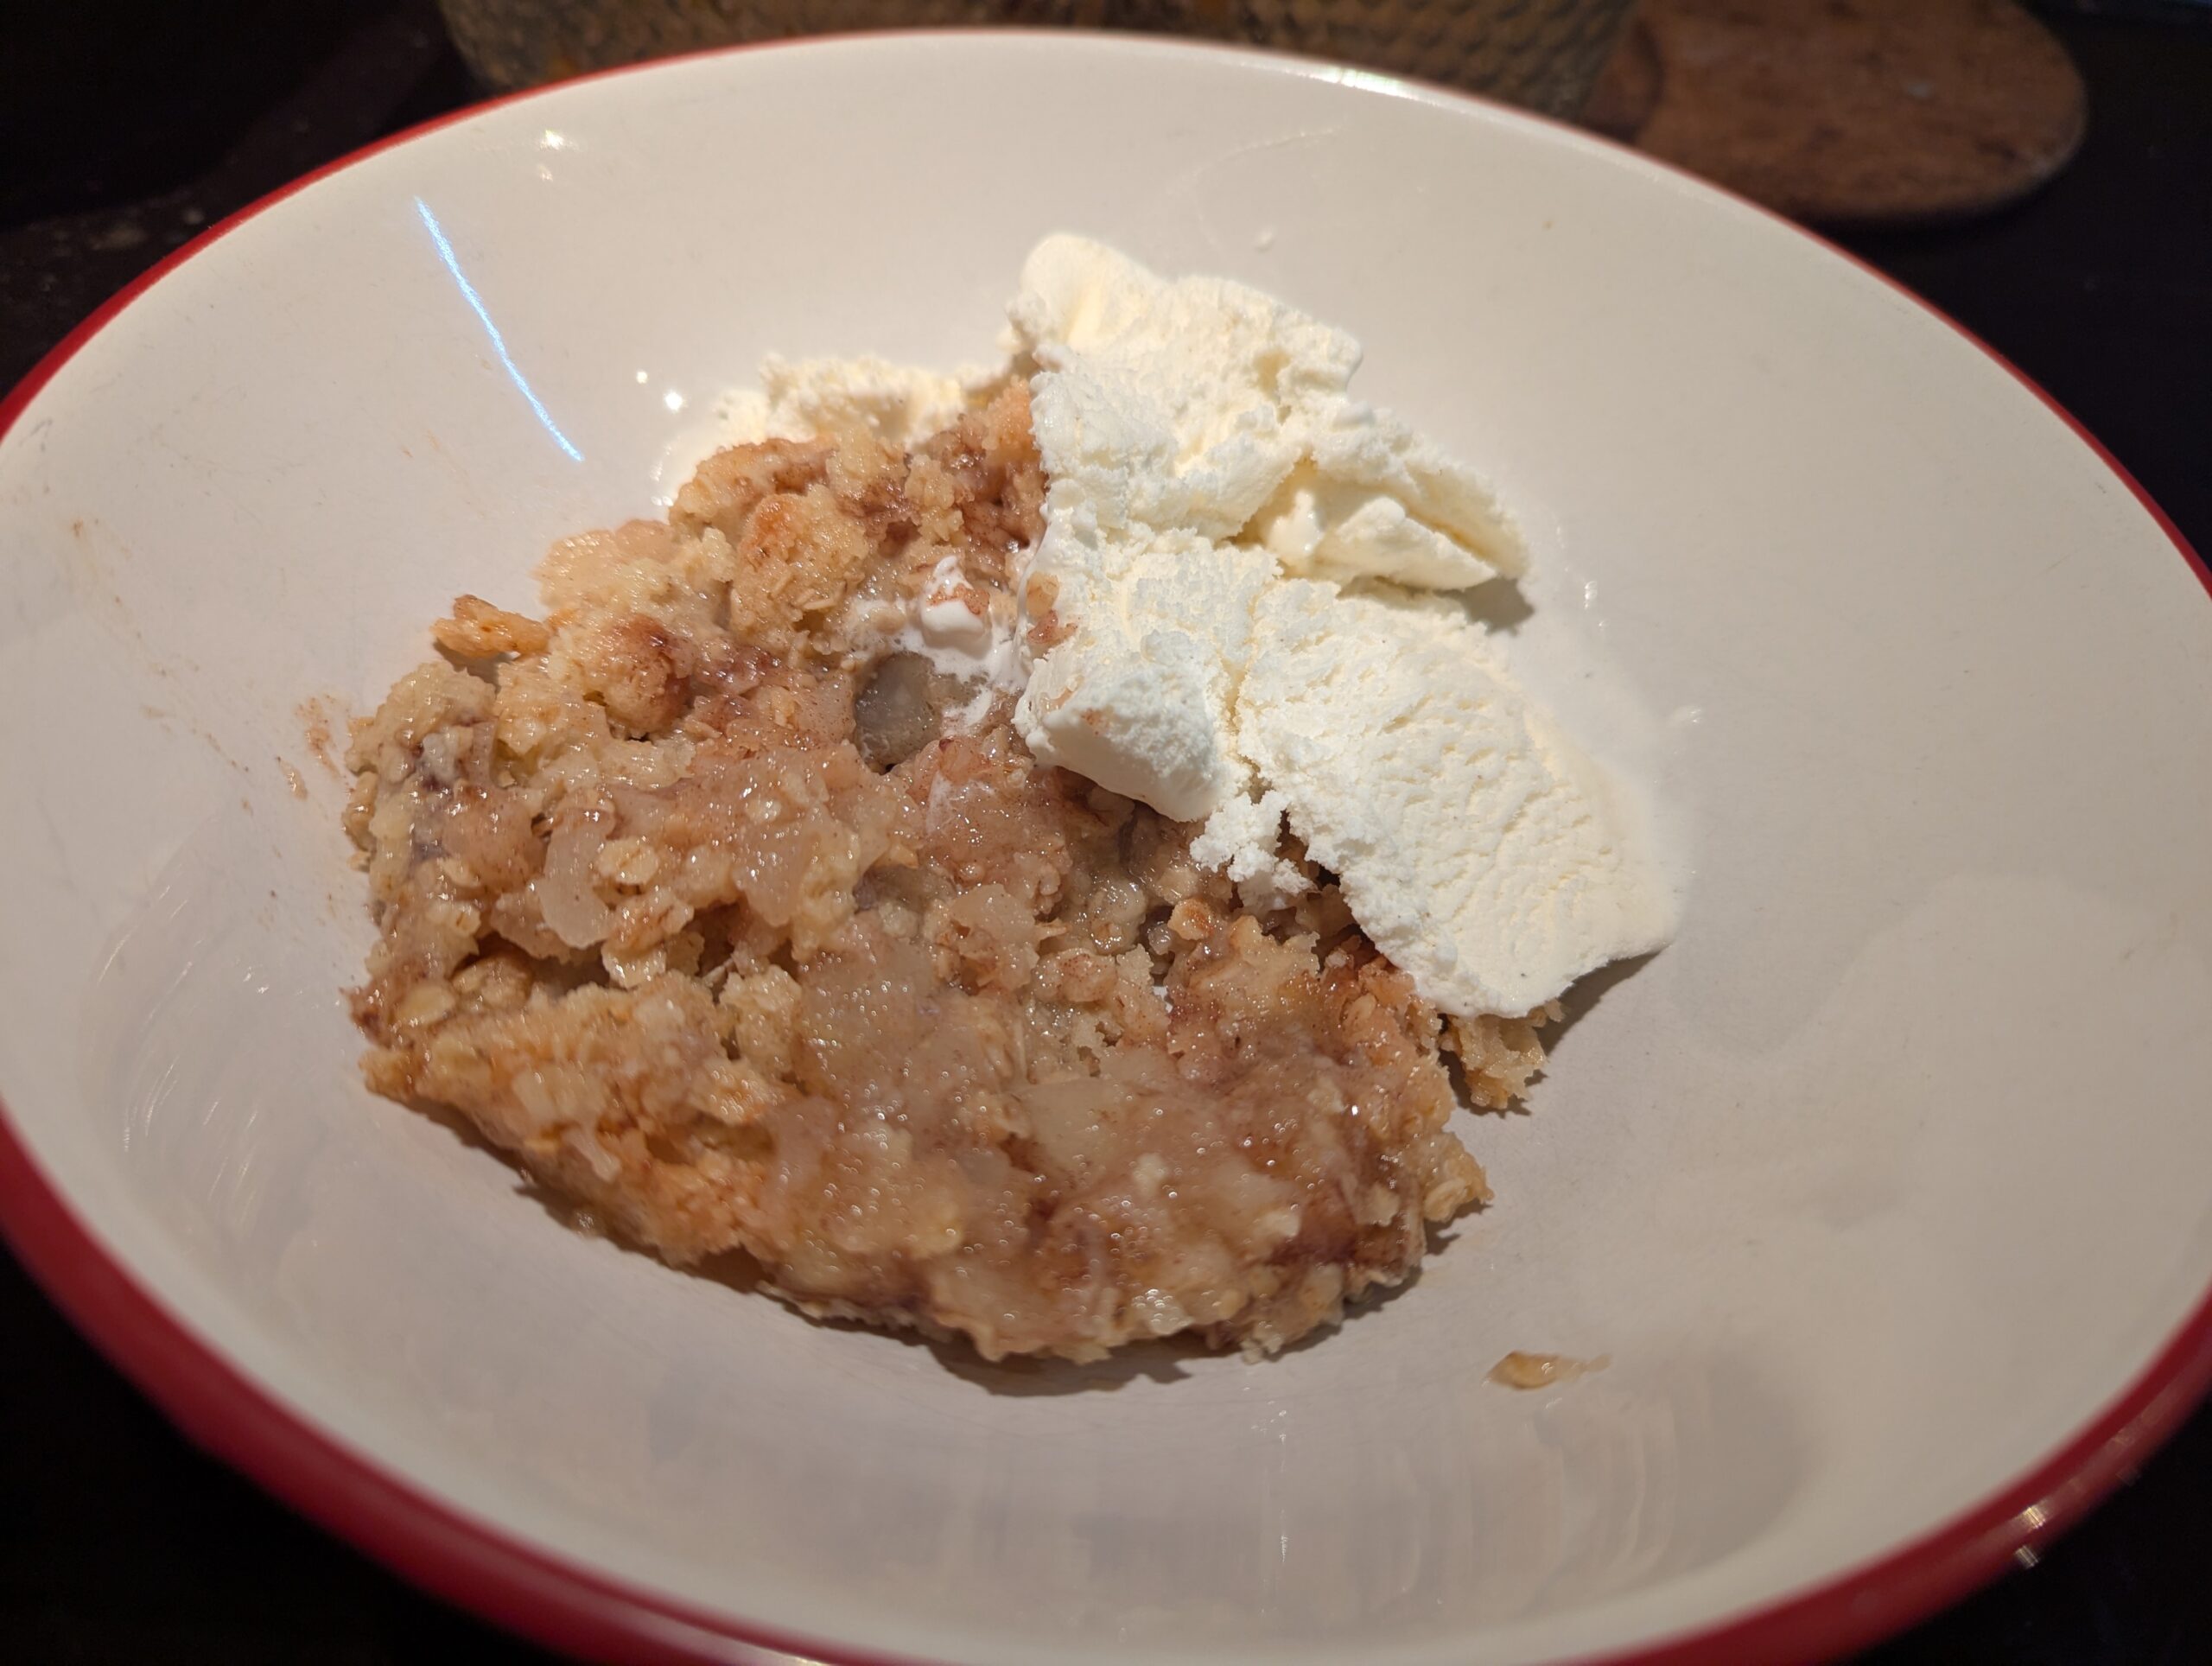
The ingredients for this one really couldn’t be simpler. And the results turned out absolutely scrumptious!
The proportion of sugar called for here will give you a sweeter crumb topping than I would generally go for myself. If you’d prefer it a little less sweet, feel free to reduce the amount of sugar a little. Next time I will probably cut it back by maybe 25% to my taste. But, everyone’s is different, and this was wonderful as-is.
Gluten Free Swedish Apple Crumble
A Swedish take on one warming classic cool weather dessert. Fresh juicy apples are seasoned with cinnamon, topped with a gluten free oat crumb topping, and baked until golden and bubbly.
250mlcertified gluten free rolled oats(1 cup, or 100g)
225mlgluten free flour blend(scant 1 cup, or 135g of what the original recipe writer used)
200mlgranulated white sugar(¾ cup, or 180g)
150gcold butter(10 tbsp is close enough) cut into small chunks
Method
Start the oven preheating to 200℃ / 400℉.
Generously butter a large deep pie dish, or 8"x8" / 20cmx20cm baking dish. This recipe could easily be doubled to fill a 9"x13" / 23cmx33cm pan, though you may also need to increase the baking time a little.
Peel, core, and slice the apples.
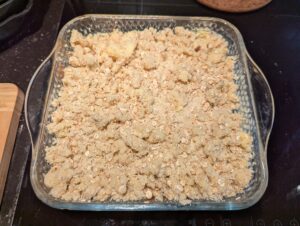
In a mixing bowl, place your dry dough ingredients and stir well to combine. Work the butter chunks through to make a crumbly mixture.I started out trying to cut the butter in with a fork, but soon got my hands in there.
Lay the apples into the buttered dish, and sprinkle the cinnamon over top.
Add the crumb topping.
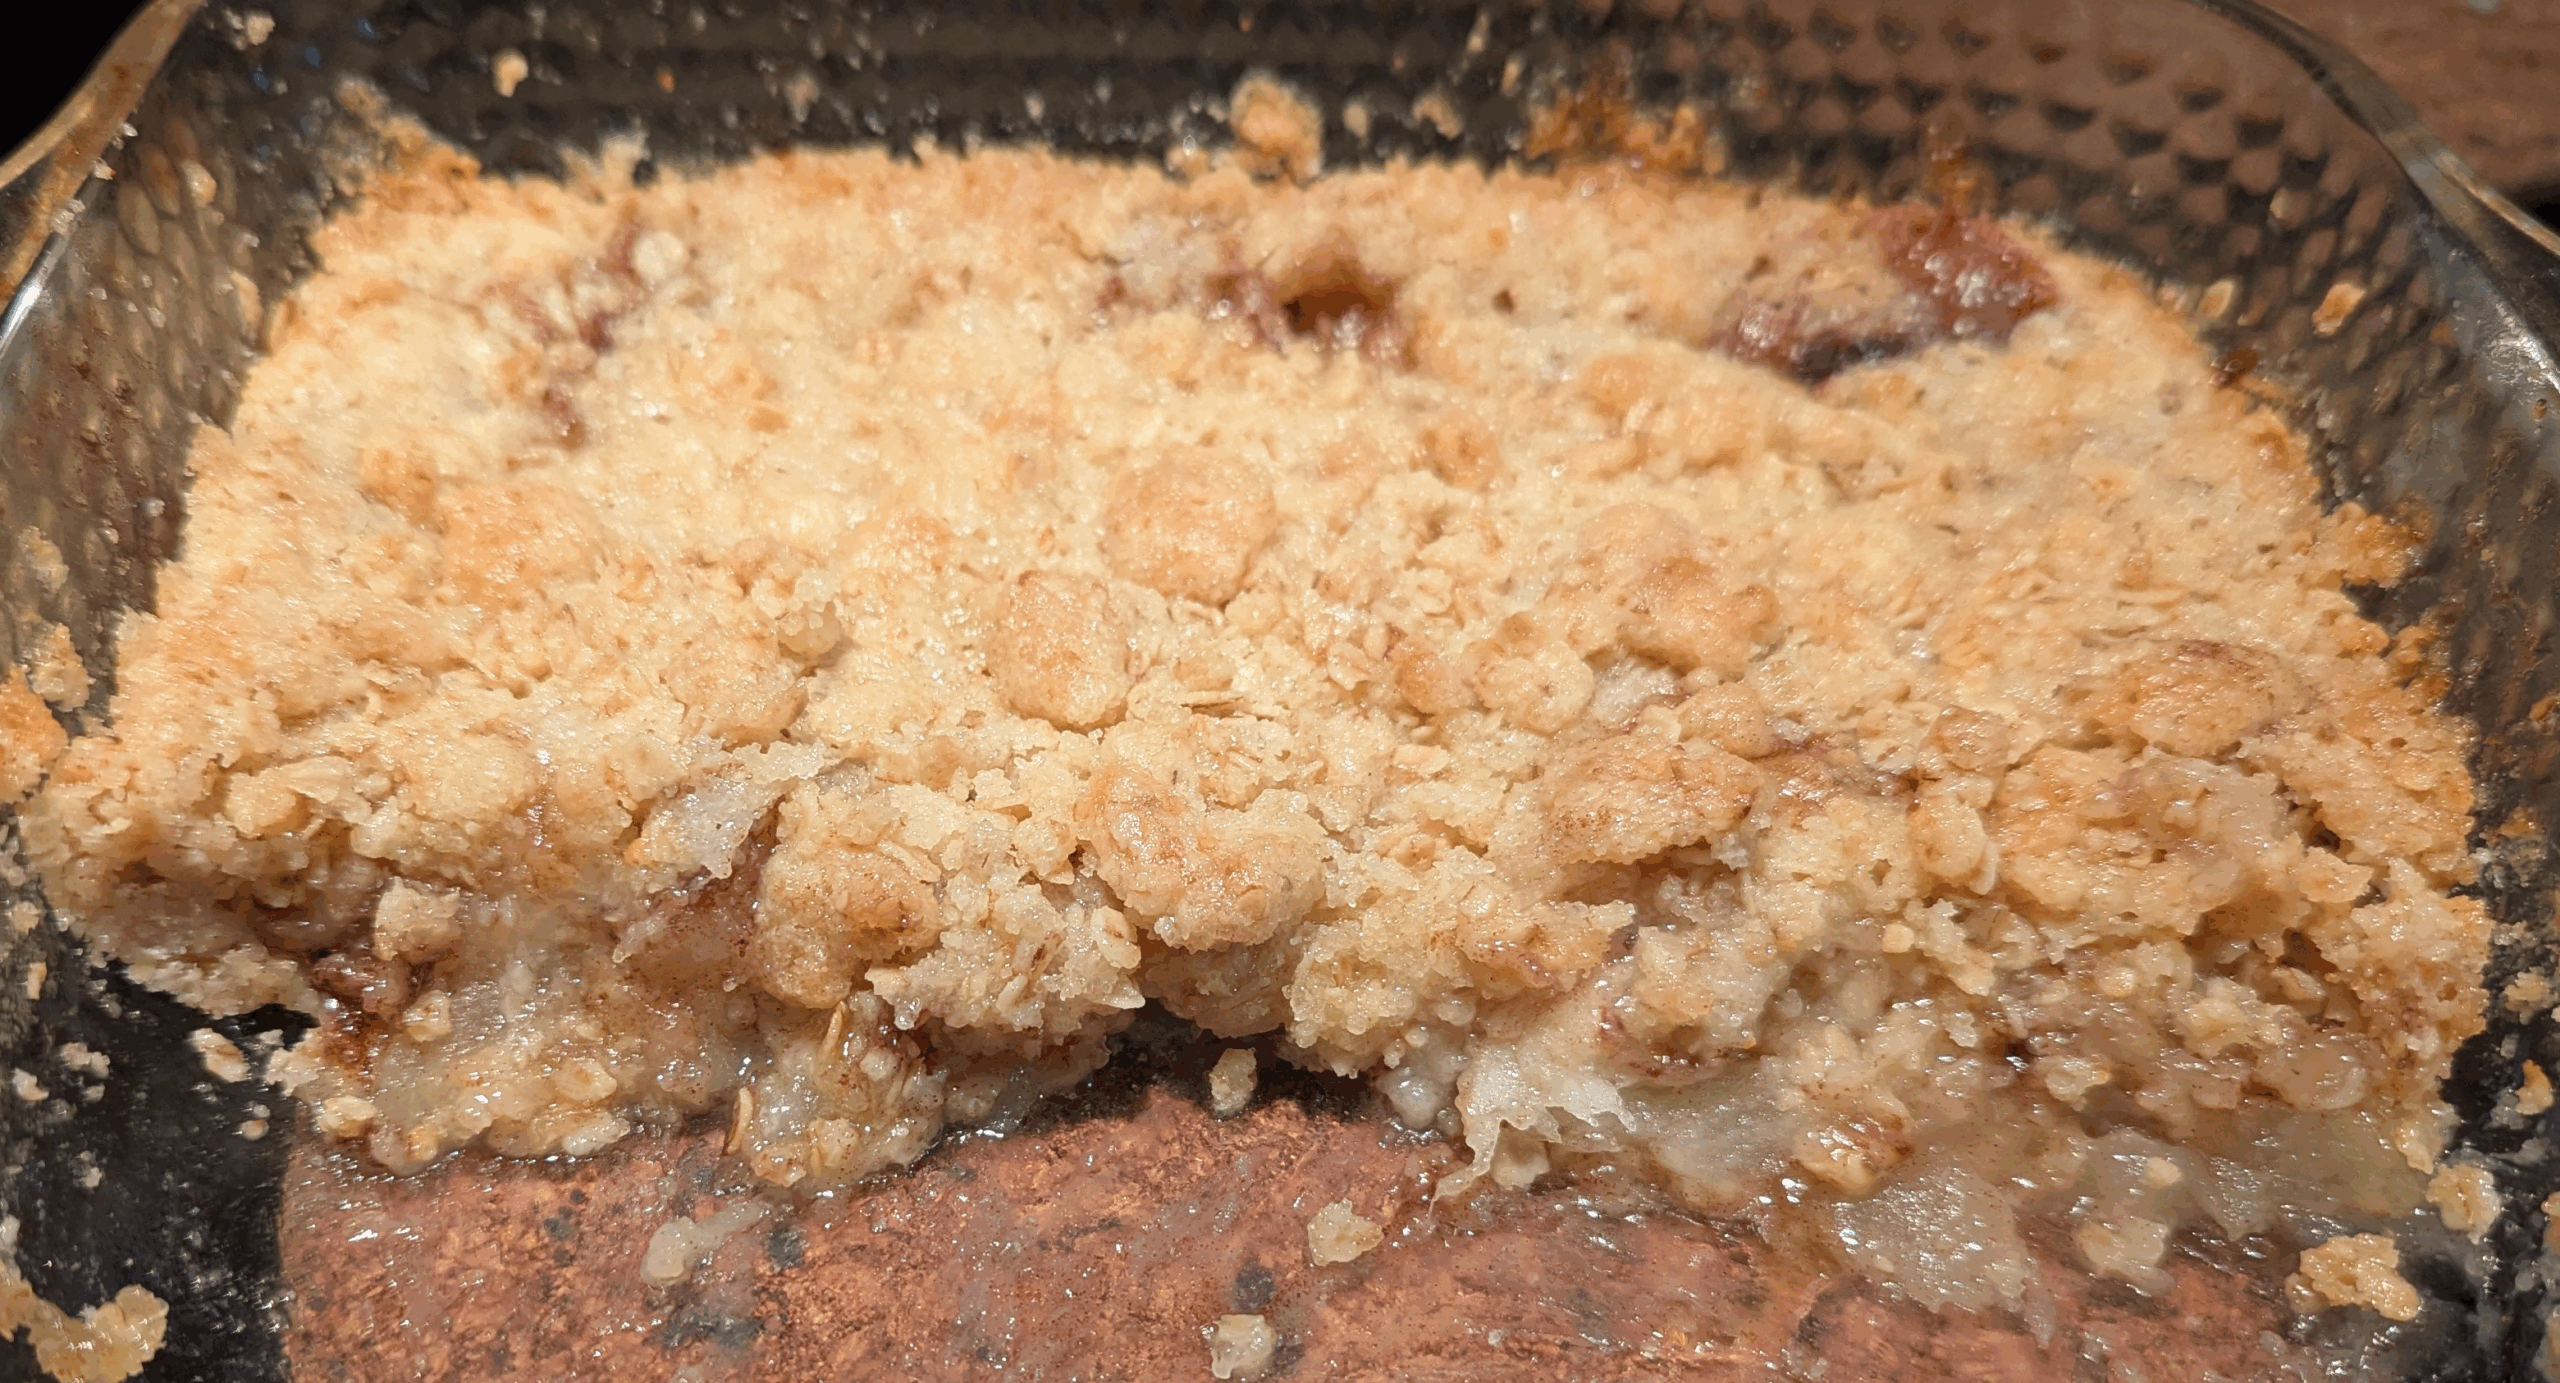
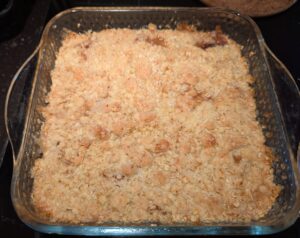
Bake for around 20-30 minutes, or until browned on top and bubbling up around the edges. The smell will be amazing toward the end.Mine went for 25 minutes in this pan and oven, and possibly could have gone a few minutes longer for more browning. Using all white sugar here, though, it won't get as dark.
Let rest for 15 minutes, then serve warm with some vanilla ice cream or the classic here: vaniljsås, or vanilla custard.
I love Southern Louisiana style home cooking in the way that only someone from another region of the South who has spent the last 20+ years in Europe can love Southern Louisiana food. It’s not even my home, but by now the distinctive flavors feel …