Nana's Devil's Food Cake
A gluten free adaptation of a classic recipe for an extremely rich and moist, intensely fudgy chocolate cake. Here I chose to pair it with a simple peanut butter icing.
Yield: 12 servings
Materials
Wet Ingredients
- 1 cup neutral oil of choice (250ml)
- 2 cups granulated sugar (500ml)
- 2 eggs
- 1 cup coffee - cooled but not cold (250ml)
- 1 cup milk (250ml
- 1 tsp vanilla extract or 2 tsp. Swedish type vanilla/vanillin sugar
Dry Ingredients
- 2 cups
Multipurpose Gluten Free Flour Blend (500ml, or 260g of this particular blend) - ½ tsp salt
- 1 tsp baking powder
- 2 tsp baking soda / sodium bicarbonate
- ¾ tsp xanthan gum
- ¾ cup cocoa (65g)
No Cook Peanut Butter Icing (for 12 cupcakes, or a half-batch cake)
- ½ cup peanut butter (120ml)
- 3 tablespoons butter melted
- ¾ cup powdered / confectioners' sugar (180ml)
- 2 tablespoons milk or enough to get the texture you want
- ½ teaspoon vanilla extract or 1 tsp. Swedish type vanilla/vanillin sugar
Instructions
- This is an easy cake to put together. First, start the oven preheating to 375℉ / 190℃.
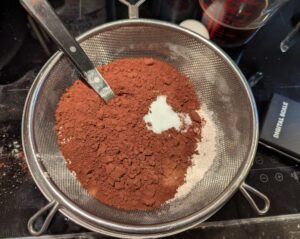
- Combine your dry ingredients in a bowl. Here, I sifted everything in through a strainer, then stirred it together well to mix.
- Whisk the sugar and oil together in a suitable sized mixing bowl. It won't get fluffy like creaming with butter, so just combine them well. Mine actually used around 1¼ c. sugar with the remainder split between erythritol (which behaves more like sugar) and granulated Splenda/sucralose to make the finished cake slightly less sugary--and that worked great. For best results, you do want to substitute other sweeteners in proportions like that alongside sugar in sweet baked goods like a cake which rely on the sugar for consistency.Whatever dry sweetening you prefer to use, whisk in the eggs until it's all looking smooth.
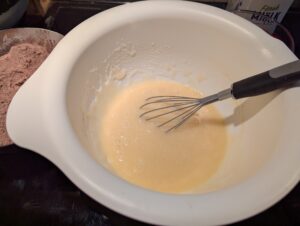
- Now add in the liquids and vanilla, and whisk it all smooth. Like me, you may question if this is too wet--but, it all works out!
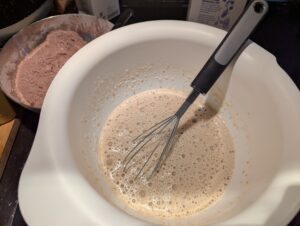
- Gradually work in the dry mixture until you have a smooth thinnish batter. No need to worry about overdeveloping gluten in this flour, but if you overbeat it will knock leavening bubbles out.
- Grease/flour the cake pan, Here, I chose to use a cupcake tin and some convenient squeeze margarine well distributed around the top before smearing it around with a paper towel. Easy pan greasing is one of my main uses for the stuff, and this is a new variety I decided to try with part butter oil for better flavor.
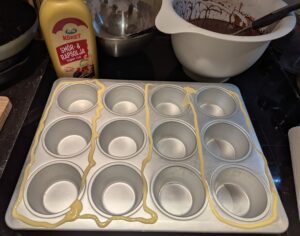
- Fill your pan(s), and tap it on the counter gently to knock out any bigger air bubbles.

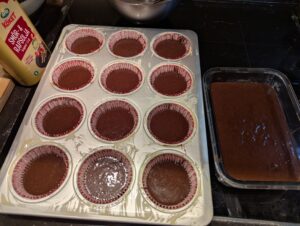
- This recipe size did require either another smaller batch of cupcakes, or an overflow pan to hold the rest of the batter. I opted to make a small unfrosted side cake to freeze for later.
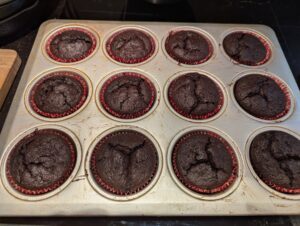
- Bake for 25-30 minutes or so, or until a toothpick or skewer in the center comes out with a few moist crumbs on it. The cupcakes took just about 20 minutes, and the glass pan closer to 30.
- Looking good! Let the pan cool on a rack. (And, in this case? Bake the overflow cake which was waiting in the fridge.)
Optional Peanut Butter Icing
- I did not go overly precise on measurements here, and it doesn't really need to be. There looked to be roughly ½ cup of peanut butter left in that open jar, so I rolled with that as enough to cover the cupcakes.

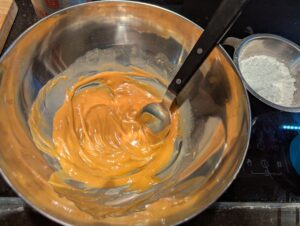
- Stir together the peanut butter and melted butter in a bowl until it's smooth.
- Also stir in the vanilla extract at this stage, if you're using it. Mine is in a powdered sugar base, so I just added it in with the rest of the sugar.
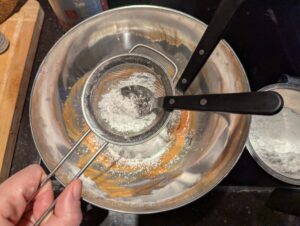
- Add about half of your powdered sugar. This may not be totally necessary here, but mine was lumpy enough that I chose to put it in through a strainer.
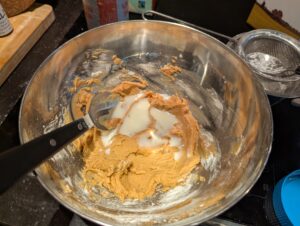
- Thoroughly mix, and this will probably start going pretty thick. Stir in at least half the milk.I was initially skeptical that this icing would need the whole amount of milk called for in the inspiration recipe. But, it will probably take the whole 2 tablespoons, and possibly a splash extra at the end as the peanut butter absorbs the liquid.
- Repeat the procedure with the rest of the ingredients. You are aiming for it to look a little looser than this. The peanut butter WILL slurp up a lot of liquid, and I would recommend letting the frosting mixture sit at room temperature until your cake finishes cooling the rest of the way.Then you can adjust the consistency as required with small amounts of milk and/or powdered sugar.
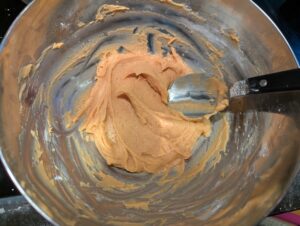
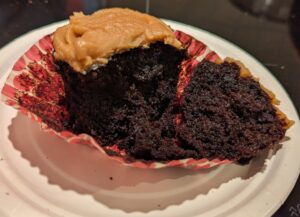
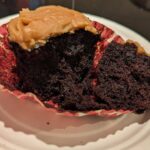
- This icing will not be particularly spreadable, with more of a fudgy texture. The cake is moist enough that you'll tear the top completely up if you do try to spread it around. I would recommend distributing dollops around the top of the cake, then gently patting them around with a rubber spatula.
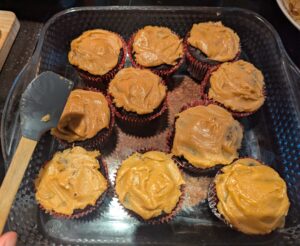
- There are more spreadable peanut butter icings out there, but I was specifically going for less sweet and intensely peanutty with this variation. It did turn out absolutely delicious on this devil's food cake.
- Serve, and enjoy! The remaining cupcakes have kept well for several days, well covered at room temperature. The crumb still tastes just as moist and fresh, likely thanks partly to the amount of oil in there.