
Swedabilly Ärtsoppa
My own take on a classic Swedish yellow pea soup, made in the Instant Pot.
Yield: 4 people
Materials
Advance Soaking
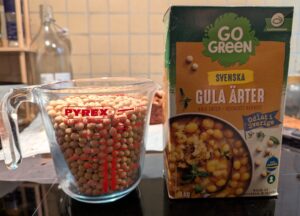
- 500 g dried whole yellow peas (600ml/2½ cups/one British pint, or just use a pound)
- 0.5 teaspoon baking soda sodium bicarbonate, for soaking
- 2 liters water
For Initial Cooking
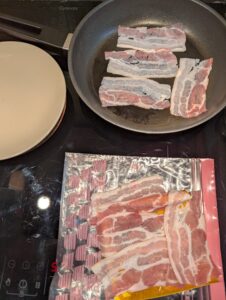
- 4-6 slices bacon, crumbled
- 2 medium onions chopped, or one large
- 2-3 cloves garlic chopped
- 1-2 tablespoons neutral oil of choice depending on how much bacon grease it made
- peas soaked and rinsed
- 200 ml hot water (¾ cup) for rinsing out the bacon and onion pan
- 1 liter water (just over a quart) for the main soup cooking
- 2 Knorr vegetable bouillon cubes (or enough bouillon of your choice to make 1 liter or quart)
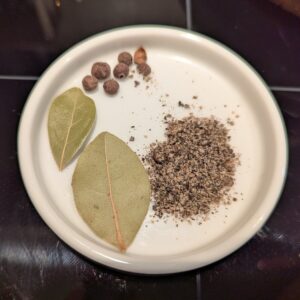
- 1 large bay leaf or 2 small
- 6 allspice berries
- 0.5 teaspoon coarsely ground pepper white is probably more traditional here, but I used black
Final Seasoning
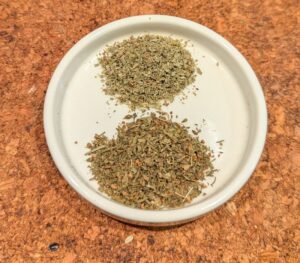
- 0.75 teaspoon dried savory or ½ tsp. thyme
- 0.5 teaspoon dried marjoram
- salt and pepper to taste
To Serve, Per Bowl
- optional mustard, to taste Preferably Swedish sweet hot mustard, but German or Polish mustards with a little sweetness work great. A teaspoon or so stirred through your bowl is a good place to start.
Instructions
Pea Preparation
- The night before, or at least 8-10 hours in advance, get out your peas.If you can only find split peas where you are, this method won't work for them. You'll be better off following another recipe's cooking instructions like these from Savor The Best, and laying off the pressure cooking.
- The quality control on the Swedish-grown peas like these tends to be very good. But, like with any other dry bean? You will still want to look over them carefully by the handful to remove any broken or unsavory-looking individuals as you transfer them over into a large pan or bowl.Once they're sorted into the soaking container, cover them over well with cool water, and swirl them around in the container with your hand to rinse off any surface dirt. Wash them several times like this until the water stays clear, and drain the pan.
- Cover the peas with a good few inches of fresh water for soaking, and add the baking soda. This was probably slight overkill on both the pot size and level of water,
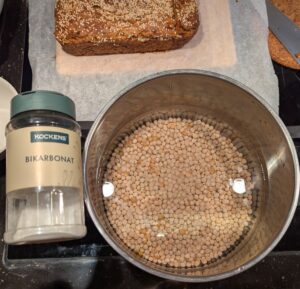
- Cover the container, and set aside for 8-12 hours until you're ready to cook the soup. Soaking at room temperature is much quicker. Unless it's, say, the worst of the summer in a hot area with no air conditioning? The worst soaking beans or peas might do left at room temperature is to start the sprouting process, which some people like to do on purpose with longer soaks. It is extremely unlikely to happen within 8-12 hours at normal room temperatures.(If it is beastly hot weather with no AC, like I grew up with? Transfer into the fridge after 3-4 hours, and let them finish their soaking time there. We did have the occasional mess of beans start fermenting in an undesirable way before my mother started doing that during particularly hot spells, back in Virginia.)if you want to soak overnight but need to be somewhere in the morning? Drain the soaking water then, and place in the refrigerator until it's time to cook.
- Drain the soaking water off the peas when you're ready to cook them, and rinse with fresh water.Mr. Sweden insists that they must be soaked and cooked in the same water, for maximal flavor. (He also grew up in a much softer water area, and doesn't include the soda for soaking.) My own position is that not changing the water would mainly maximize the gas factor, and he has never noticed the difference.Most Swedish recipes I have seen do call for a water change.
Assembling The Soup
- Cover the now soaked, rinsed peas with another liter of fresh water in the inner pot for your Instant Pot. This will be your main cooking liquid. Set aside.
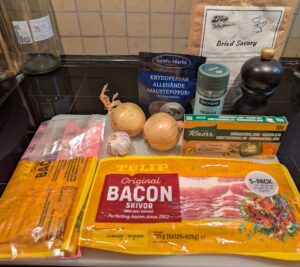
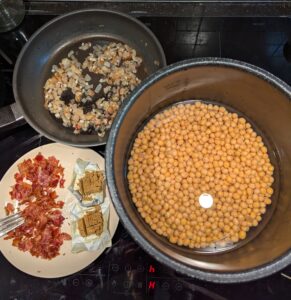
- Assemble your main ingredients, and chop the onion and garlic.
- Get your longer-cooking seasonings ready for the soup.
- Fry the bacon until it's brown and starting to crisp up. Unless you're using remarkably more bacon than I am, we're going to want all the grease and browned bits for flavor.
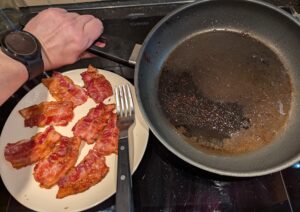
- What we're left with: some cooling crispy bacon with most of the fat rendered out, and some browned bacony goodness plus maybe a tablespoon and a half of flavorful grease.
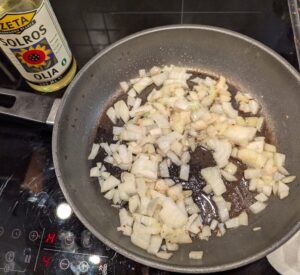
- Now, you'll want to turn the heat up to the higher side of medium, and throw your chopped onion in there to fry a little and help deglaze the pan. Add the extra neutral oil to help things along, with no more fat than will come out of this amount of bacon.
- Crumble the bacon while the onions cook.
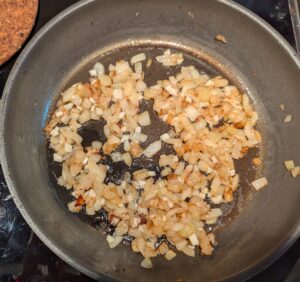
- We're not really looking to soften the onion up; that should happen in the soup. We're just wanting to capture the rest of the bacon flavor, and get a little browning around the edges for more yum.When the onion is starting to brown a little, add the chopped garlic and stir it around for a minute or so until you're really starting to smell the garlic too. You really don't want that to burn. Remove from the heat.
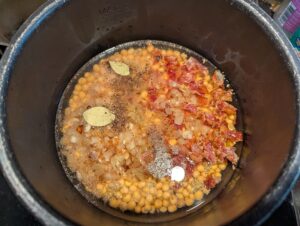
- Time for other ingredients to join the peas!You can crumble the bouillon cubes, but these are both hard and sticky to the touch enough that I prefer to chop them with a knife instead. They will dissolve much better through your soup if you do break them up in some way, though.These Knorr cubes are going to be doing some pretty heavy flavor lifting here.
- Add all the starting ingredients into the pot with the peas.Rinse the onion skillet out with the little additional hot water, and pour that into the soup pot too. We want all that flavor, and it will also help make cleanup easier later.Stir everything to combine.
Pressure Cooking
- If you prefer to cook this entirely on the stovetop or in a slow cooker, please scroll down to the notes section. I will add instructions there.
- Place the inner pot with soup fixings into the Instant Pot base. Seal the lid and set the program to "Manual - High" for 15 minutes.If you're using a stovetop pressure cooker model operating at 15psi, I would cut the time under pressure back to probably 10 minutes and check from there.
- IMPORTANT: Let the pressure come down on its own ("natural release") for 15-20 minutes before touching the valve to open the lid. Even whole peas with skins are rather prone to foaming up.
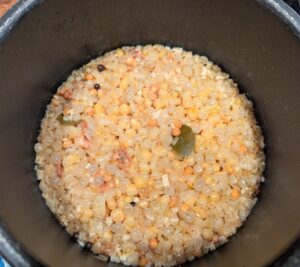
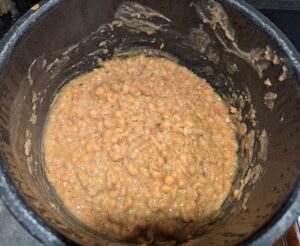
- If you open it up and see something like this, don't be alarmed. It's fine.A lot of pea skins will come off and float to the top as it cooks. You can either stir it all back down into the soup to get all the fiber and more texture, or carefully skim that layer off with your spoon.
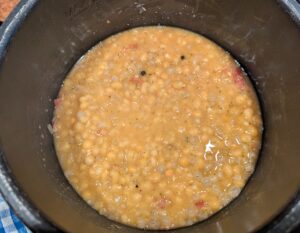
- What it looks like after stirring everything back together. Much better!However, as you could probably see? In this case, a few undercooked peas were also pushed up out of the liquid by the floating skins. From past experience, I suspected this might happen.You could just skim those off too, but I decided to stir it all back in and pressure cook for another 10 minutes on the same "Manual - High". (With another resting period to depressurize after.) I wasn't in a hurry, and we are aiming for soft, soupy results anyway.
Finishing The Soup
- Once everything is pressure cooked to your satisfaction, set the unit to "Brown/Saute - Low" and let it simmer uncovered for a little while with the occasional stir. If you want it thicker, simmer it longer. Add a little more water to thin, if you think it needs it. Classically, we're looking for a thick soup, but make it whatever consistency you prefer.At this stage, if you're using a stainless steel inner pot rather than the nonstick like mine? Be extra careful about stirring, or it will want to stick and burn as it simmers down.The liquid ratios called for here turned out just about perfect to Mr. Sweden's taste, after just a short simmer with the herbs and a covered rest off the heat while I baked the cornbread. He likes his soup thicc. I needed to thin my bowl out with a little hot water from the kettle, and it was still pretty thick.
- Stir in the herbs, and simmer for a final 10 minutes or so. Adjust seasonings with more salt and pepper as required.
- Enjoy! In this case, with fresh buttered cornbread.Add a dollop of mustard if you like.

Notes
For Stovetop: Use a suitable heavy-bottomed soup pot, and proceed the same up to the point of the main cooking. Add at least 750ml / 3 cups of extra water. Bring to a boil on the stove, and simmer covered while stirring occasionally for probably an hour and a half until it's done. Add more water as required. Do the herb addition and final seasoning adjustment as above.
For Slow Cooker: Proceed the same up to the point of the main cooking. Put everything in your crock. Cook on "High" for 4 hours or "Low" for 7-8. You'll probably want to stir at least once around halfway through, to avoid the floating skins issue. Do the herb addition and final seasoning adjustment 30 minutes or so before you want to eat it.