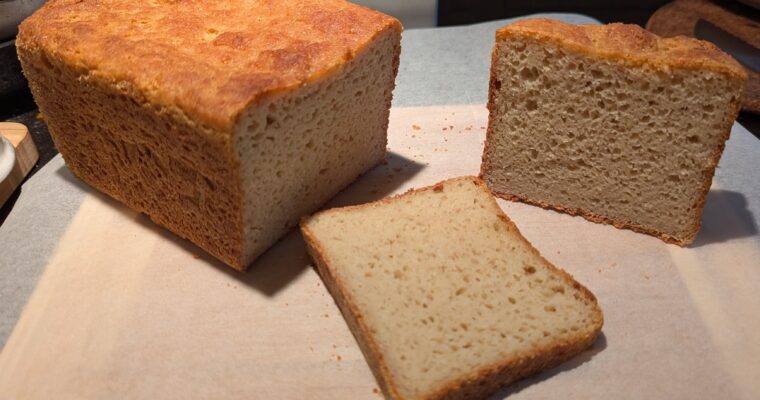
This is based off a recipe from King Arthur Baking: Gluten-Free English Muffin Bread, which had appealed to me for a while. It’s easy to make with hand mixing, and does carry a lot of the distinctive crumb texture of an English muffin. There was …
Living outside of North America, I can’t readily get the King Arthur brand GF bread flour, which is a shame when you’re interested in trying recipes written with that particular blend in mind. A lot of other people baking GF bread think extremely well of …
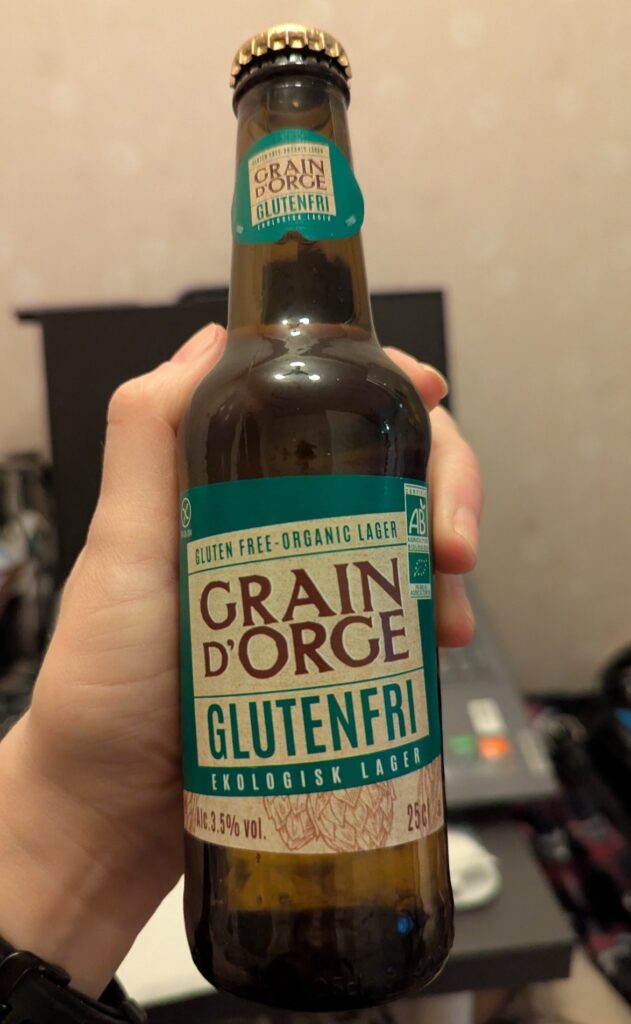
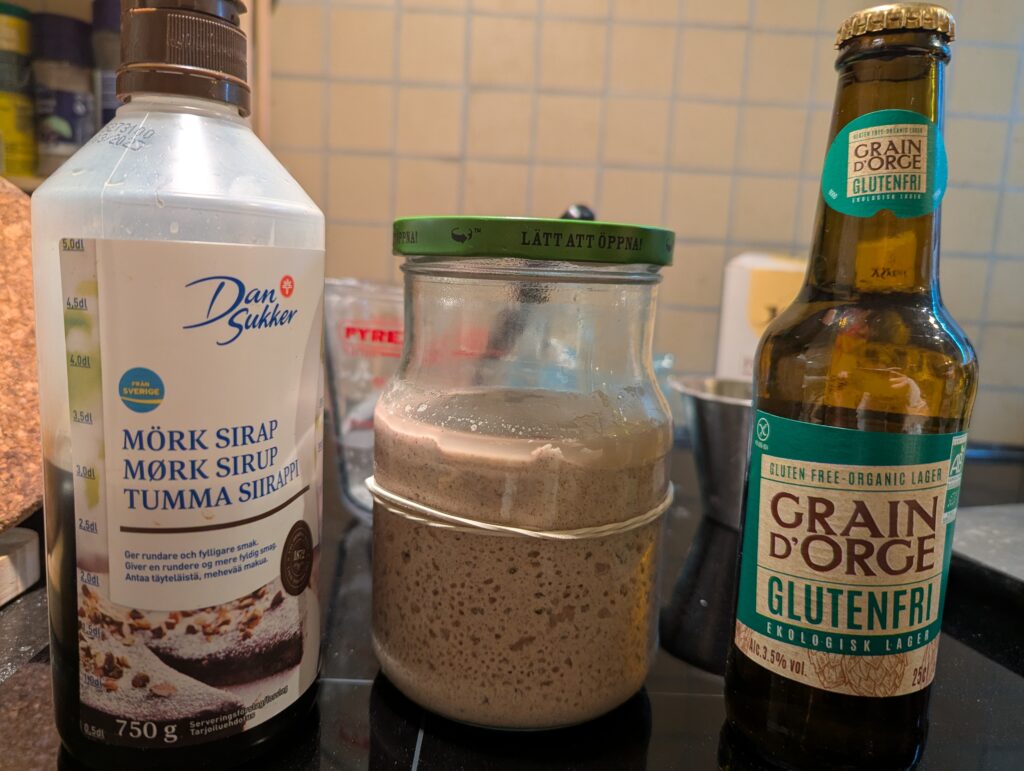
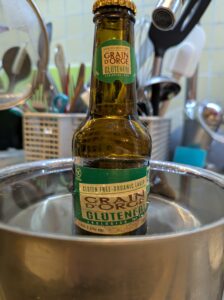
This was a pretty successful experimental loaf. I had been considering making more pseudo-rye for a while, and also had a spare bottle of some random gluten free beer that I picked up to try out of curiosity. So, an attempt at beer “rye” suggested itself!
This is the highest ABV available outside the state-run liquor store here, and the bottle I drank did come across very much like I remember from something like Coors Light. I’ve never been a huge fan of lagers (or beer in general) anyway. But, it can work well as an ingredient in other things–so, may as well turn the remaining bottle into bread.
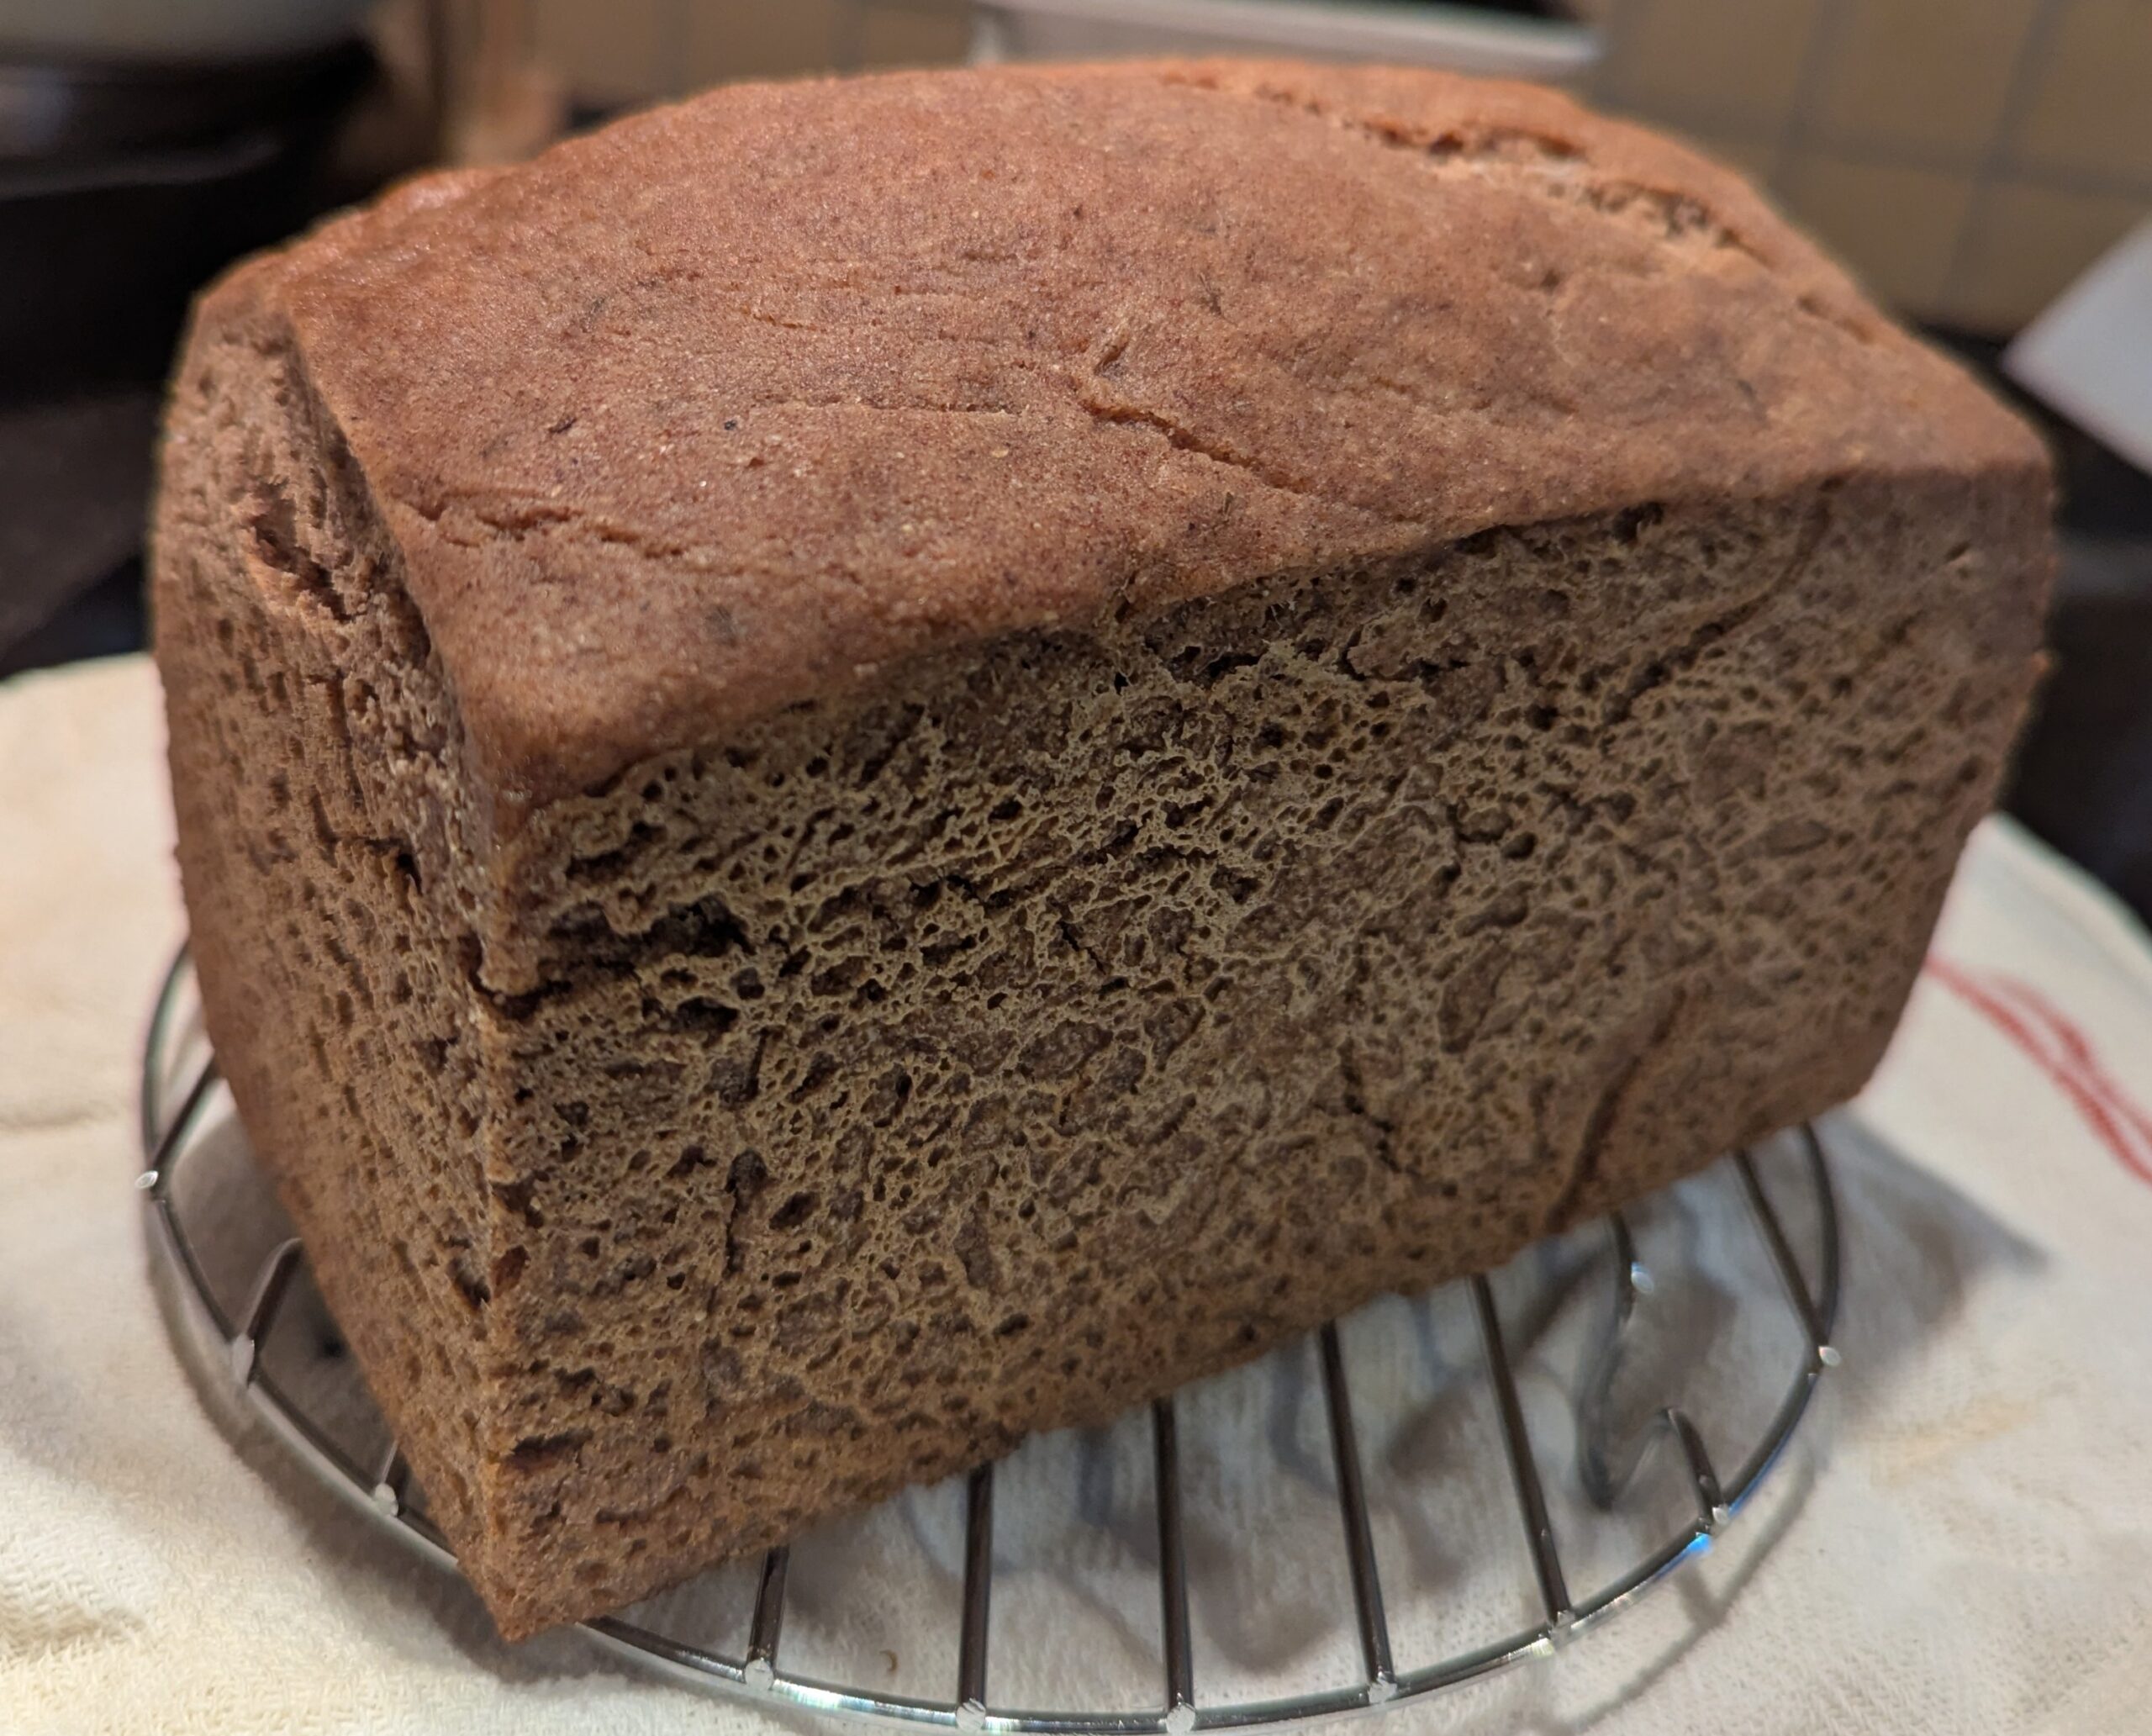
In the past, I have made a couple of pretty successful “rye” loaves, using buckwheat and other wholegrain flours to approximate the color and flavor of rye. It’s not exactly the same, but it scratches a very similar itch. The first attempt was a US-style “pumpernickel” which actually came out more like what I understand the local kavring to be like. Also good enough that I should try and repeat it! (No exact recipe anymore, but a photo.)
The second take worked off the recipe that I tracked down again for this version: Gluten-Free Rye Bread. Only made with a slightly different mix of flours, a cider yeast starter, buttermilk, some fermented pickle juice for that extra rye-like twang, and dill seeds. I always used to be a fan of the lighter style of dill rye available back home, and was trying for an effect more similar to that.
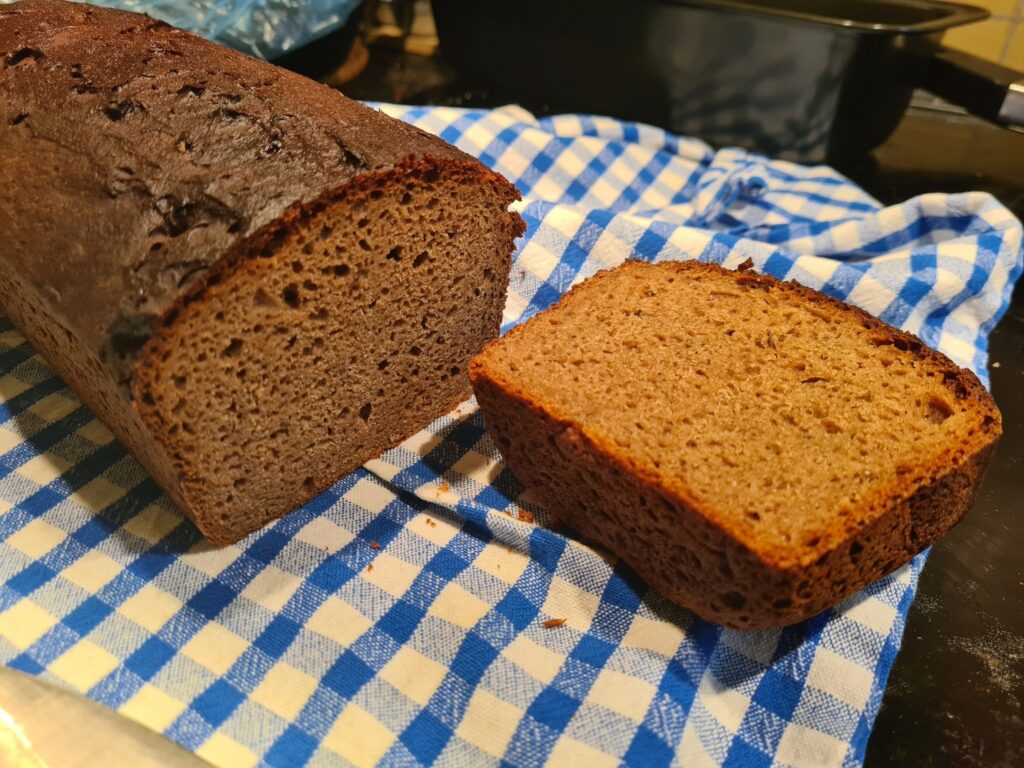
Also delicious, if even denser because I did hew pretty closely to the extremely high proportion of whole grains called for in the original recipe. But, enough about “rye” mimics past!
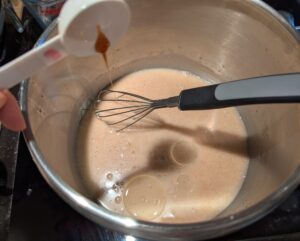
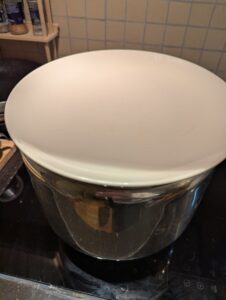
For this new batch using the beer, I had this delicious (if not very tangy) quasi-sourdough starter begun off homemade sake lees, which originally used a Riesling wine yeast strain. Most recently, it’s been fed with about 50:50 sorghum and very dark millet/ragi flours. It’s not quite at peak here, but as you can see it was very active and bubbly.
This also seemed like an excellent place to use more of that ragi flour, partly to take advantage of its color. This loaf is made without the added cocoa, with all the color coming from the grains. (And a very little from the low amount of syrup or molasses.)
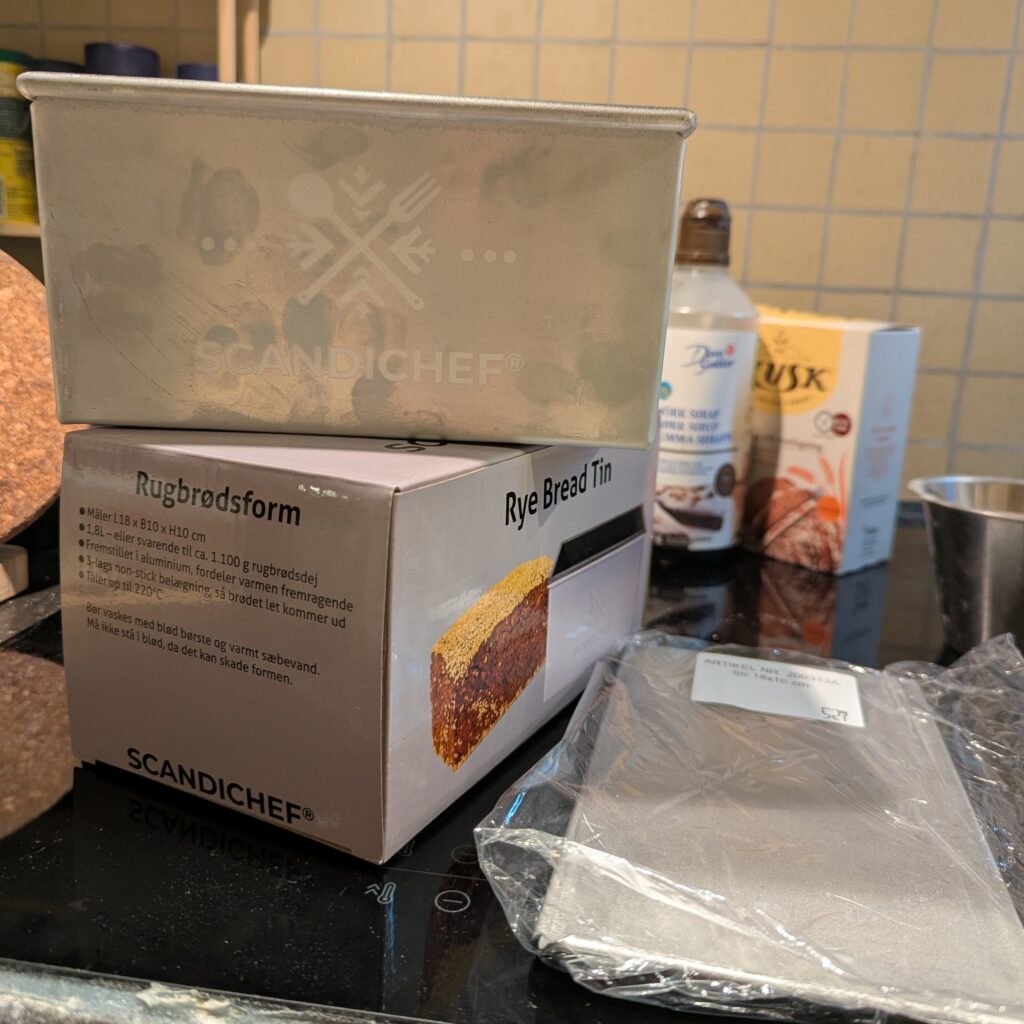
Also, I had a new toy to play with, after finally buying a Pullman pan to hopefully help with higher rise on loose GF bread doughs.
Amusingly, they’re often sold as “rye bread pans” here, since actual rye doughs benefit from the extra support from the higher, straighter sides in the same way. (This time, I decided to forego the lid, so didn’t bother unbagging and washing it until later.) But, what better inauguration for the new “rye bread pan” than this pseudo-rye loaf?
For this loaf, I also drew some inspiration from Glutenfria Godsaker’s (“Gluten-Free Goodies”) recipe for a vaguely similar buckwheat and teff bread. Her Glutenfri formfranska med havre, a sandwich type loaf involving oatmeal has turned into one of my main go-to base recipes the past few years. I should probably post a take on that, the next time I make some.
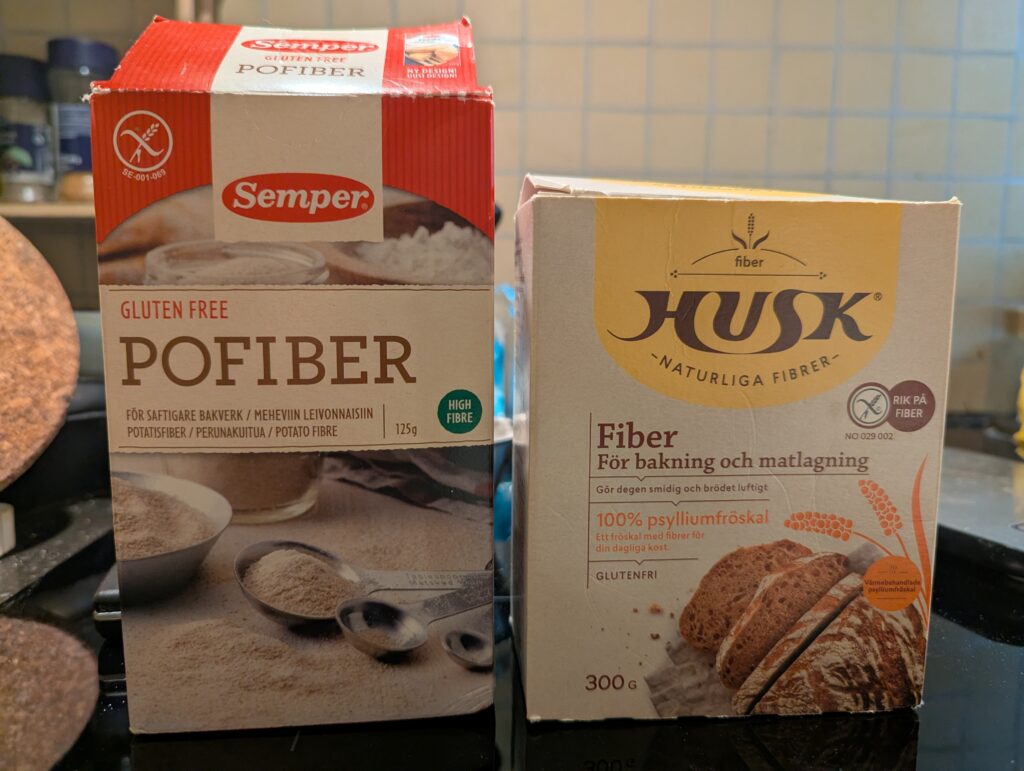
At any rate, for this recipe I decided to try including a rather popular local ingredient, which you don’t really see used outside the Nordic countries: potato fiber. (And using that buckwheat and teff recipe as a rough guideline for how to best use it alongside the usual psyllium.)
This is a pretty popular GF baking ingredient here to help keep things moist and flexible, and it also gets used in low carb baking a good bit. It’s supposed to be useful in flatbreads for the moistness and flexibility. The potato fiber seems to be just be what’s left after they grind up potatoes and settle out the starch industrially, powdered and sold separately. And potato starch is (thankfully!) the go-to inexpensive starchy ingredient used in so many foods here. The Pofiber does seem pretty useful for a byproduct, and I’d much rather see it get good use than be wasted.
My verdict here? I think I would have preferred the texture if I had either used less potato fiber, or just all psyllium as usual. There was a noticeable roughness from the amount used here, which I wasn’t sure enhanced the bread. But, it was well worth a try–and definitely calls for more experimentation in future!
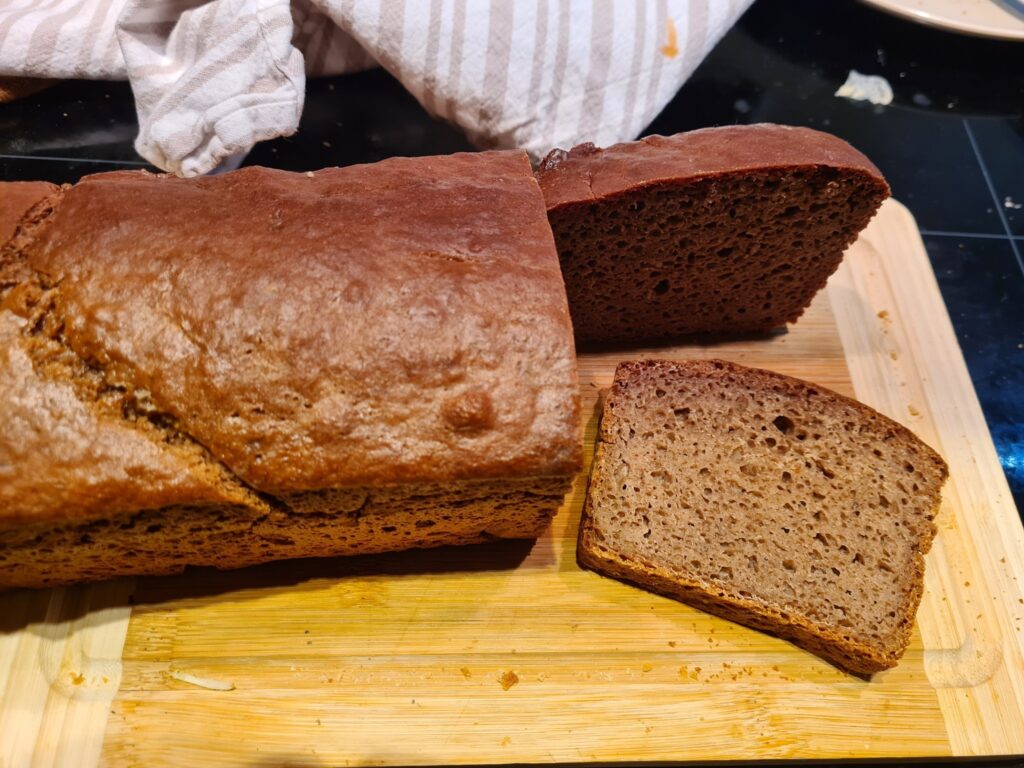
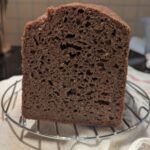
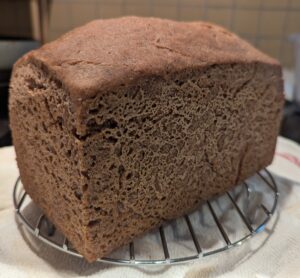
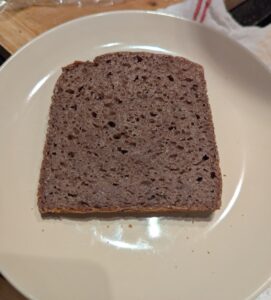
A gluten free approximation of a rye sandwich loaf. This is heavy on the whole grains, and comes out with a pleasant dense chewiness similar to some darker rye breads.
22gPofiber(100ml or ⅓ cup) – see the end of the introduction
6gfine salt(1 tsp table salt)
1½-2tspcaraway or dill seeds
Additional Adjustment
100mllukewarm water as needed(⅓ cup)
buckwheat flour as needed to adjust dough consistency
Instructions
Combine the dry ingredients listed under "Dry Flour Mix" in a container, and mix well.
Heat the beer to just where it feels slightly warm to the touch.Probably the easiest method is to set the container into a pan or bowl of warm water for a few minutes. Be smarter than I was, and make sure to open it first! Otherwise, the carbonation might erupt when you do pop it open.Also warm the sauerkraut juice the same way, if you need to.
Combine your starter with the wet ingredients in your stand mixer bowl. If you're not using a sourdough/yeast starter, add an extra 100ml (⅓ cup) of water and use a whole package (around 7g) of dry yeast.Whisk in the psyllium, and around 100ml (⅓-½ cup) of the flour mixture, along with the yeast. If you prefer, omit the additional yeast; I was just going for a quicker rise with some sourdough flavor here.
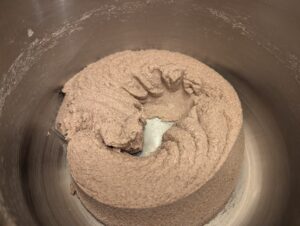
Cover and let sit for 20 minutes or so, to let the yeast wake up and the psyllium gel up.
Move to the stand mixer, and start gradually working the dry mixture into the gloop at a low speed setting.
Once all the flour is incorporated, turn off the mixer and let the dough sit and rest to slurp up liquid for 10-15 minutes. An especially important step if you are including the potato fiber.
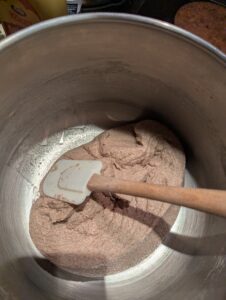
Once the moisture has equalized some you'll be in a better position to watch the mixer work the dough, and do any consistency fine tuning.Scrape things down with a spatula as needed.
Let the dough work for a couple of minutes at lower speed, then turn it up more toward medium for 5-10 minutes.
This is roughly the dough consistency you're aiming for near the end of mixing. Add little bits of lukewarm water and/or flour as needed to get it that way.
We're looking for something on the wet and sticky side, but not a complete batter. It should come away from the sides of the mixing bowl. With the potato fiber, it actually held a clear imprint of the dough roller–but didn't leave bits stuck onto it as it was removed. I would expect more minor sticking with an all-psyllium dough.
In fact, I could nudge it loose from the bowl fairly cleanly with a spatula. Still plenty of moisture, but not nearly as gooey as I would normally expect.
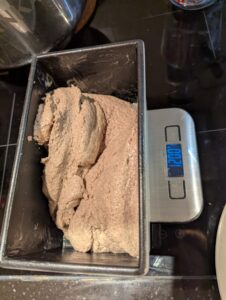
The bowl itself, after turning the dough out.
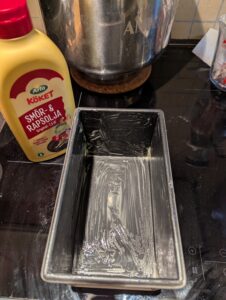
Grease a pan well. This is one place where I really like to use squeeze margarine. This variety includes around 30% butter oil for flavor.
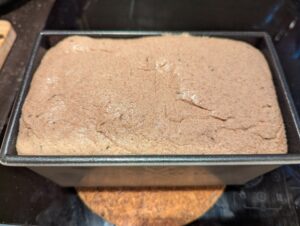
The dough came out to 1200g total, not including the pan. (1.8L capacity Pullman, as shown earlier.)
Proofing and Baking
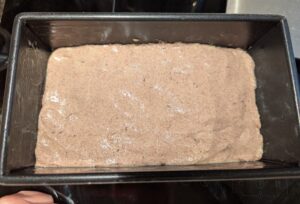
Smooth out/grease your dough on top, so it's fairly smooth and even. There is no shaping this loaf otherwise. Also oiling your hands to pat it out into the pan is probably going to be your best strategy.
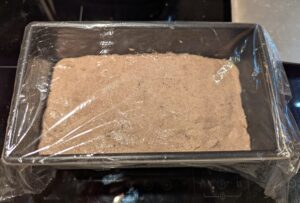
Cover and let sit in a warm place for about 30 minutes. If your oven has a light, I would suggest setting it in there with the light turned on for a little extra warmth.This is a good time to at least start the mixing bowl and dough attachments soaking.
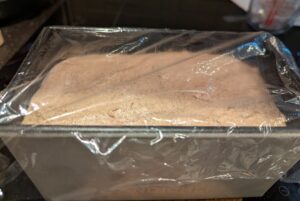
After 30 minutes, there's some decent rise. Now is a good time to start the oven preheating to 375℉ / 190℃.The dough can finish rising on top of the stove while that happens.
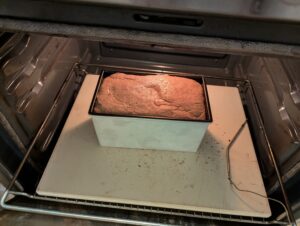
Preferably, have a baking stone or steel ready near the bottom of the oven. I picked this up for pan breads from The Loopy Whisk, and it really does seem to be very effective for preventing that sad heavy glump of dough at the very bottom of the loaf that even some commercially baked GF breads tend to come with.With the stone or steel, it's best to give the oven at least 45 minutes to preheat everything thoroughly.
When the oven is ready and the dough looks roughly doubled, put it in to bake for 40 minutes starting out.
If you're using a stone or steel, you'll want to set the loaf pan directly on that.
Evaluate for doneness after the 40 minutes. I carefully thump on the top crust and listen/feel for the "right" hollowness, to go along with fairly even browning on the crust. Wish I could give better advice than that!My loaf took 50-55 minutes to finish. It may vary with yours.
When the bread is done, let it cool for 15-20 minutes before turning it out of the pan. I also lightly buttered the top crust.Cool on a rack until it's only mildly warm, if that, before cutting in.
Enjoy!I couldn't resist grabbing a slice to eat with just some butter, as soon as it had cooled down enough to cut.
Notes
If you don’t have potato fiber or prefer not to use it, I would suggest instead using more psyllium. A total of 20-25g of powdered psyllium should be good for a loaf like this. You may also need to add a little extra flour to adjust the consistency.